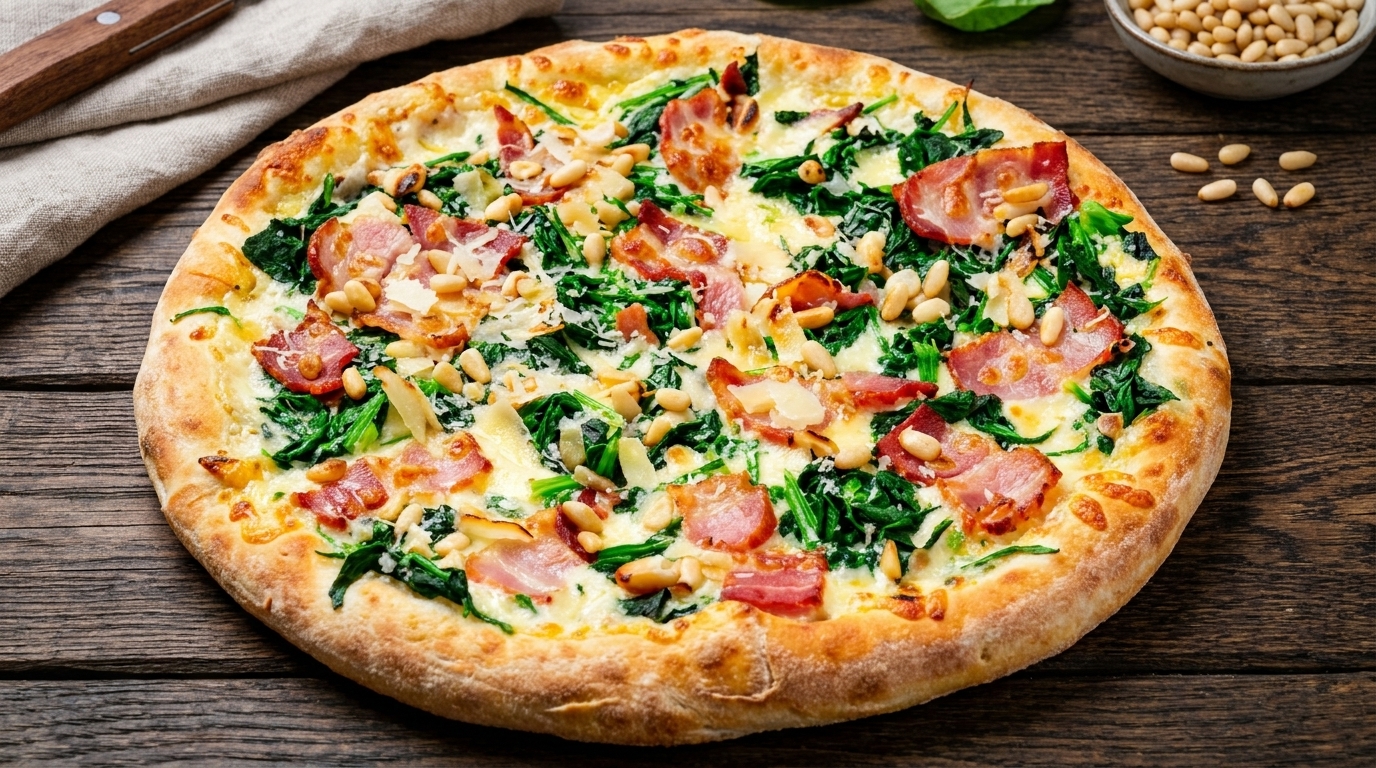
Four-Flavor Pizza (Shrimp, Durian, Mixed Fruit
Bacon)
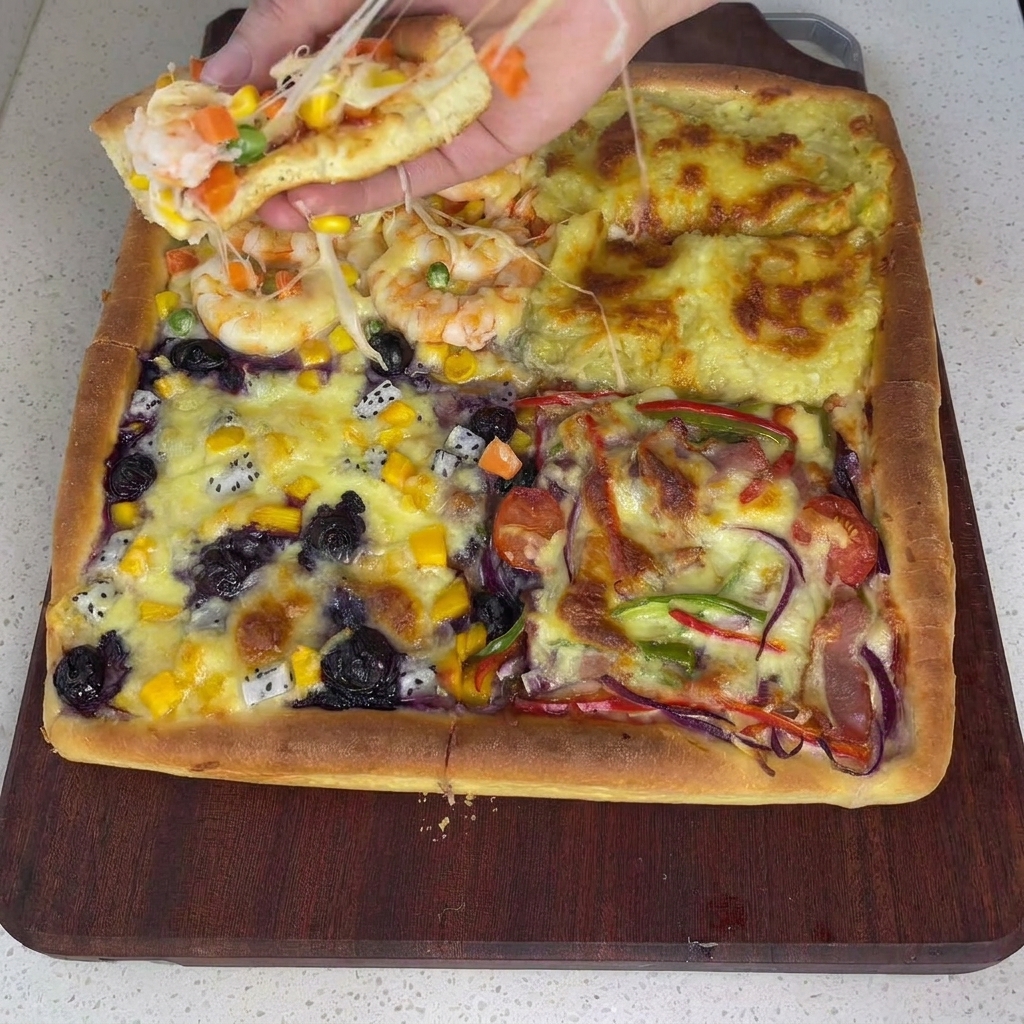
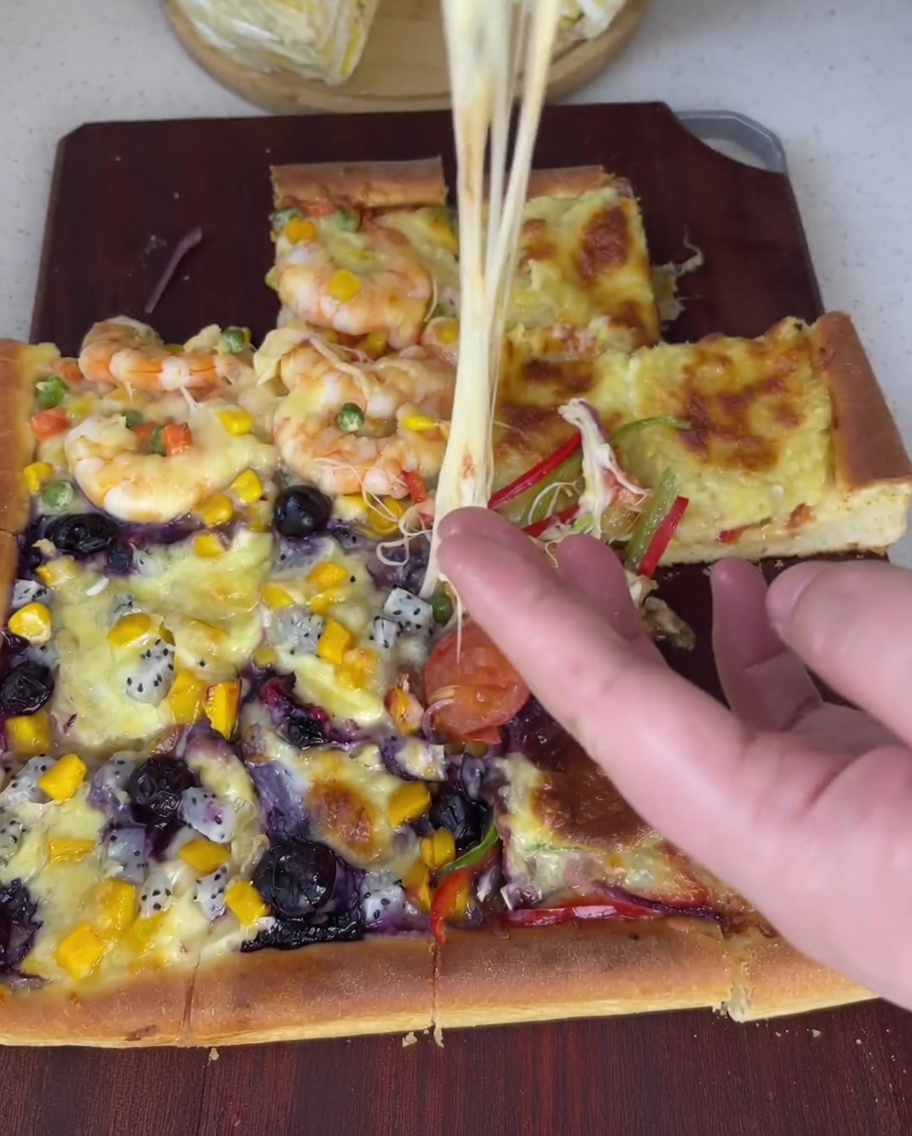
A homemade square pizza featuring four distinct, crowd-pleasing flavor quadrants: sweet durian, savory bacon with peppers, succulent shrimp with mixed vegetables, and a refreshing assortment of fresh fruits.
Four-flavor pizza offers an ingenious culinary solution for gatherings with diverse tastes, bringing savory and dessert-style combinations onto a single baking sheet. Rooted in modern Asian fusion pizzerias, this recipe pairs classic toppings like bacon and shrimp alongside innovative additions like rich durian and vibrant fresh fruits. A simple, egg-enriched dough provides a pillowy, soft crust that perfectly supports each unique quadrant.

Ingredients
- 200 g high-gluten flour
- 1 whole egg
- 3 g dry yeast
- 10 g white sugar
- 2 g salt
- 120 g warm water
- 20 g butter
- to taste shredded mozzarella cheese
- to taste tomato sauce
- to taste salad dressing
- to taste sliced bacon
- to taste shredded onion
- to taste green and red bell peppers
- to taste creamy mashed durian flesh
- to taste peeled shrimp
- to taste mixed corn, peas, and carrots
- to taste sliced bananas, mango cubes, and blueberries
Instructions
- 1Add Egg to Flour Well
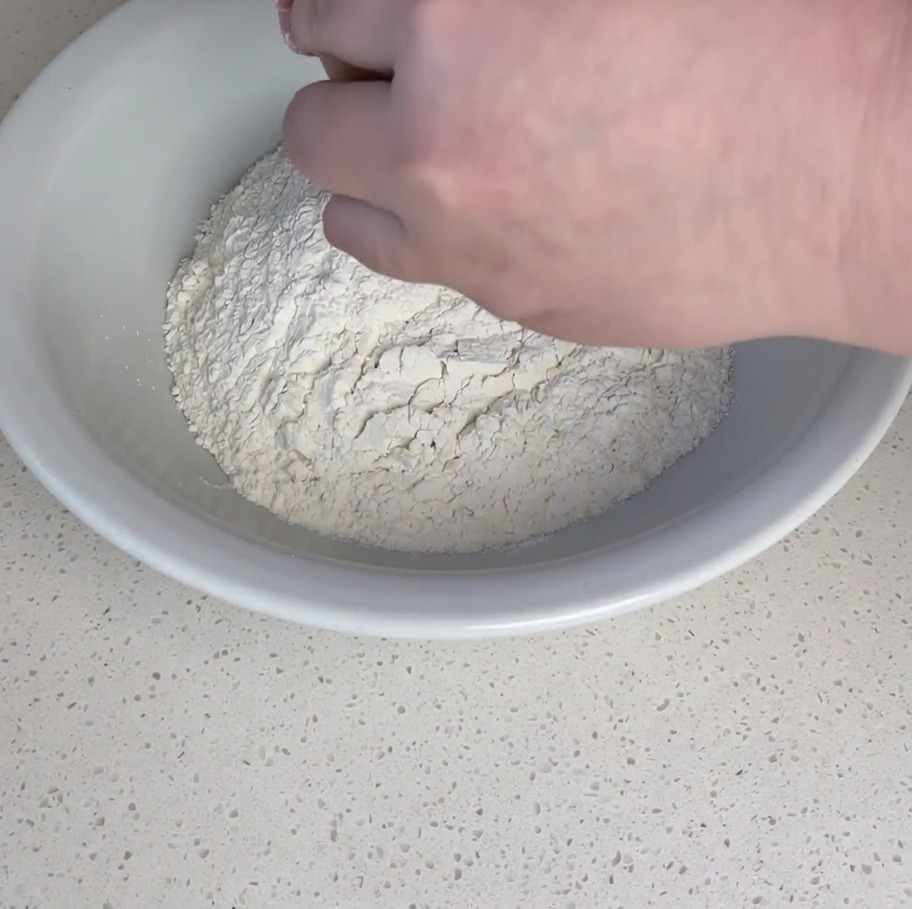
Make a small well in the center of the high-gluten flour and crack in one whole raw egg. This enriches the dough, providing better structure and flavor for the pizza crust.
Tip: Ensure the egg is at room temperature so it does not chill the mixture and slow down the initial fermentation process. - 2Add Yeast and Sugar
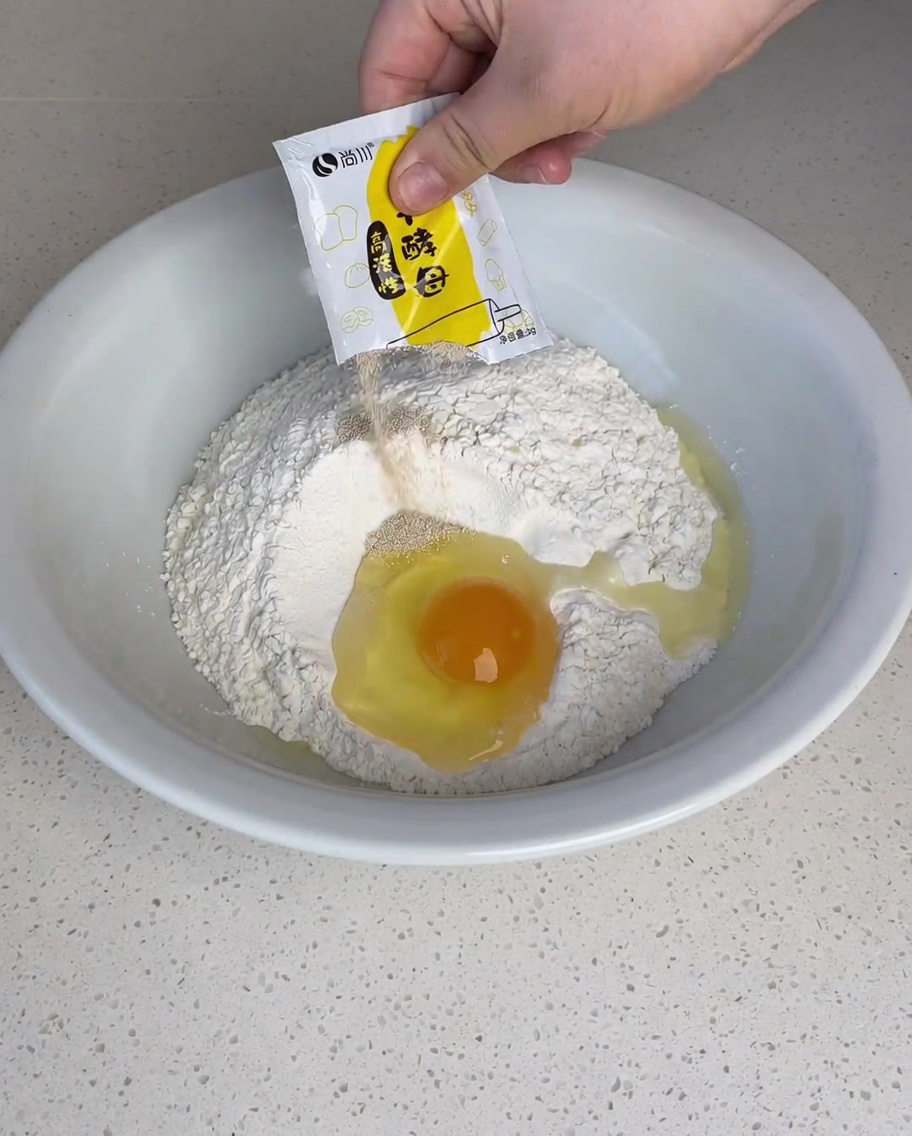
In a large mixing bowl containing the high-gluten flour and egg, add 3g of dry yeast, 10g of white sugar, and 2g of salt, distributing them well across the base.
Tip: Keep the yeast separated from the salt initially in the bowl, as direct contact can inhibit yeast activity and affect the overall rise. - 3Pour Warm Water & Form Flakes
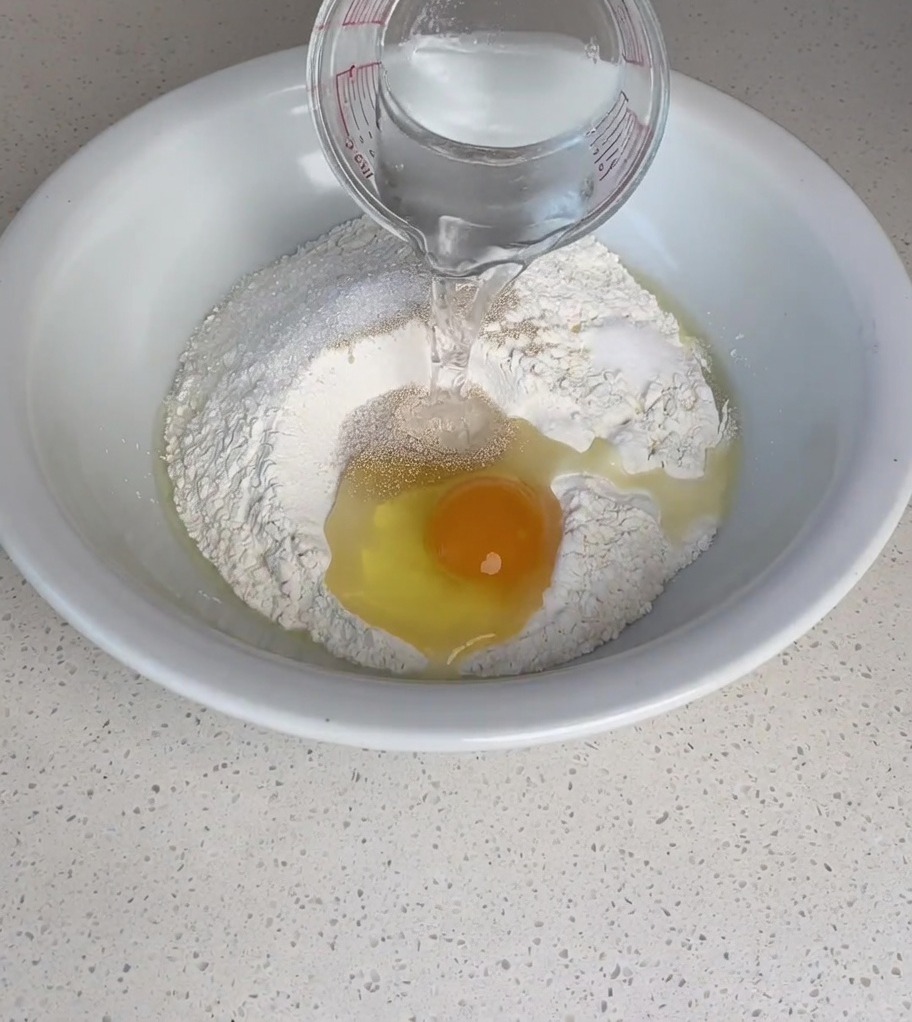
With the yeast, sugar, and salt added to the dry mixture, slowly pour in the warm water. Begin mixing the ingredients together until they form shaggy, flaky clumps.
Tip: Slowly pour in the warm water while stirring steadily with chopsticks to form even flakes, ensuring no dry flour pools remain at the bottom. - 4Form a Dough Ball
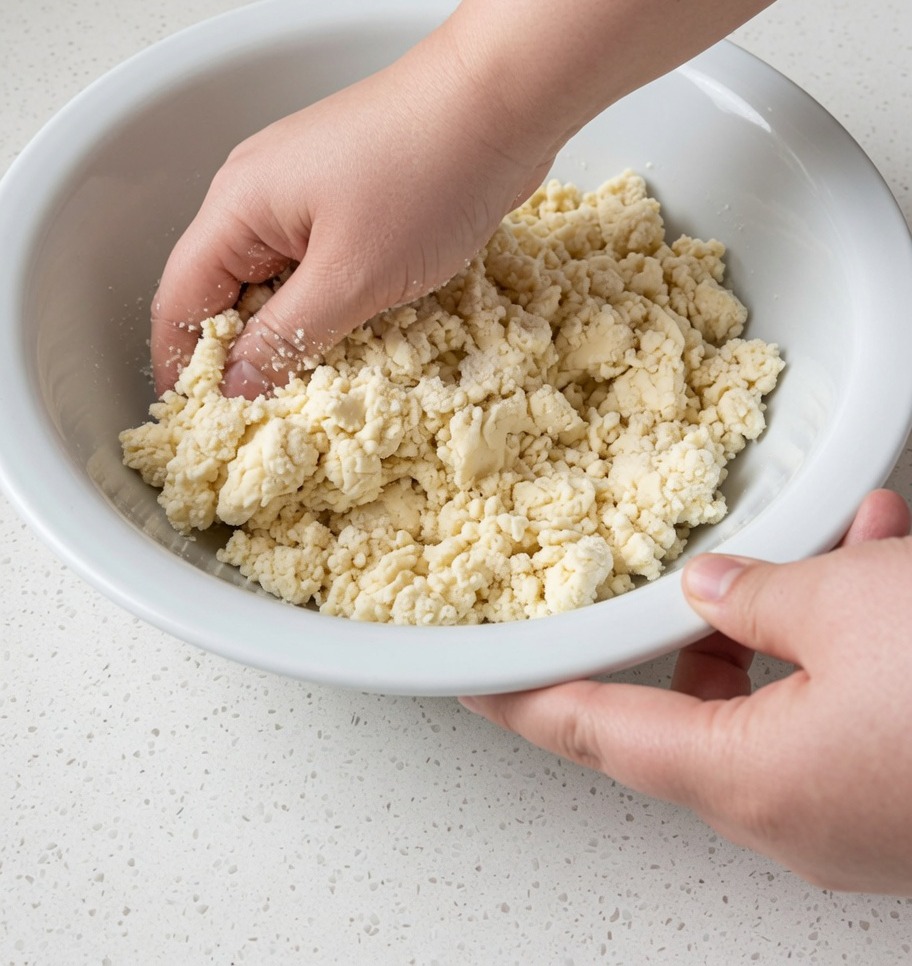
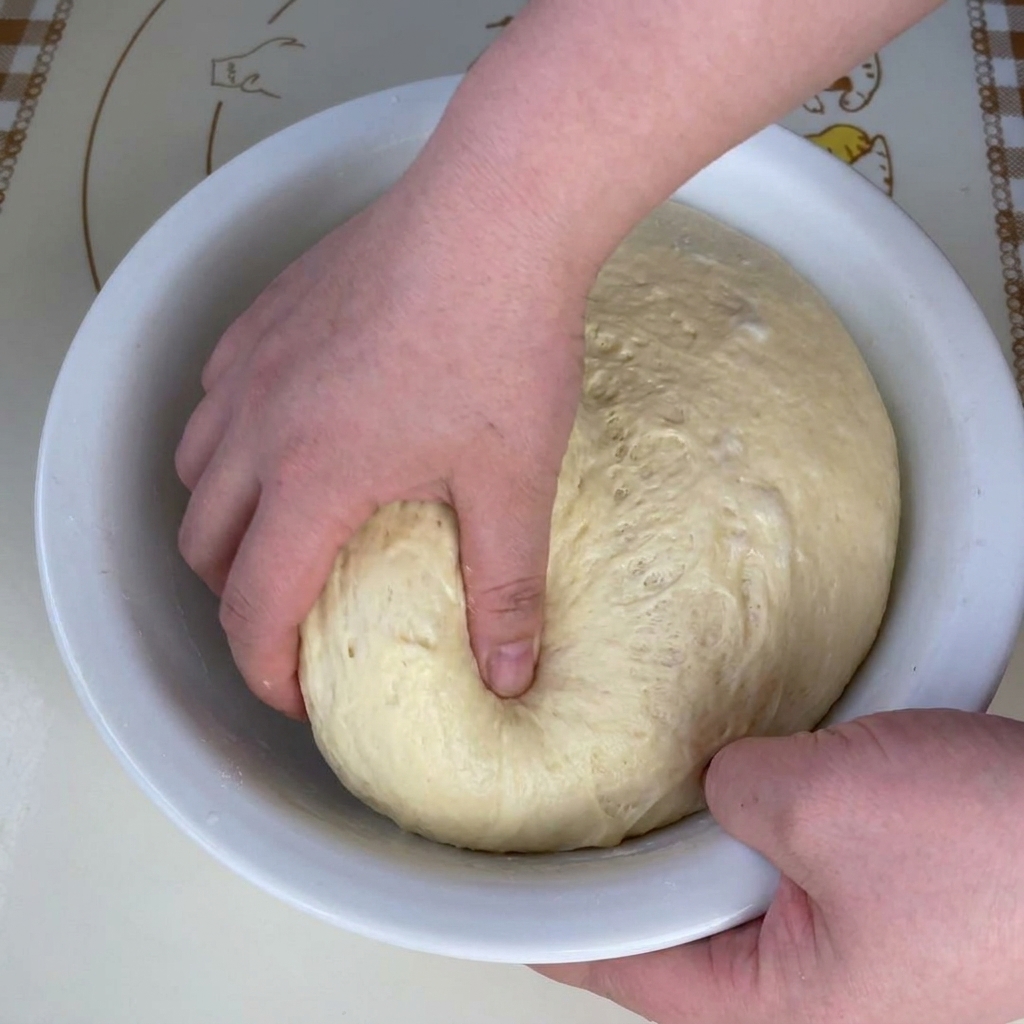
Use your hands to bring the shaggy dough flakes together inside the bowl. Knead the mixture until all the loose flour is incorporated and a rough dough ball forms.
Tip: The dough might feel a bit shaggy and dry initially, but keep kneading until it fully gathers by hand before tempting to add extra liquid. - 5Add Softened Butter
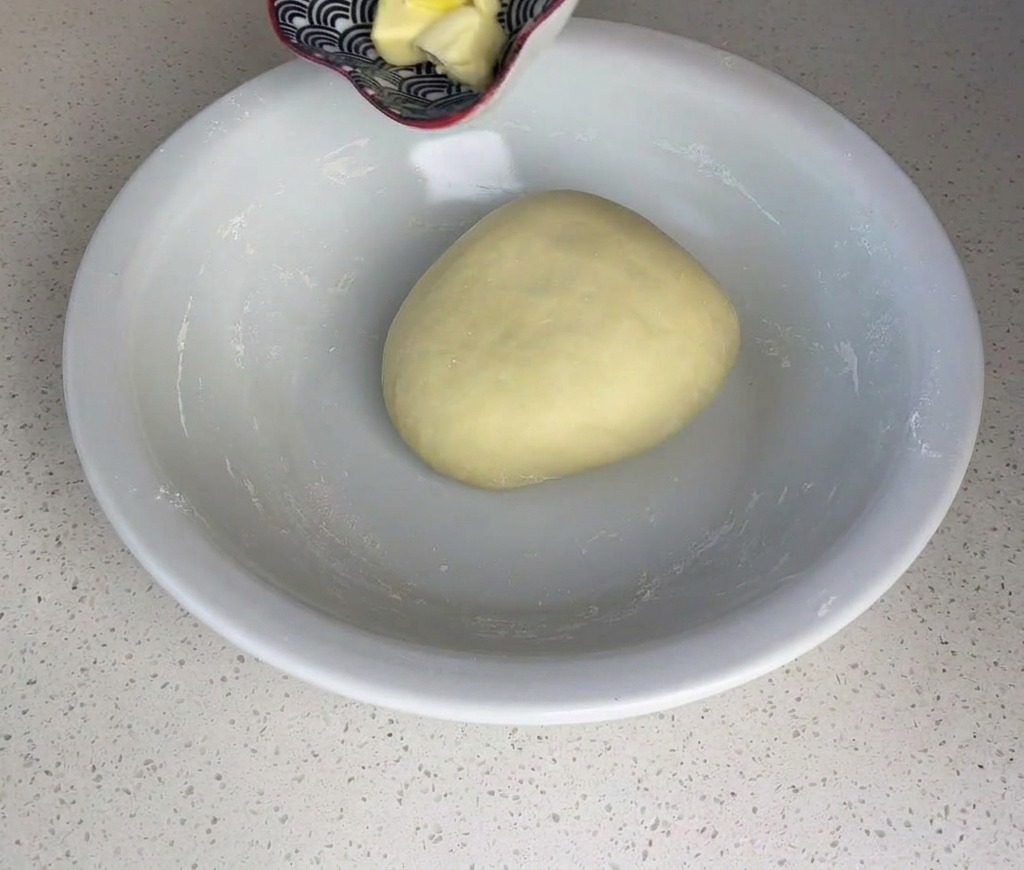
Once the shaggy dough has gathered into a cohesive ball, add 20g of softened butter into the center of the dough.
Tip: Using room-temperature softened butter makes it much easier to blend into the dough fibers evenly without creating slippery patches. - 6Knead Until Smooth
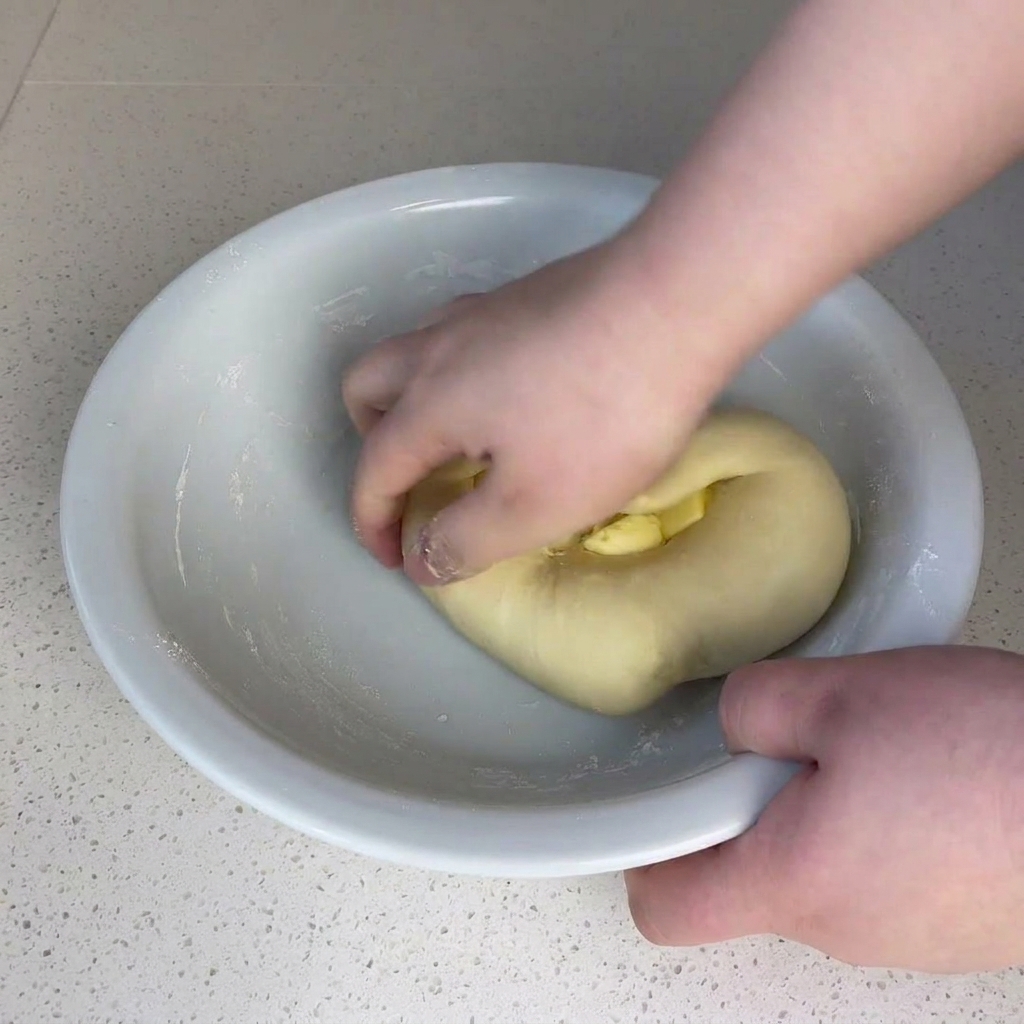
Knead the dough by hand continuously until the added butter is completely absorbed. There is no need to knead it to a delicate windowpane stage; simply work the dough until the surface becomes entirely uniform, smooth, and satin-like.
Tip: Keep kneading by hand until the fat incorporates completely. Skip trying to form a windowpane stretch; just bring it to a uniform, smooth, satin-like texture. - 7Cover and First Proofing
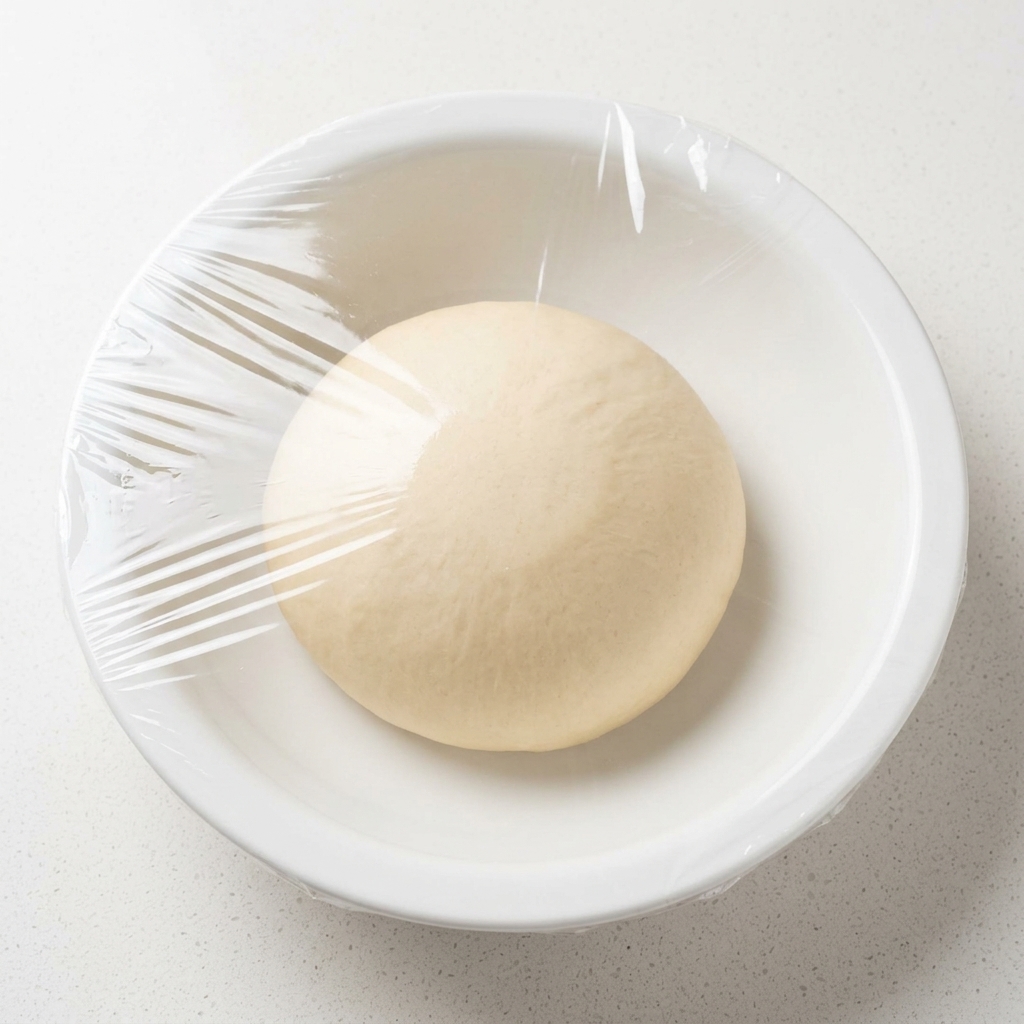
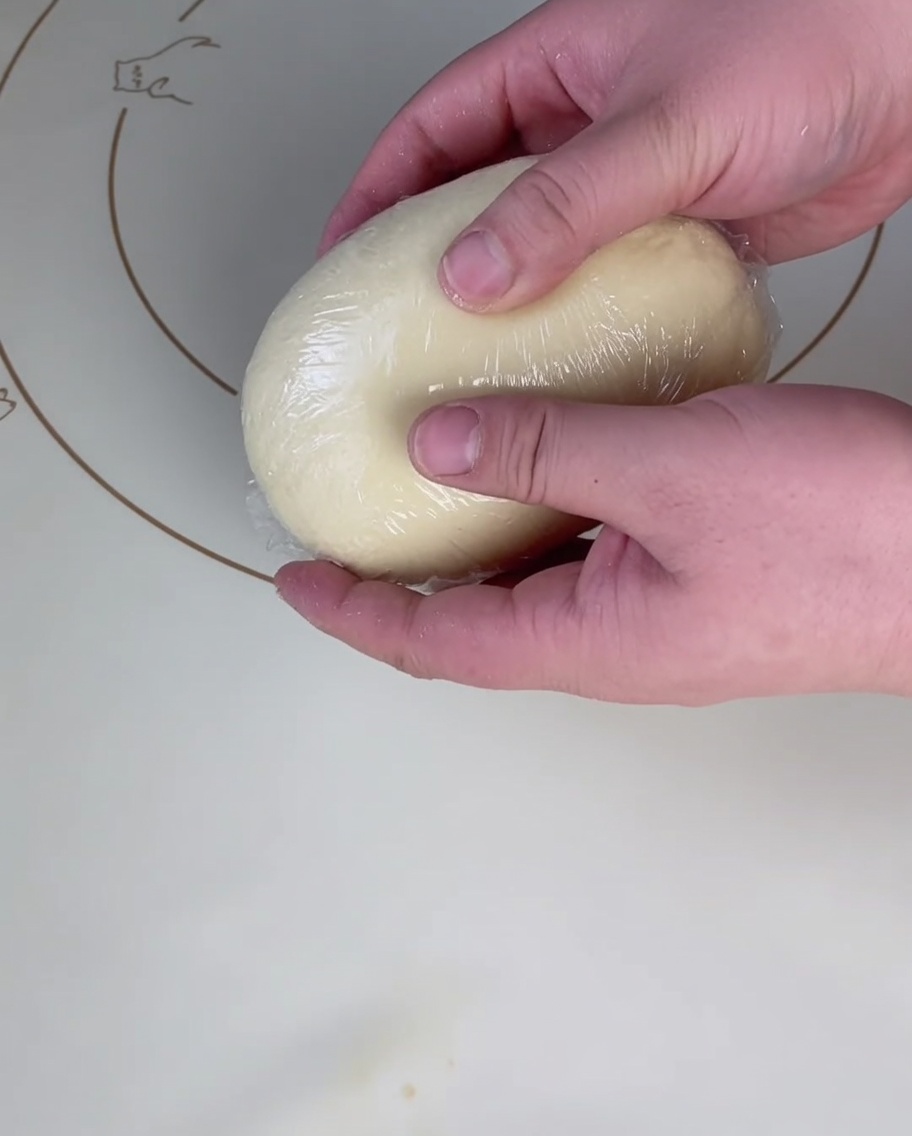
Once the dough is smooth, cover the bowl tightly with clear plastic wrap to prevent it from drying out. Allow the dough to proof until it has doubled in size. For the absolute best flavor development and an incredibly pillowy crust texture, let it proof in the refrigerator overnight for a slow cold fermentation.
Tip: Cover tightly. Letting it proof in the fridge overnight develops a deeper flavor profile and makes the crust extra soft. - 8Check Fermentation
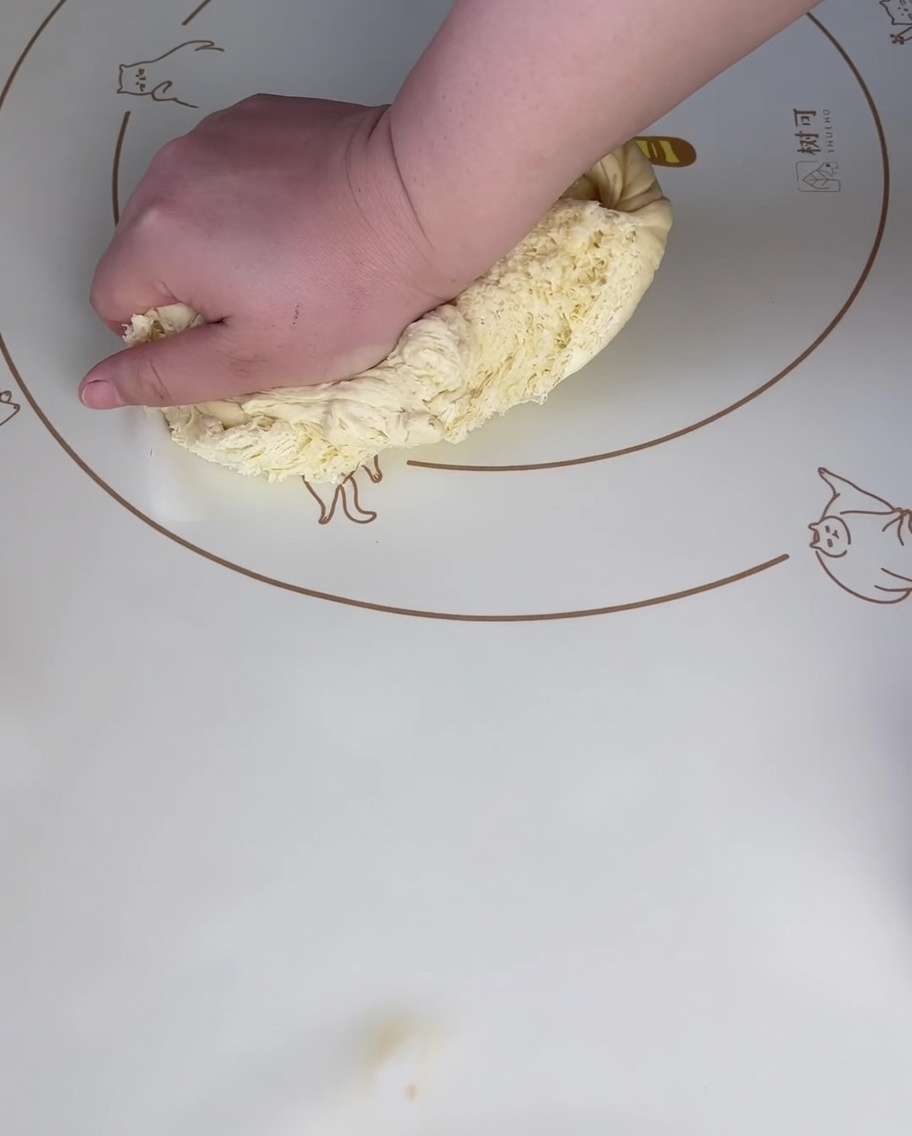
After proofing, check the dough by pulling it apart to reveal a stringy, honeycomb-like fermented texture. This indicates the yeast has properly leavened the dough.
Tip: Look for a prominent web-like network inside the dough. If it lacks this structure, let it proof a bit longer. - 9Deflate and Release Air
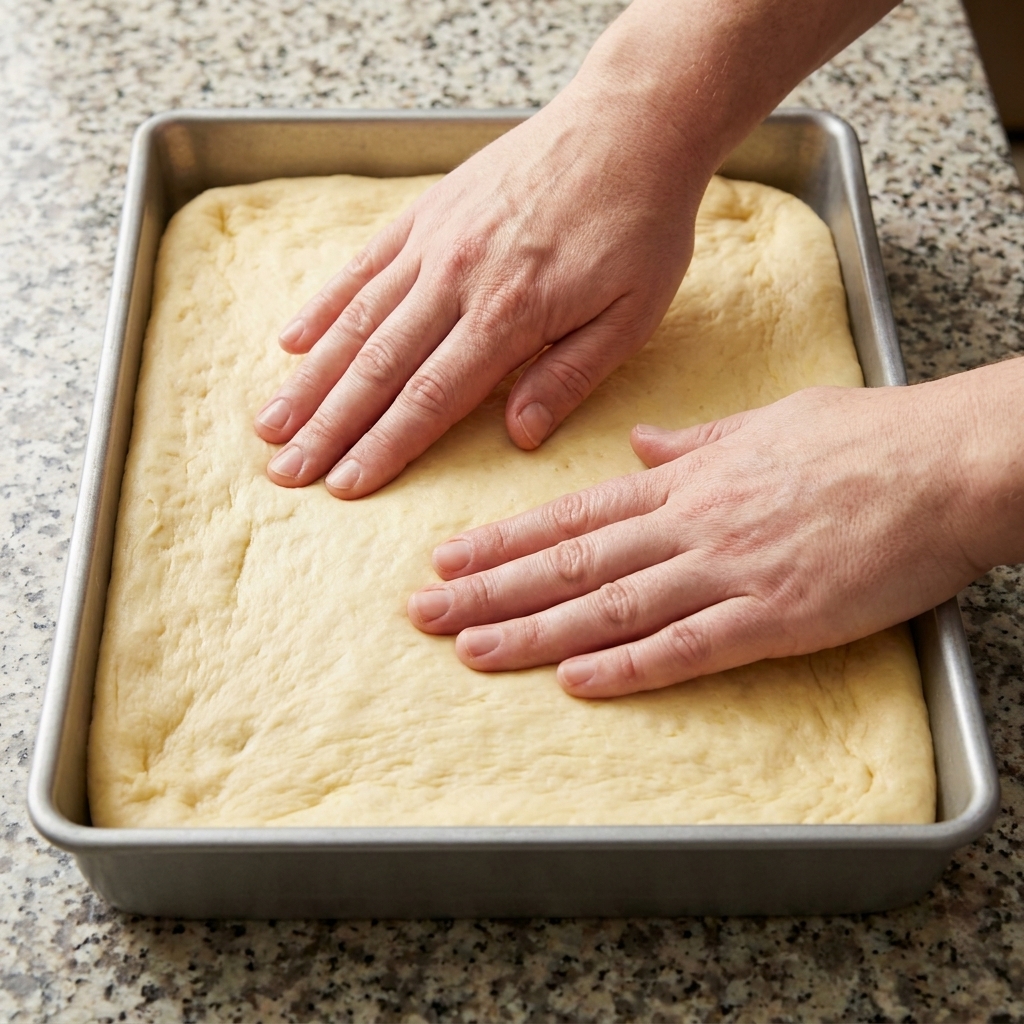
Transfer the proofed dough onto a flat silicone mat. Firmly press and knead the dough by hand to release all the trapped air from fermentation. After deflating, allow the dough to rest for another 15 minutes before rolling.
Tip: Press firmly across the silicone mat to release air pockets, then let it rest for 15 minutes so it does not shrink back when rolled. - 10Rest Dough Strands
After degassing the proofed dough on your work surface, cover it cleanly and let it rest undisturbed for 15 minutes to allow the tight gluten strands to relax.
Tip: Continue to let the deflated dough rest undisturbed for 15 minutes; skipping this step will cause the dough to stubbornly shrink back when you try to roll it out. - 11Roll Crust to Shape
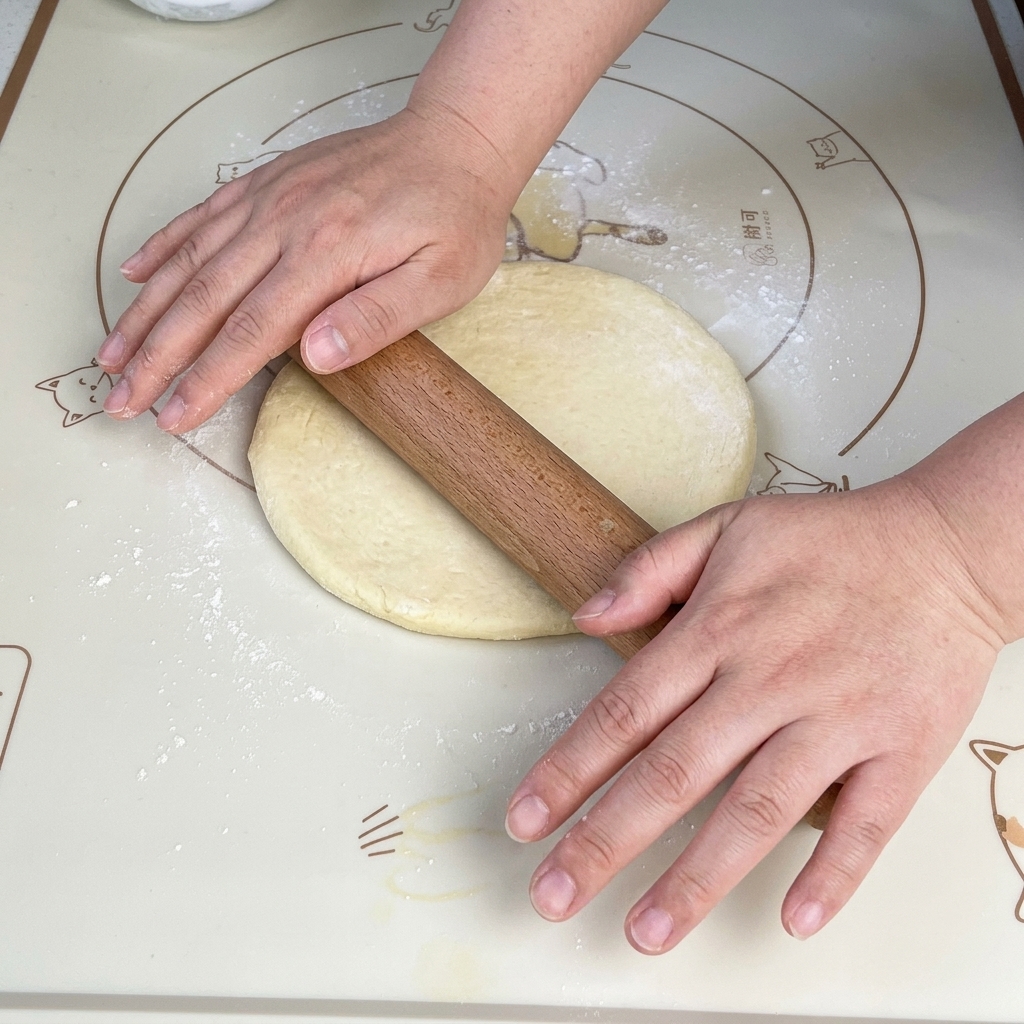
Take the rested dough and use a wooden rolling pin to roll it out into a flat, even square shape on a clean surface.
Tip: Roll out smoothly from the center outward to fit a 28cm square baking pan evenly. - 12Transfer to Greased Pan
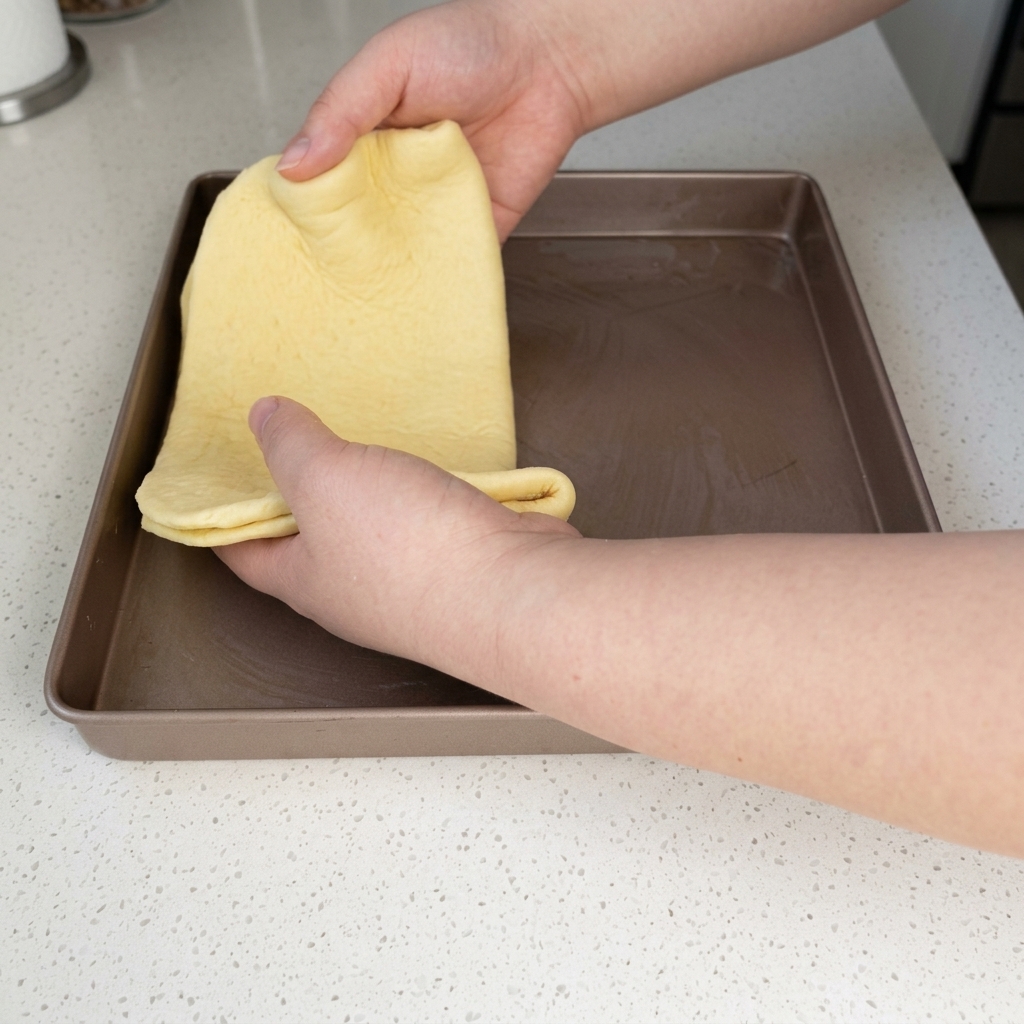
Carefully lift the rolled square of dough and place it into a previously greased 28cm square baking pan.
Tip: Grease the pan first to ensure the crust removes easily and develops a nice golden bottom. - 13Fit Pan Edges
Use your hands to gently press and stretch the dough so it fits snugly and evenly into all the corners and edges of the square baking pan.
Tip: Gently press and stretch the dough into all corners and edges of the pan using your thumbs to ensure a uniform crust border. - 14Fork Docking
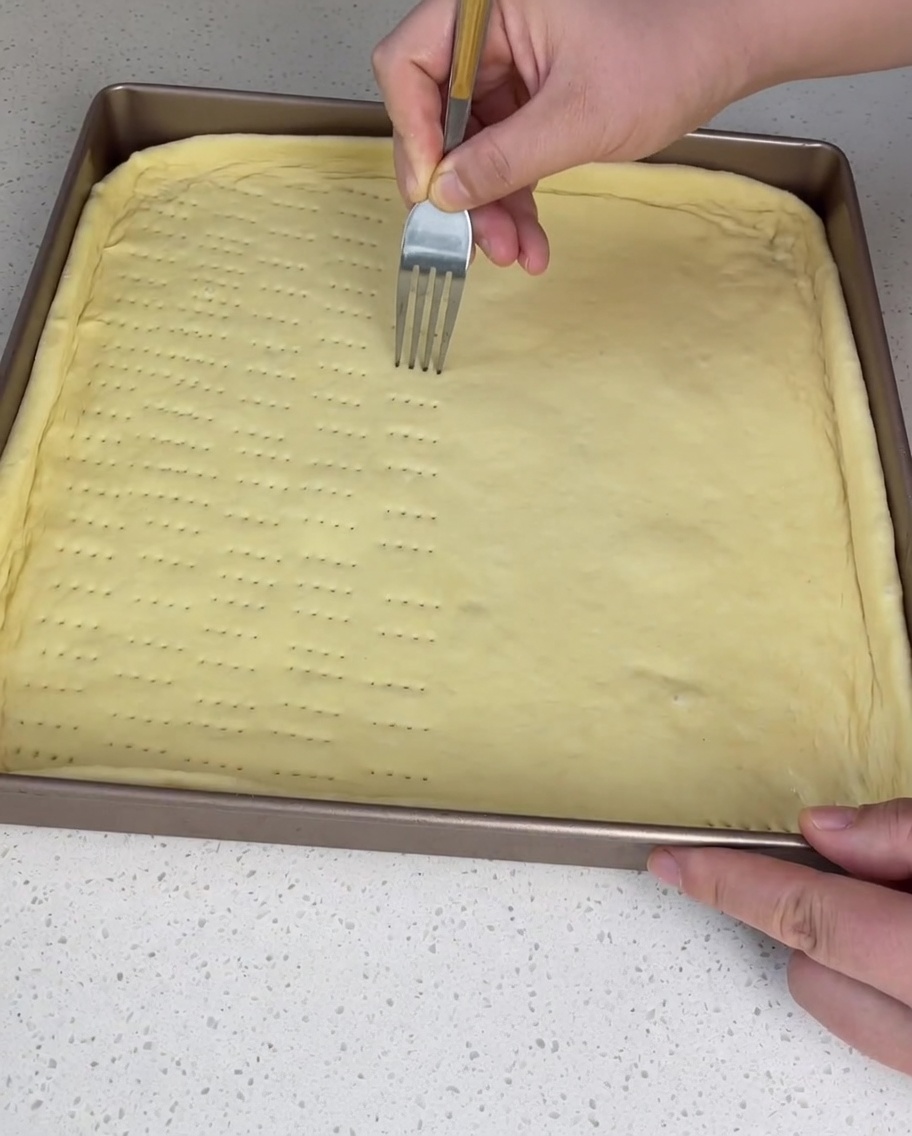
Use a metal fork to poke rows of small, even holes across the entire surface of the rolled square dough in the baking pan.
Tip: Poke rows of holes completely across the crust using a fork to prevent large bubbles from rising up unevenly during baking. - 15Second Proof & Par-Bake Crust

Do not rush to bake the crust right away. Allow the docked dough sheet to rest and proof a second time directly in the square pan for 20 minutes to guarantee an ultra-soft, pillowy texture. Once proofed, place the pan into an oven preheated to 180°C and bake for exactly 5 minutes to set the structure.
Tip: Proof directly in the pan for 20 minutes for a pillowy soft bite. Par-bake at 180°C for exactly 5 minutes before adding any base sauces or cheese layers. - 16Apply Divided Base Sauces
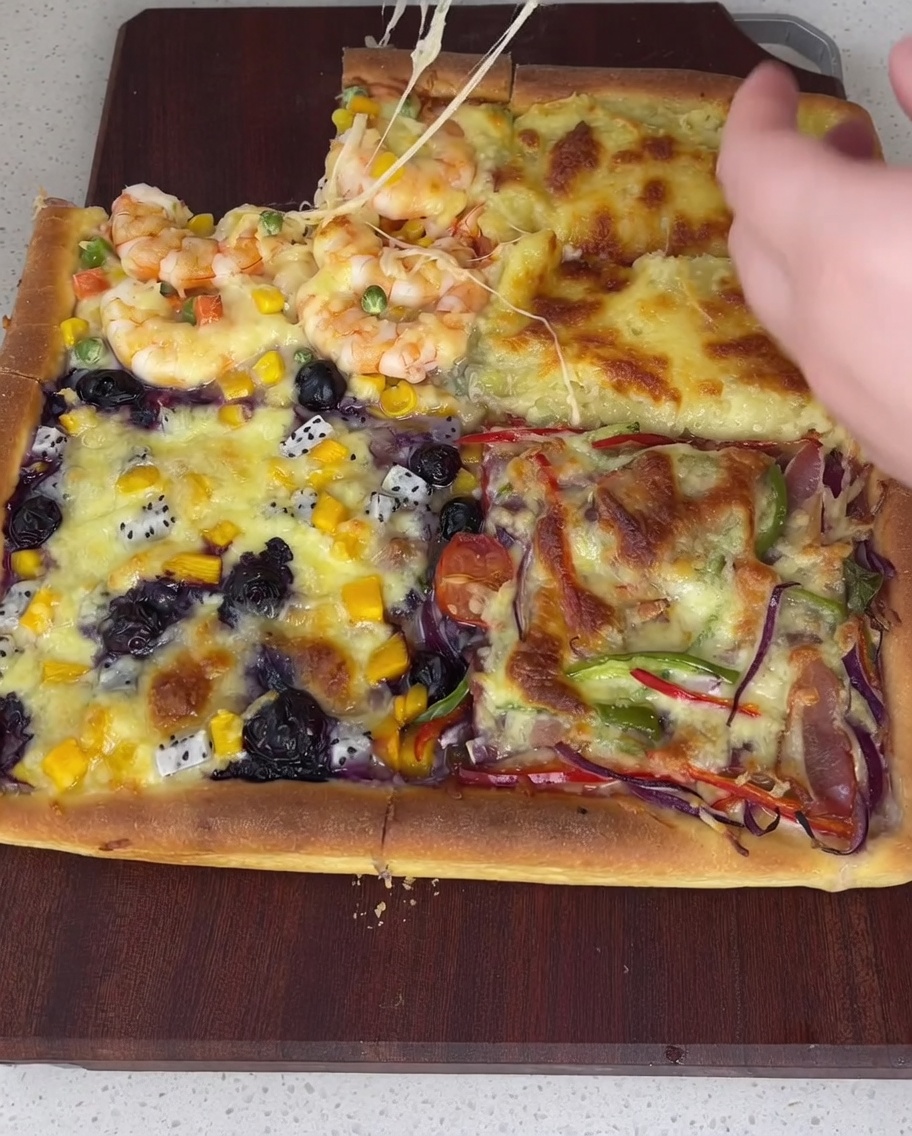
Take the par-baked crust out of the oven. Carefully divide the square crust into four distinct quadrants visually. Brush sweet salad dressing evenly onto the two quadrants designated for the fruit and durian sections, and spread savory tomato sauce across the remaining two quadrants designated for the seafood and bacon toppings.
Tip: Brush sweet salad dressing for the fruit and durian quadrants, and use savory tomato sauce exclusively for the bacon and shrimp quadrants. - 17Scatter Base Cheese
Sprinkle a generous and even layer of shredded mozzarella cheese directly over the sauced pizza crust, covering all four quadrants thoroughly to build a solid base for the toppings.
Tip: Sprinkle a generous layer of mozzarella over the sauces. A thick base layer holds the distinct quadrant ingredients in place securely during baking. - 18Assemble Fruit Quadrant
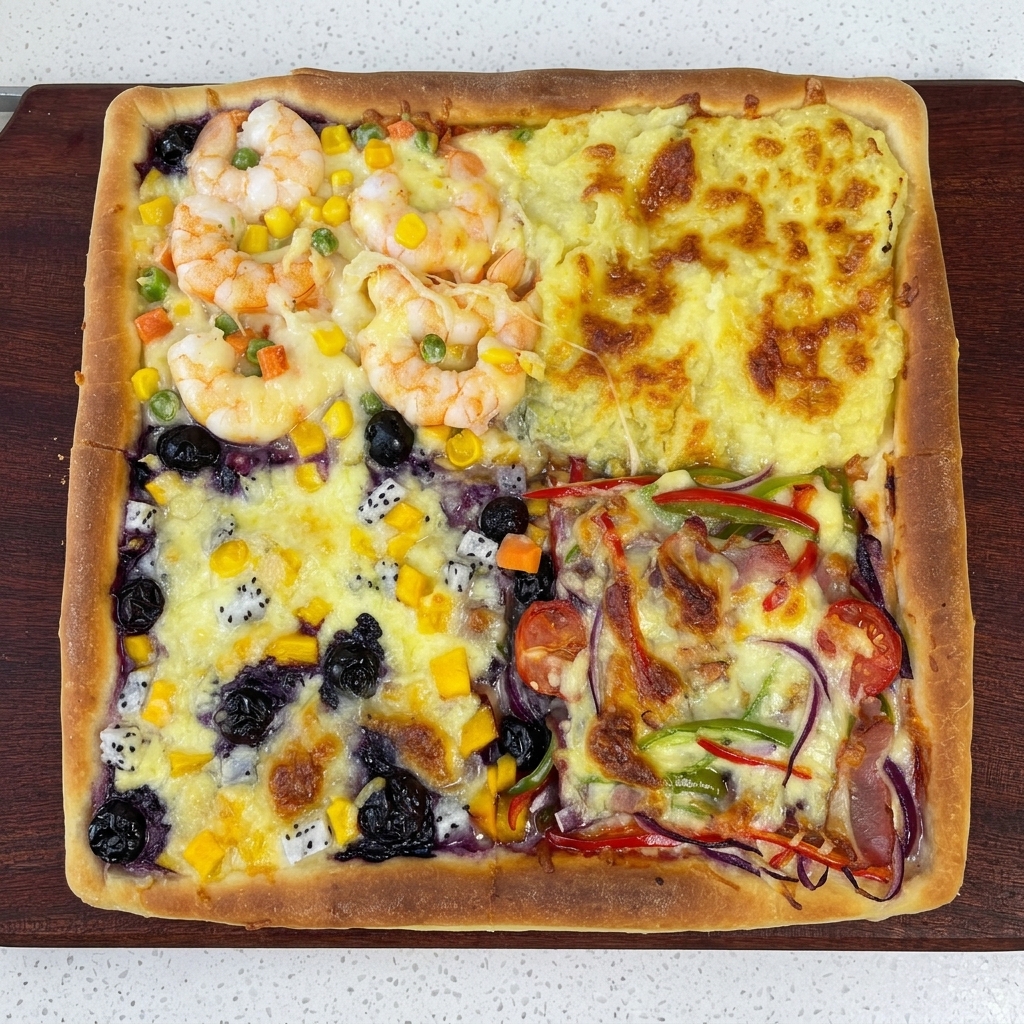
Arrange sliced bananas, mango cubes, fresh blueberries, and dragon fruit pieces neatly onto the first designated fruit quadrant over the base layer of cheese.
Tip: Pat the fresh fruit slices with paper towels if they are overly juicy to prevent the crust from becoming soggy beneath the topping layers. - 19Assemble Shrimp Quadrant
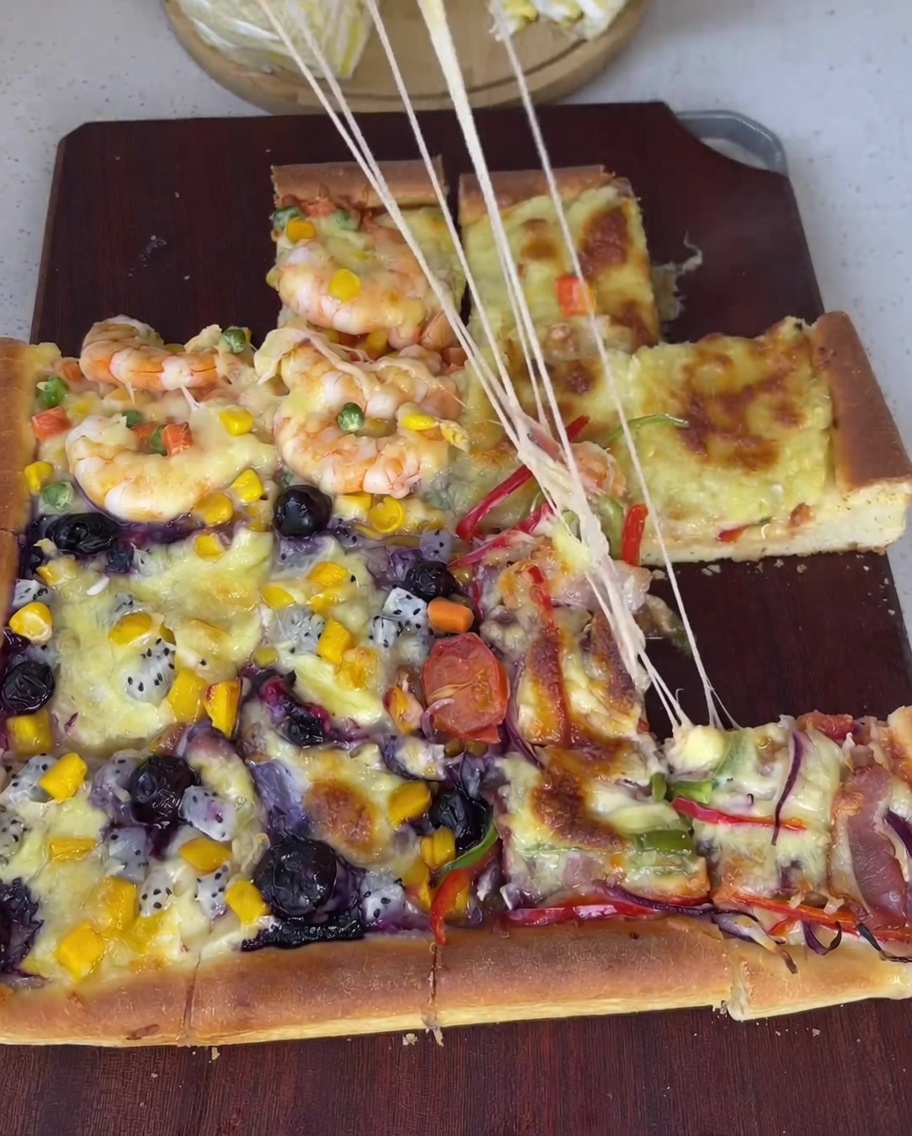
Place clean, raw peeled shrimp onto the second quadrant of the pizza, then scatter a colorful mix of corn kernels, sweet peas, and finely diced carrots evenly around them.
Tip: Ensure the shrimp are fully thawed and patted dry before arranging them along with the mixed corn, peas, and diced carrots. - 20Assemble Bacon Quadrant
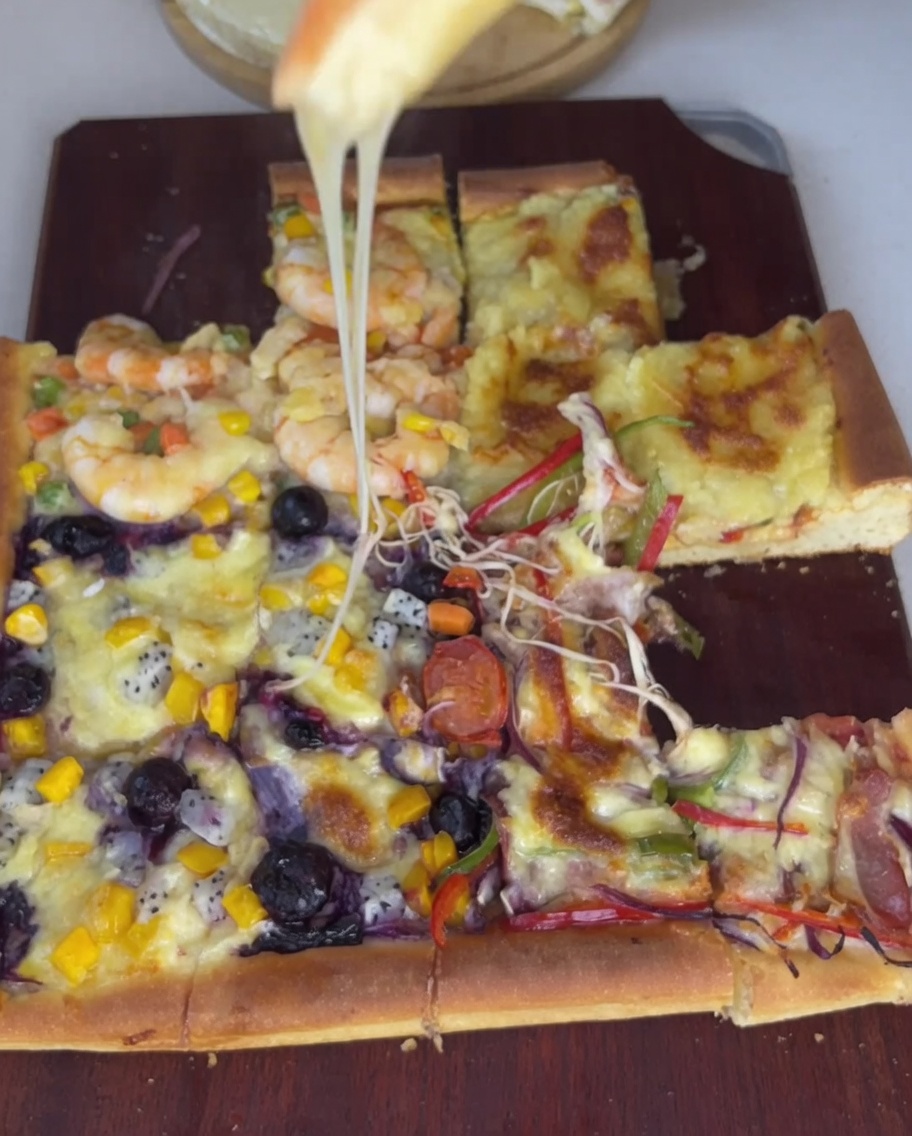
Take the third quadrant of your prepared pizza crust and arrange a generous portion of sliced bacon, thinly sliced red onion strips, and a vibrant mix of green and red bell pepper strips. Ensure the toppings are spread evenly so each bite is packed with savory flavor and a nice crunch.
Tip: Slice your bacon pieces uniformly and distribute the savory strips, red onions, and bell peppers right to the edge of the quadrant for full coverage. - 21Assemble Durian Quadrant
For the fourth and final quadrant, use a spoon to spread a thick, even layer of rich, creamy mashed ripe durian flesh directly over the base cheese layer. The unique, sweet profile of the durian creates a luxurious, dessert-style section that balances the savory meat quadrants beautifully.
Tip: Spread a thick layer of creamy ripe durian flesh across its quadrant using a spoon for a rich custard finish. - 22Top Cheese & Hot Oven Bake
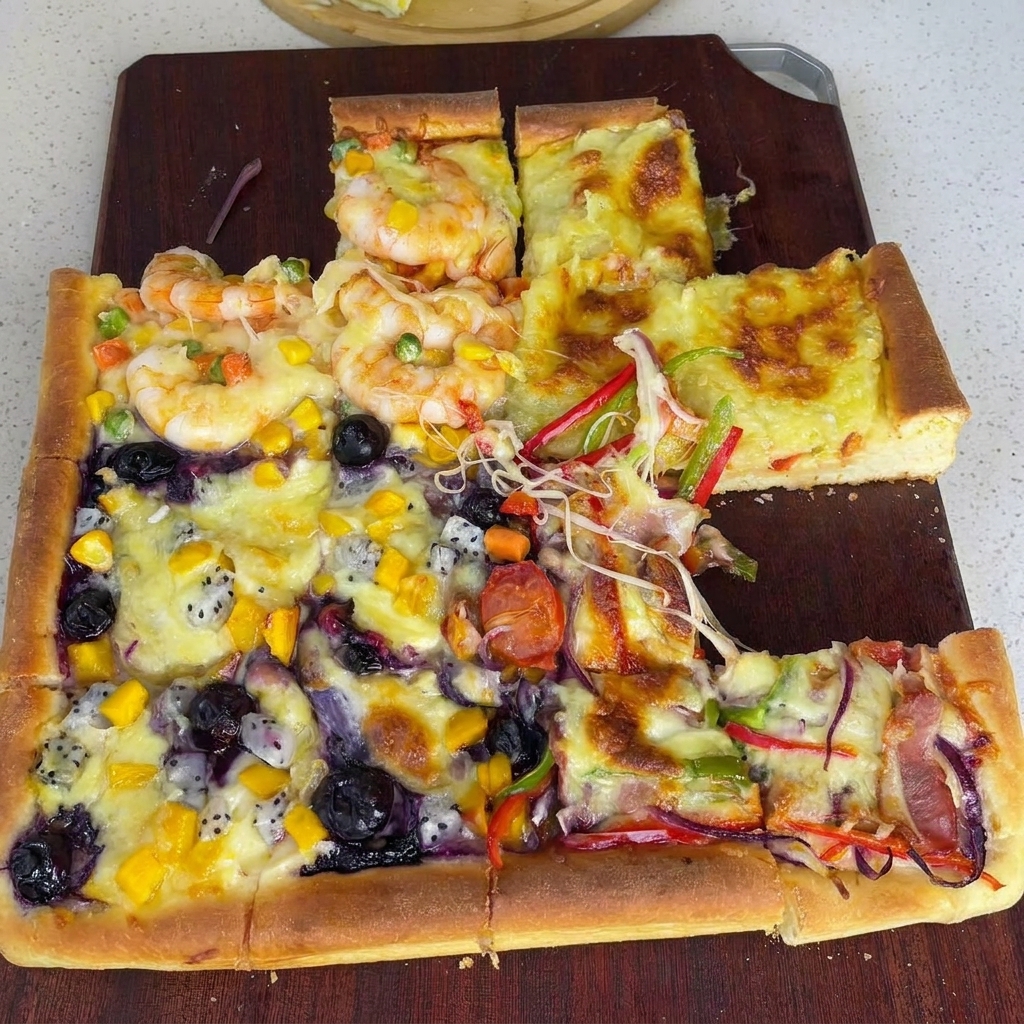
Once all your colorful toppings are arranged neatly across their designated quadrants, sprinkle another heavy layer of shredded mozzarella cheese generously over the entire surface. Place the pan in the oven preheated to 200°C and bake for 15 minutes until molten and bubbling. Remove and slice carefully while hot to enjoy the best gooey cheese pull effect.
Tip: Bake in a preheated oven at 200°C for 15 minutes. Serve immediately while hot to experience the absolute best gooey, stringy cheese pull effect.