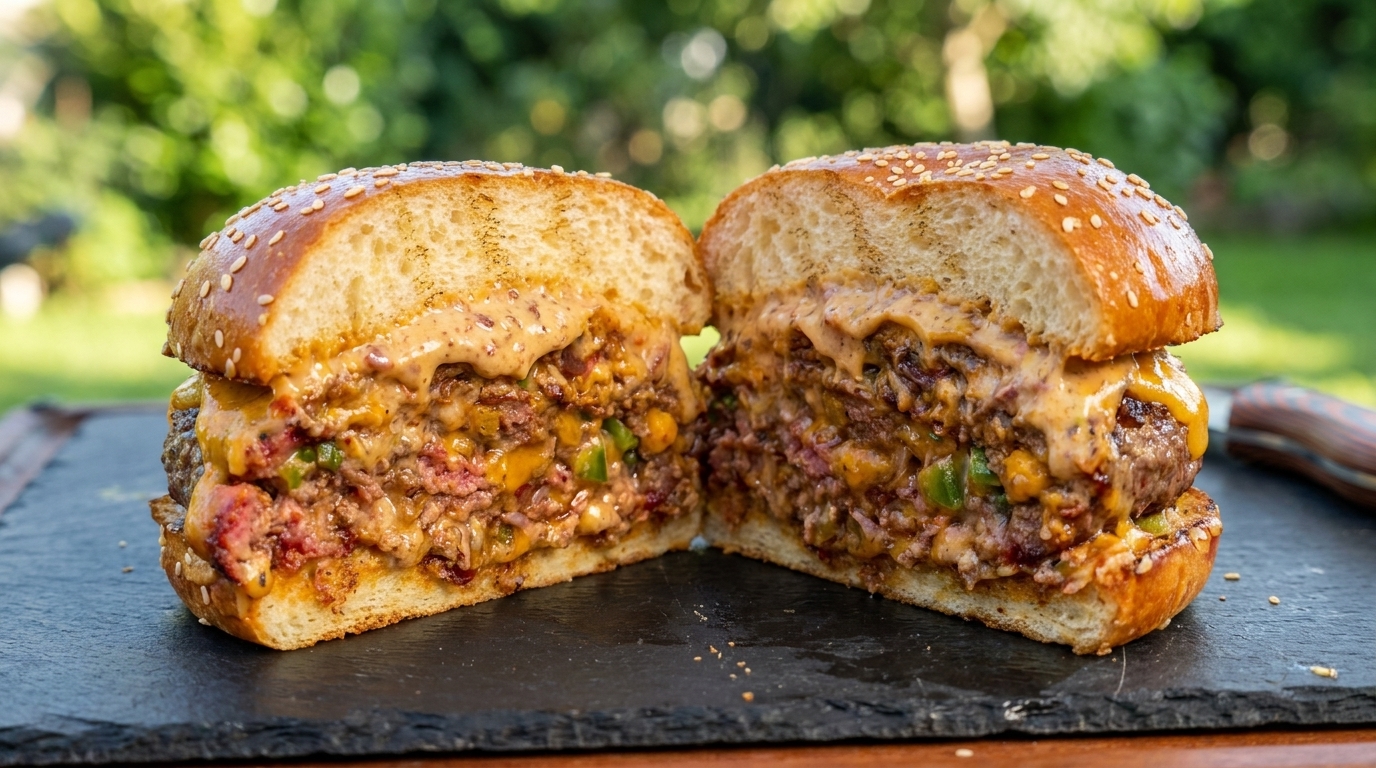
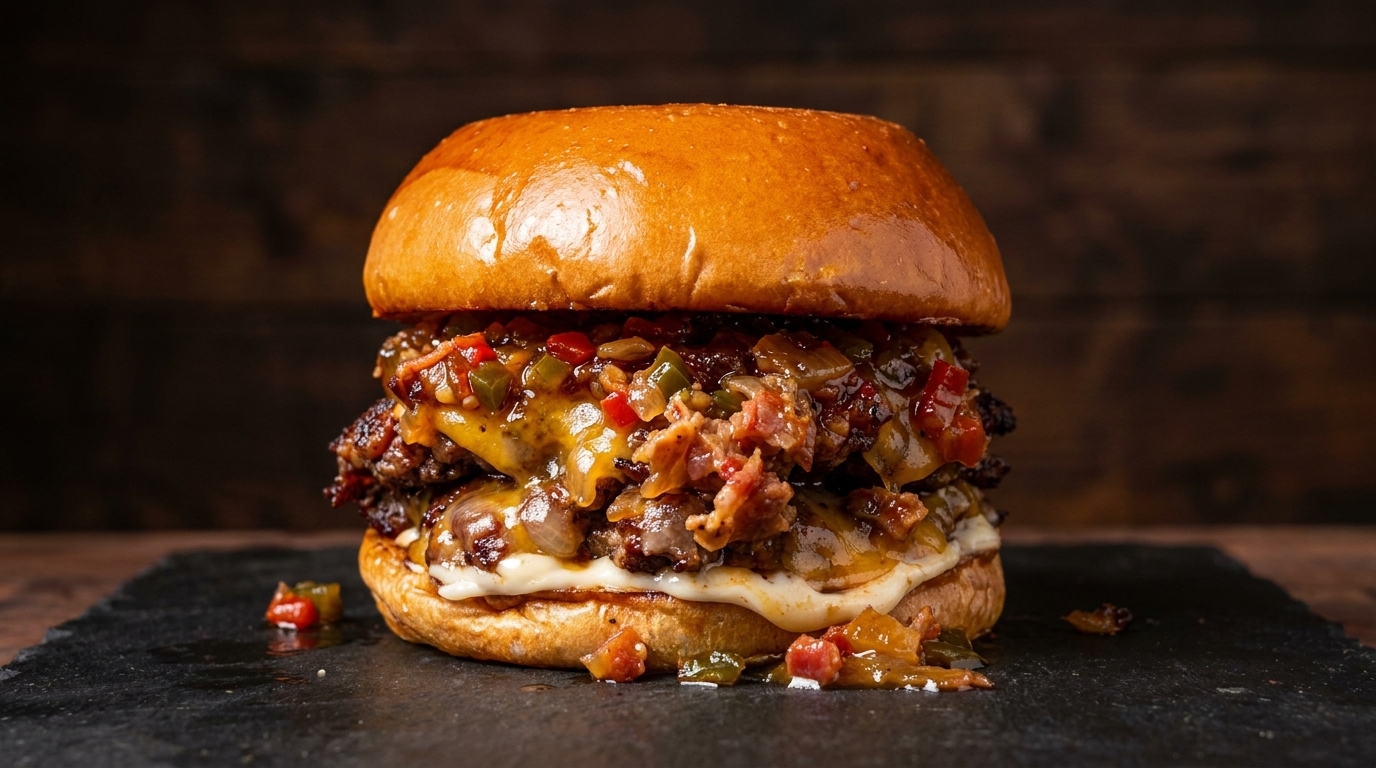
Double Smoked Smashburgers
Bacon-Pepper Jam
A masterclass in burger chemistry featuring ultra-crispy, thin smash patties infused with fruitwood liquid smoke, blanketed in melted cheese, and finished with a sticky, complex sweet-and-spicy smoked bacon jam.
Smashburgers are defined by their intense Maillard browning, but this recipe elevates the street food staple by layering deep smoky elements. The first layer builds from slowly rendered bacon simmered with chipotle and apple cider vinegar into a balanced condiment. The second layer uses an innovative home technique—misting the patties with a diluted fruitwood smoke blend—delivering a deep barbecue aroma directly upon searing.
Ingredients
- 500 g ground beef
- 200 g bacon
- 1 whole yellow onion
- 2 whole wrinkled skin green peppers
- 1 whole large red chili pepper
- 2 tbsp minced garlic
- 1 tbsp maple syrup
- 20 g brown sugar
- 2 tbsp chipotle pepper sauce
- 1 tbsp applesauce
- 120 ml apple cider vinegar
- 1 tbsp mustard powder
- 1 tbsp fruitwood liquid smoke
- 3 slices marbled cheddar cheese
- 2 whole brioche burger buns
- 30 g butter
- 2 tbsp mayonnaise
- to taste salt
- to taste black pepper
Instructions
- 1Slice the bacon
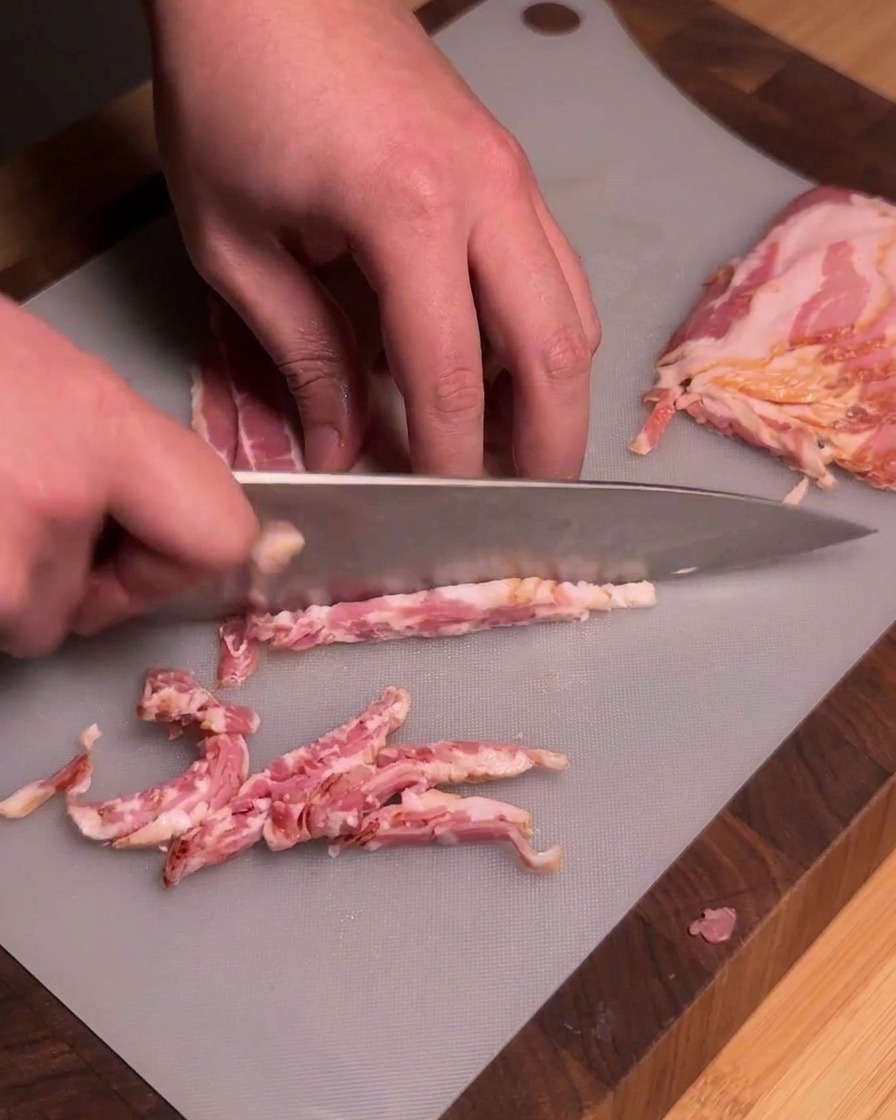
Place the raw bacon strips onto a cutting board and slice them into small, even pieces roughly the thickness of chopsticks. Slicing them uniformly ensures they render evenly in the pan.
Tip: Chilling the bacon in the freezer for 10-15 minutes before slicing makes it firmer and much easier to cut cleanly. - 2Render the bacon fat
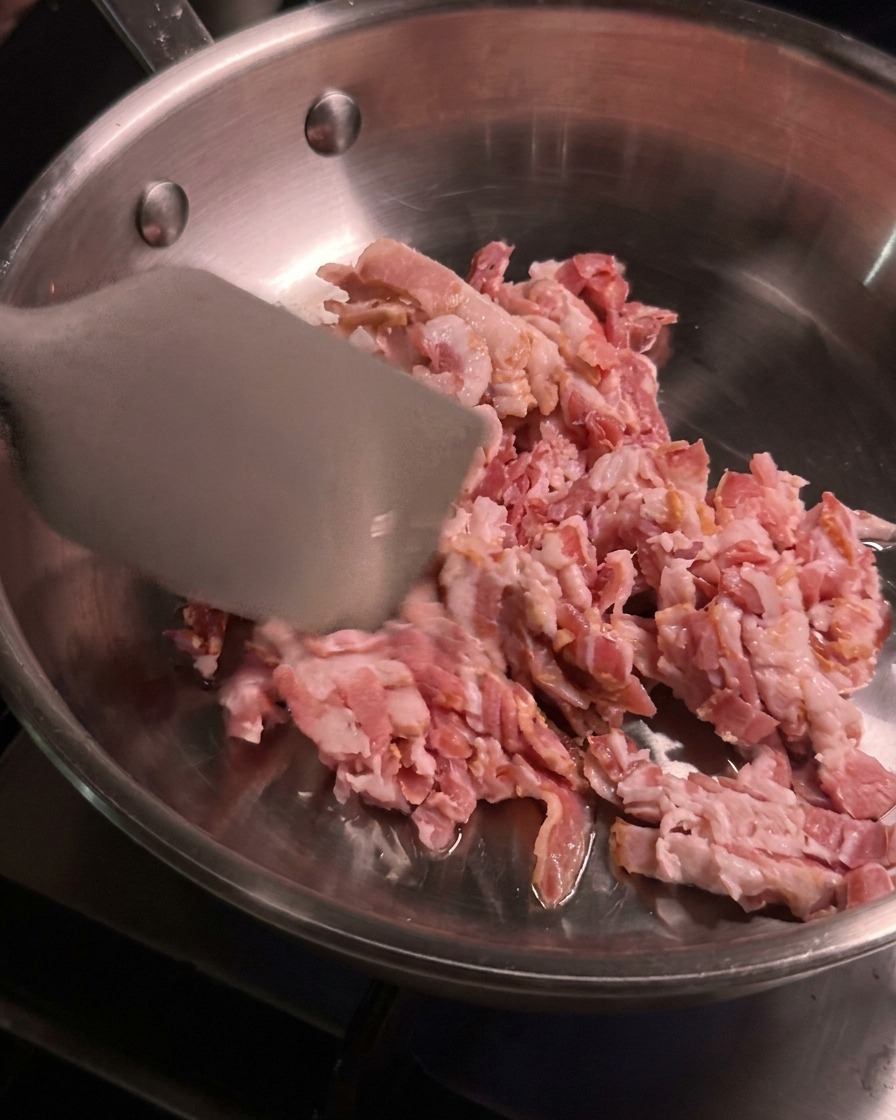
Add the diced raw bacon to a stainless steel pan along with a small splash of oil. Cook over medium-low heat, stirring occasionally with a spatula, to slowly render out the fat and crisp up the bacon.
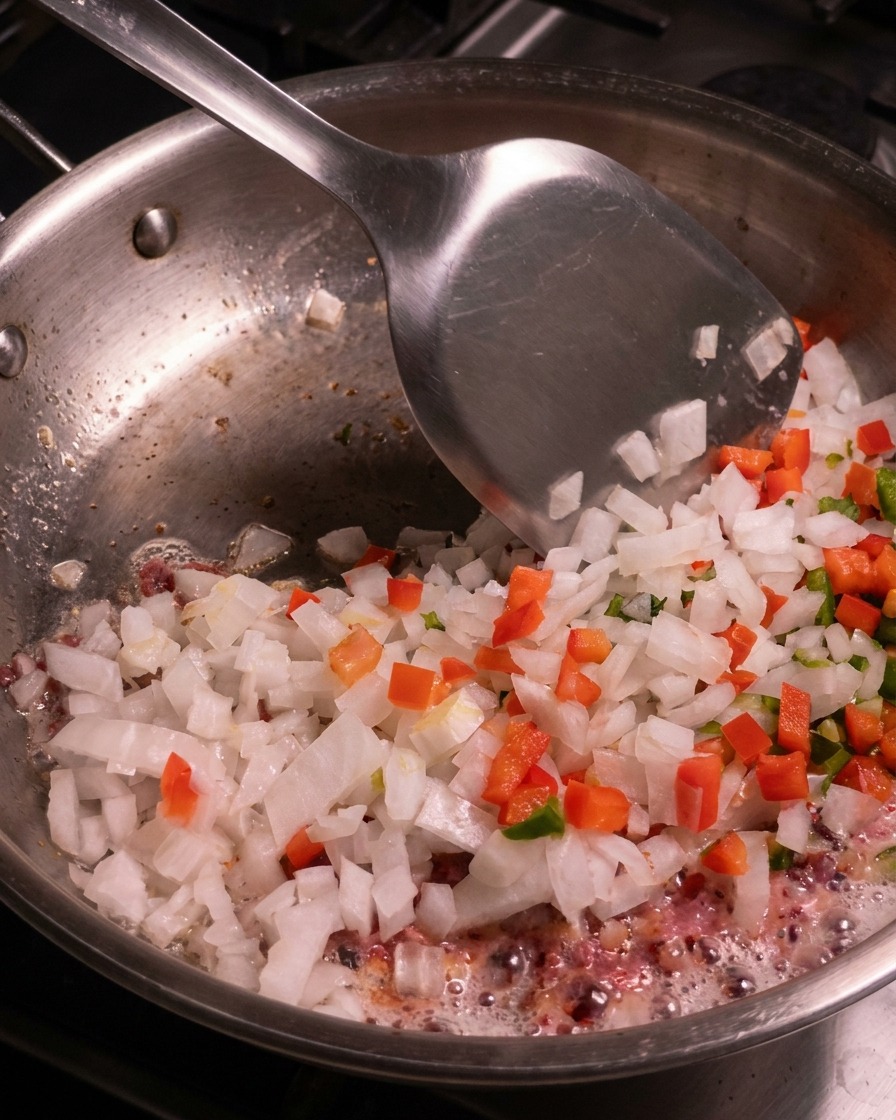
Tip: Starting with a small amount of oil helps prevent the bacon from sticking initially before its own fat begins to melt. - 3Dice the onion
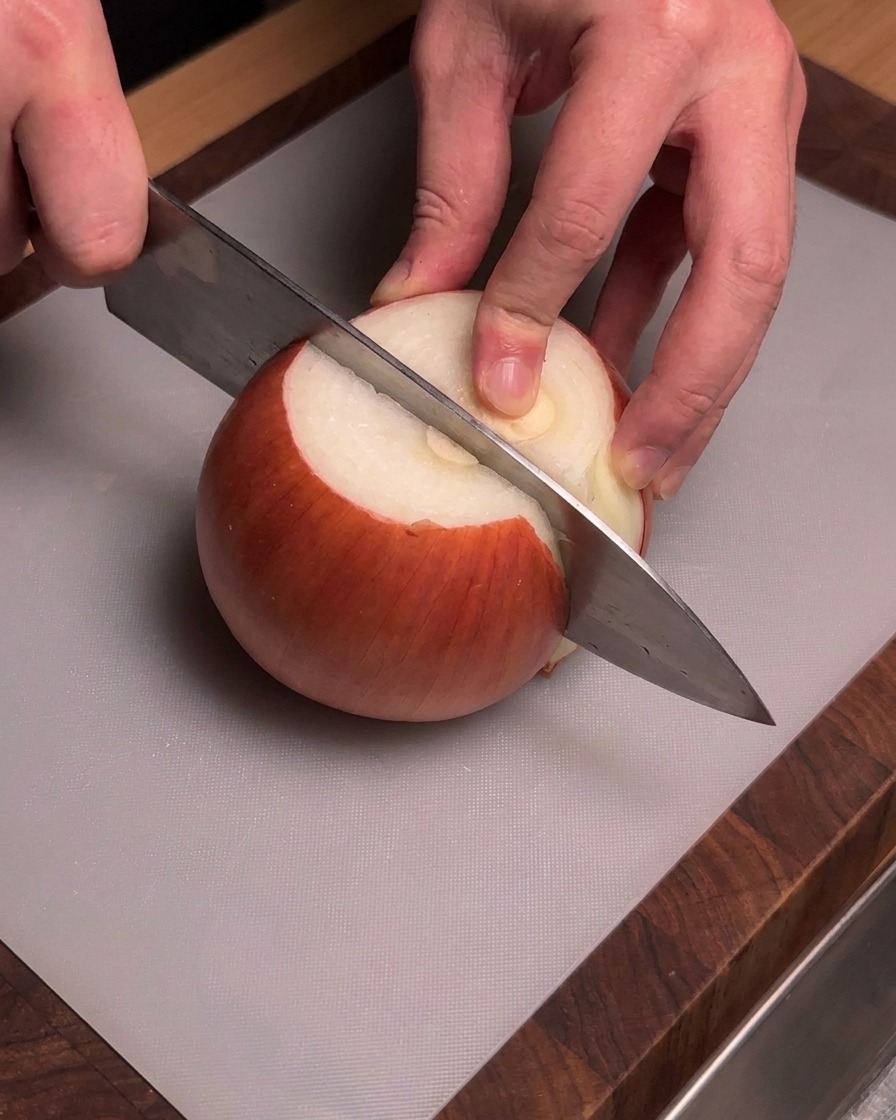
Carefully slice and dice a whole raw yellow onion into uniform pieces about the thickness of chopsticks. For perfectly even pieces, cut horizontally into the onion three times first, then slice vertically.
Tip: Keep the root end of the onion intact while slicing to hold the layers together and make dicing safer and easier. - 4Chop the green chili peppers
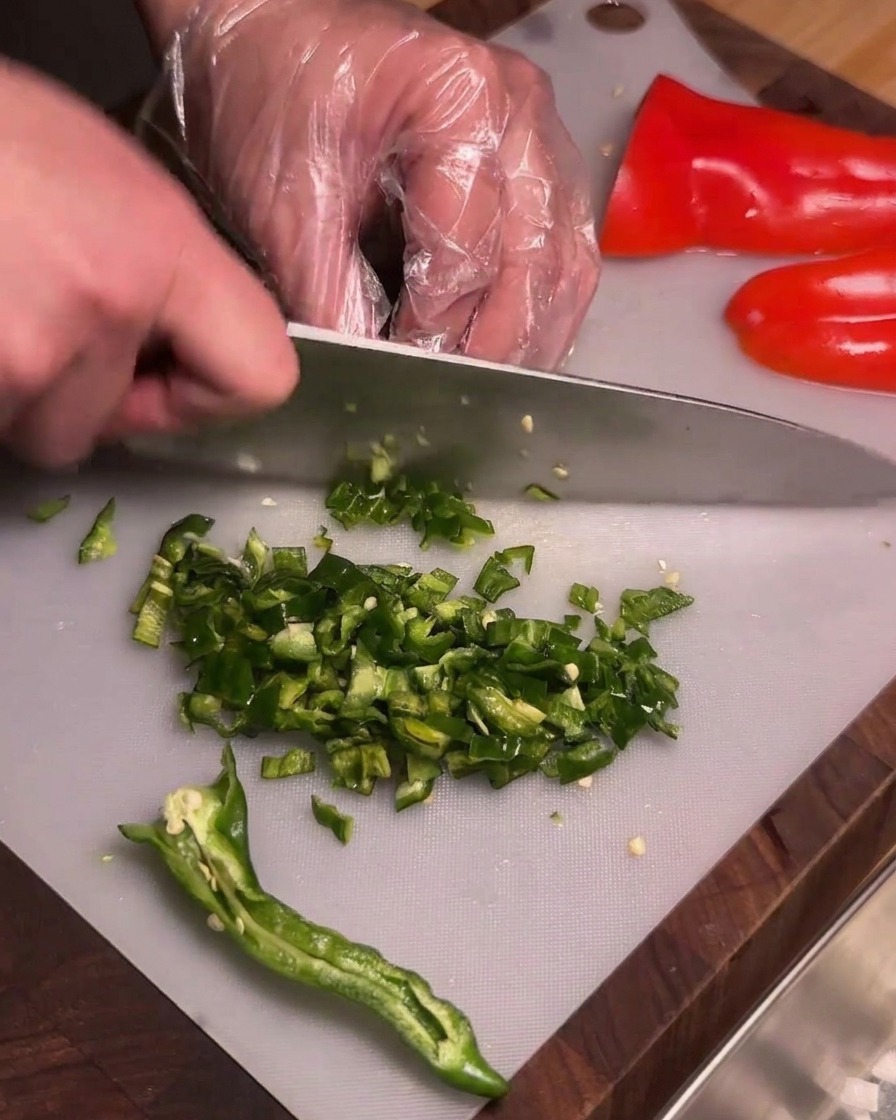
Slice the green wrinkled chili peppers in half lengthwise and remove the seeds to control the heat level. Finely chop the peppers into small pieces to match the texture of the onion.
Tip: Wearing disposable gloves while handling hot chili peppers prevents the spicy capsaicin oils from transferring to your skin or eyes. - 5Add vegetables to the pan
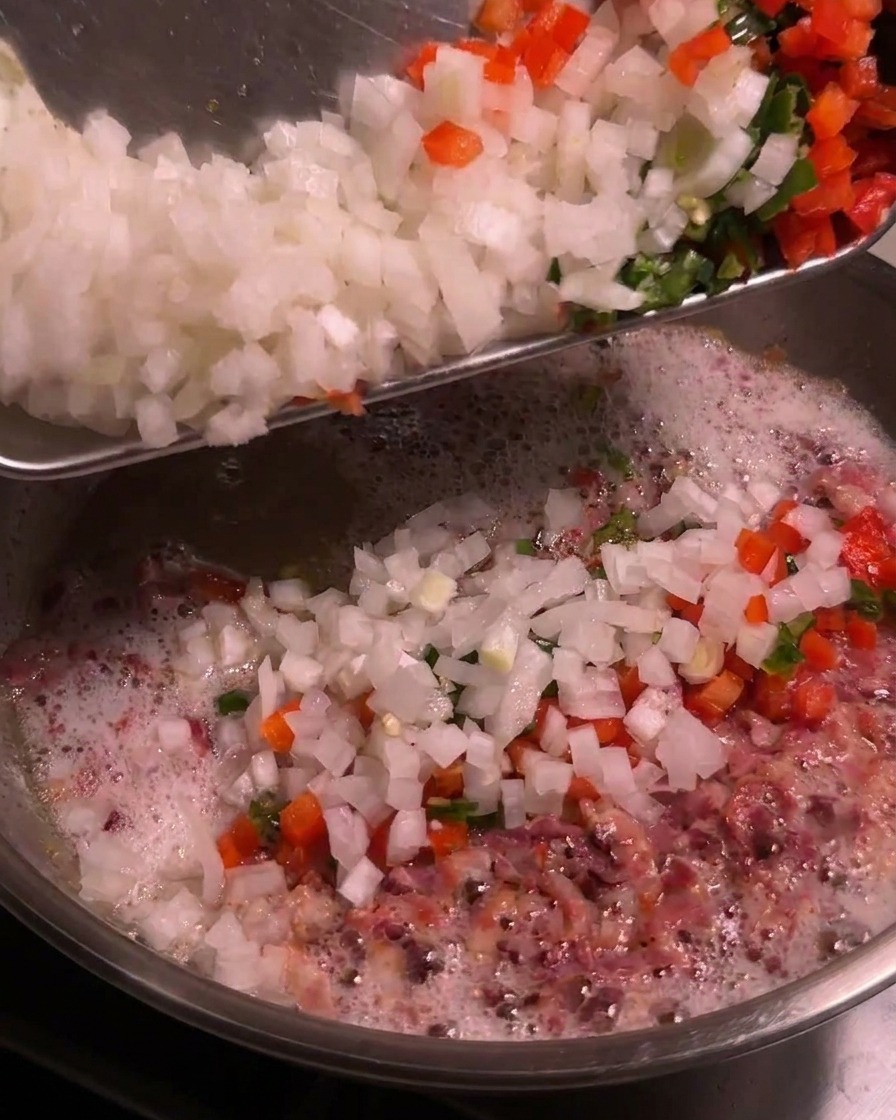
Once the bacon fat is fully rendered, pour the uniformly diced onions, green wrinkled chili peppers, and red chili peppers directly into the hot pan with the bacon.
Tip: Ensure the bacon has released plenty of fat before adding the vegetables, as they will cook and soften beautifully in the flavorful bacon grease. - 6Sauté the aromatics and garlic
Add two spoonfuls of minced raw garlic to the pan along with the bacon and vegetable mixture. Stir everything together thoroughly using a spatula to combine the flavors as they sauté.
Tip: Stir constantly after adding garlic to prevent it from burning, which can introduce an unpleasant bitter flavor to the jam. - 7Season with maple syrup and brown sugar
Drizzle a swirl of maple syrup and add a small handful of brown sugar into the skillet with the sautéed bacon and vegetables. This combination of sugars creates a sweet foundation that balances the heat from the peppers and the savory depth of the bacon.
Tip: Stir immediately after adding the sugars to prevent them from sticking to the bottom of the pan and burning. - 8Add chipotle pepper sauce
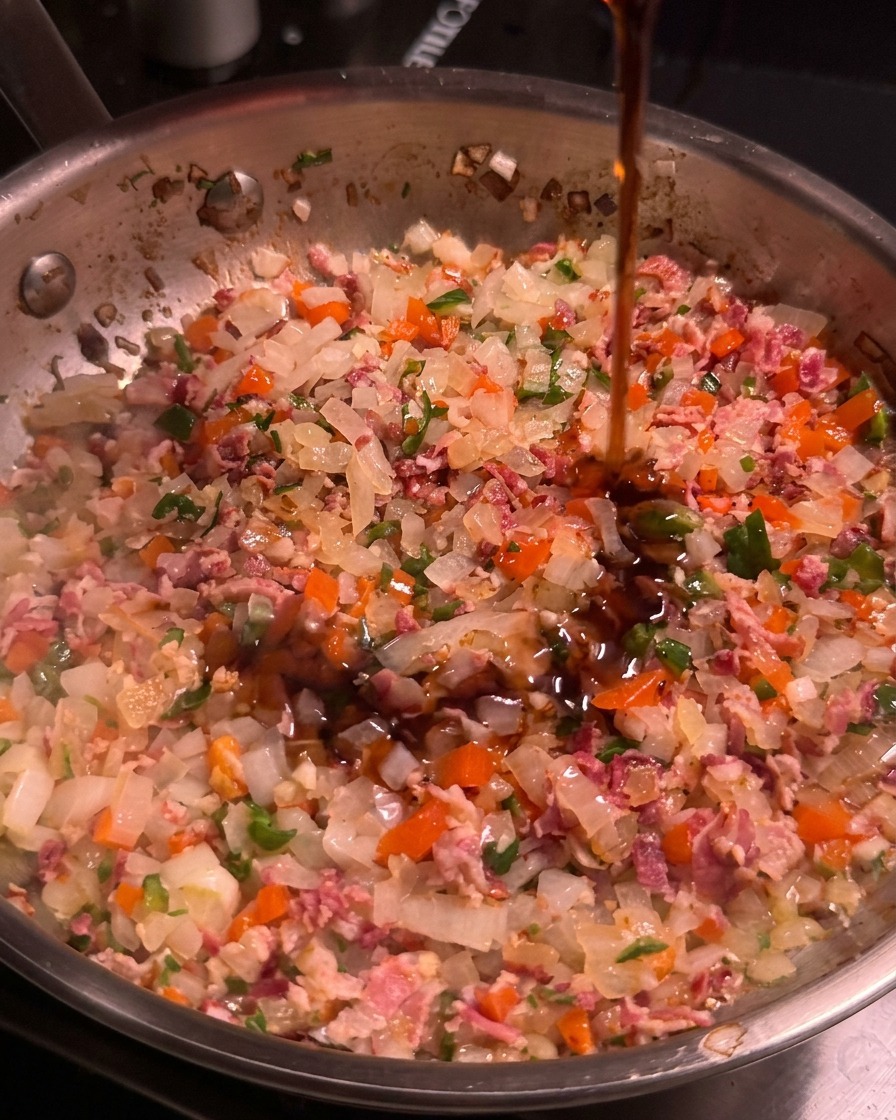
Add two spoonfuls of canned chipotle pepper sauce into the pan. The chipotle sauce introduces a rich, smoky flavor and a gentle layer of heat, which is essential for creating a complex profile in the bacon jam.
Tip: You can adjust the amount of chipotle sauce based on your heat preference, or add a piece of the pepper for extra spice. - 9Incorporate the applesauce
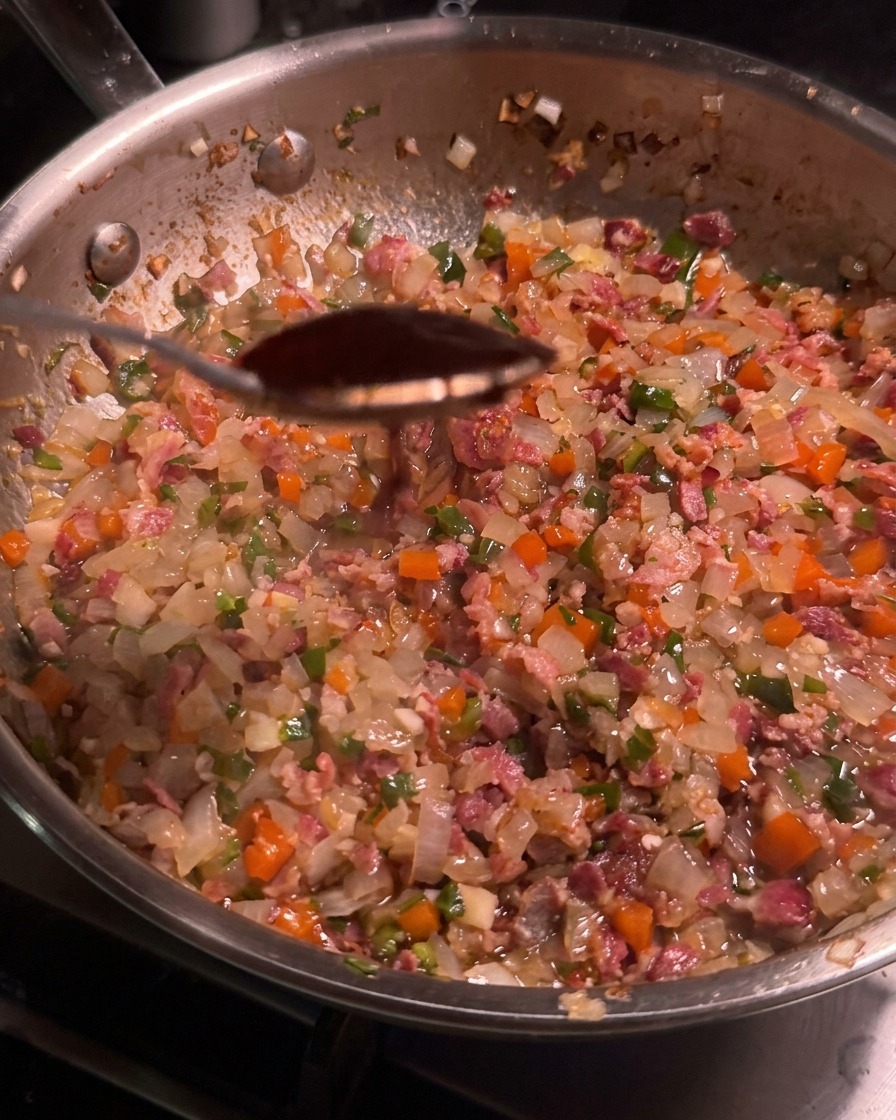
Stir a spoonful of smooth applesauce into the simmering jam mixture. The applesauce provides a natural, fruity sweetness and contributes pectin, helping the mixture bind and achieve a perfect jam-like consistency.
Tip: Use plain, unsweetened applesauce to ensure it doesnt overly sweeten the jam beyond the targeted flavor profile. - 10Pour in apple cider vinegar
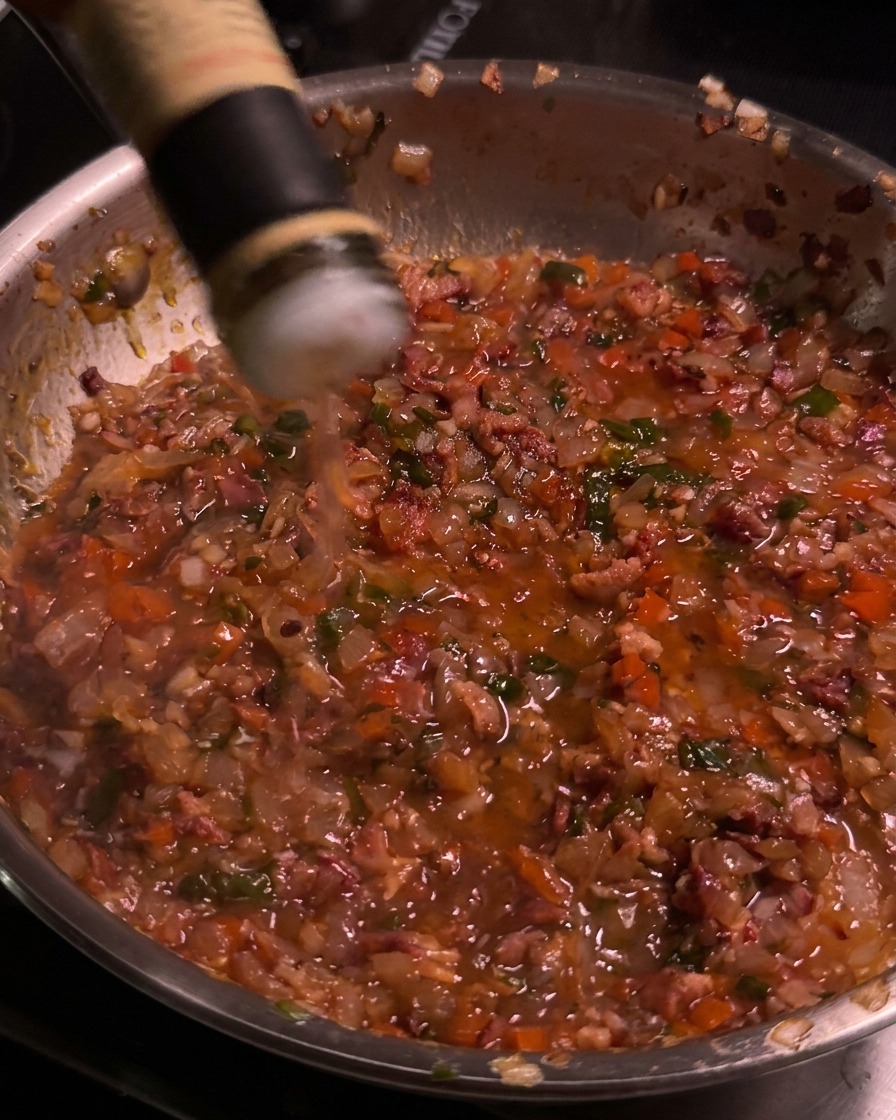
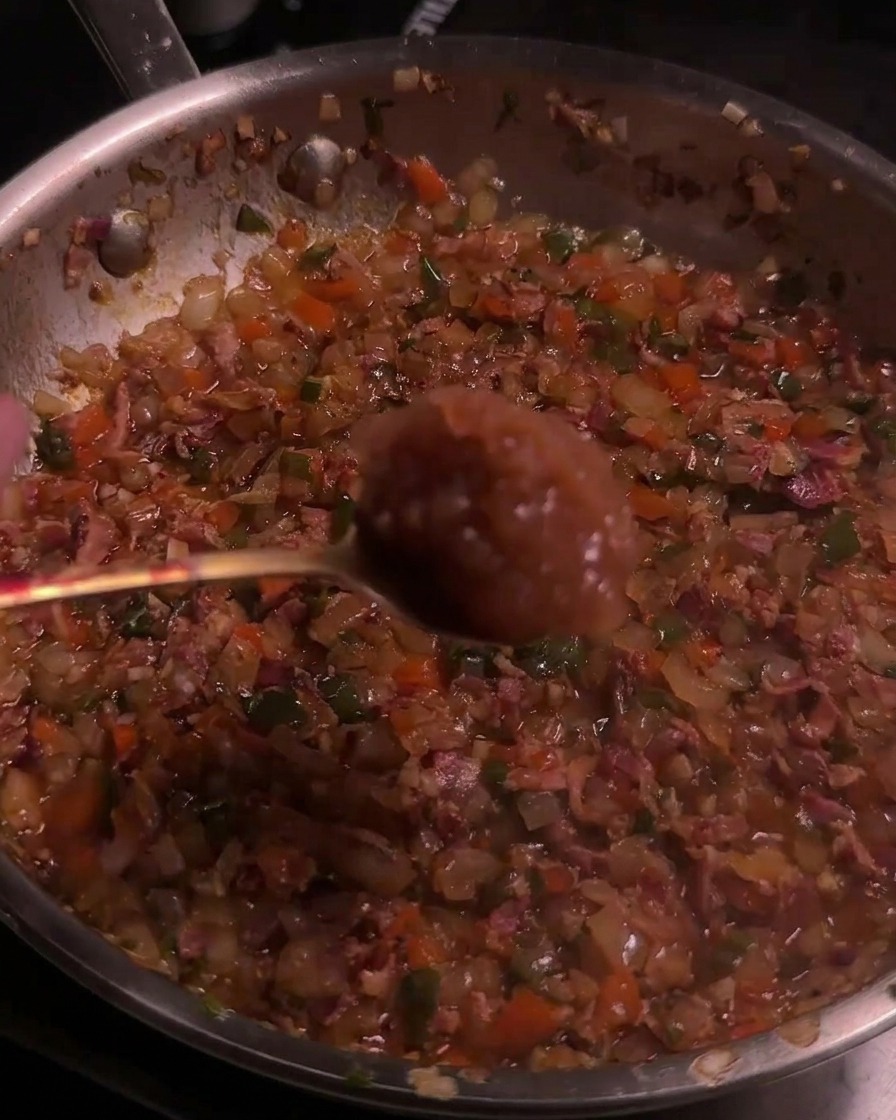
Pour a bowl of apple cider vinegar into the skillet, then season with a pinch of salt and black pepper. The vinegar introduces a sharp acidity that cuts through the rich fat of the bacon and balances out the sweetness.
Tip: Allow the mixture to simmer uncovered so the harsh acidity mellows out, leaving behind a well-balanced, tangy flavor. - 11Transfer the finished bacon jam
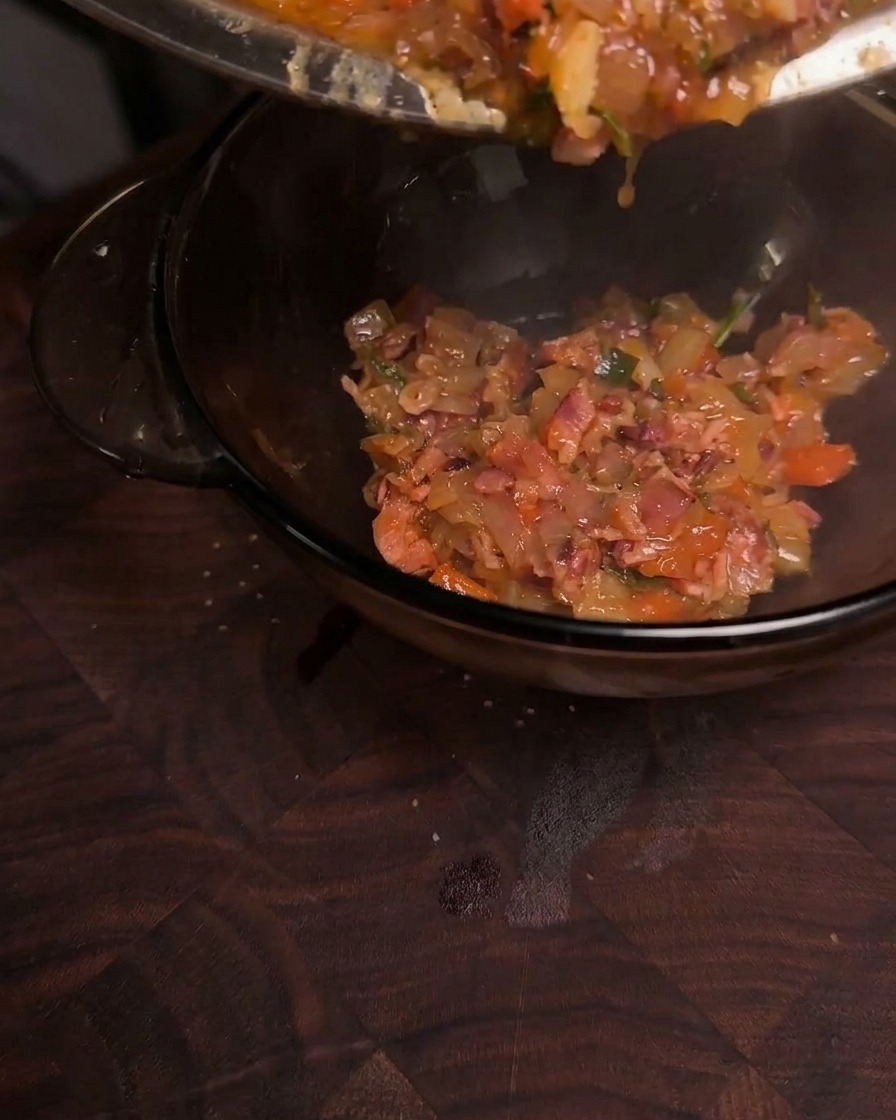
Once the bacon jam has simmered down to a thick, glossy, and slightly saucy texture, remove it from the heat. Carefully transfer the mixture into a clean glass bowl and set it aside to cool while preparing the burger patties.
Tip: The jam will thicken further as it cools down, so ensure it still has a bit of sauciness before removing it from the stove. - 12Season the ground beef
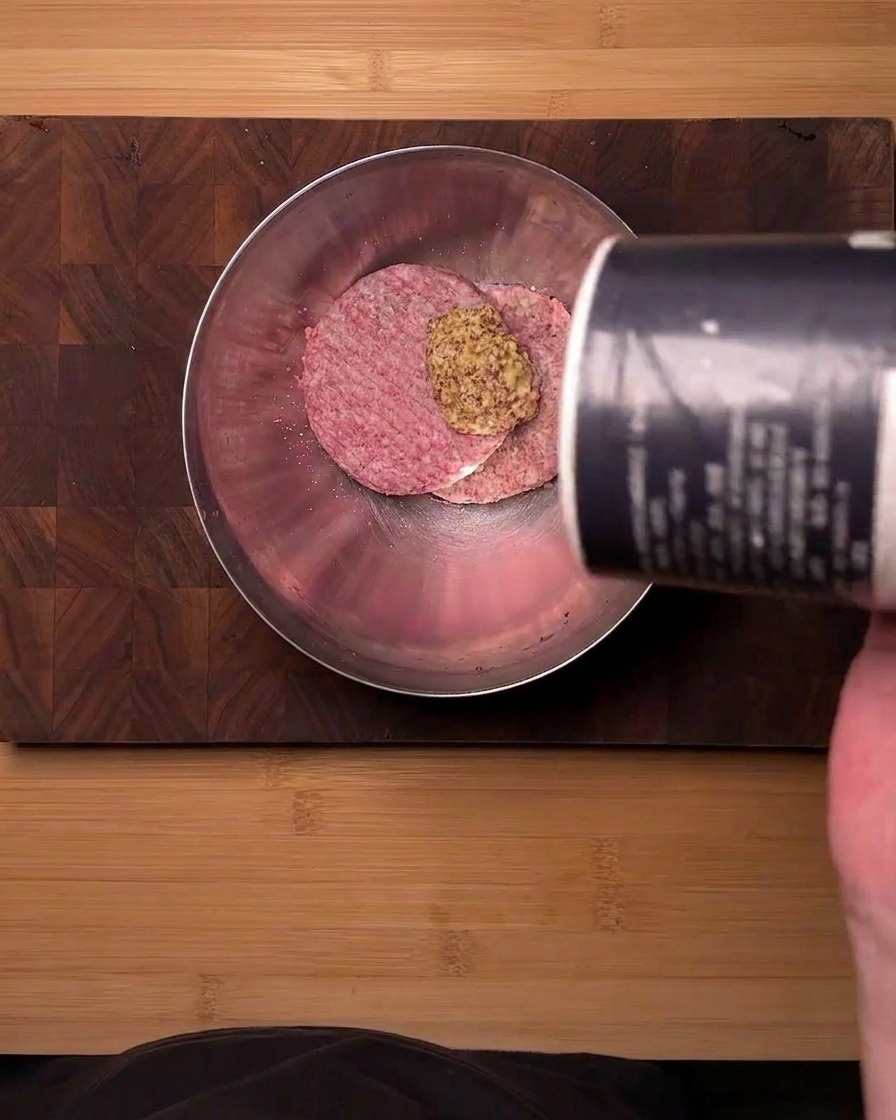
Place the raw ground beef into a metal mixing bowl. Add a spoonful of mustard powder and season with salt, pouring it evenly over the meat. Mix the ingredients thoroughly by hand to ensure the seasonings are distributed uniformly, creating a flavorful base for the burger patties.
Tip: Using mustard powder instead of prepared wet mustard adds a distinct tangy depth of flavor without introducing excess moisture, helping the meat retain its ideal texture. - 13Shape into compact meatballs
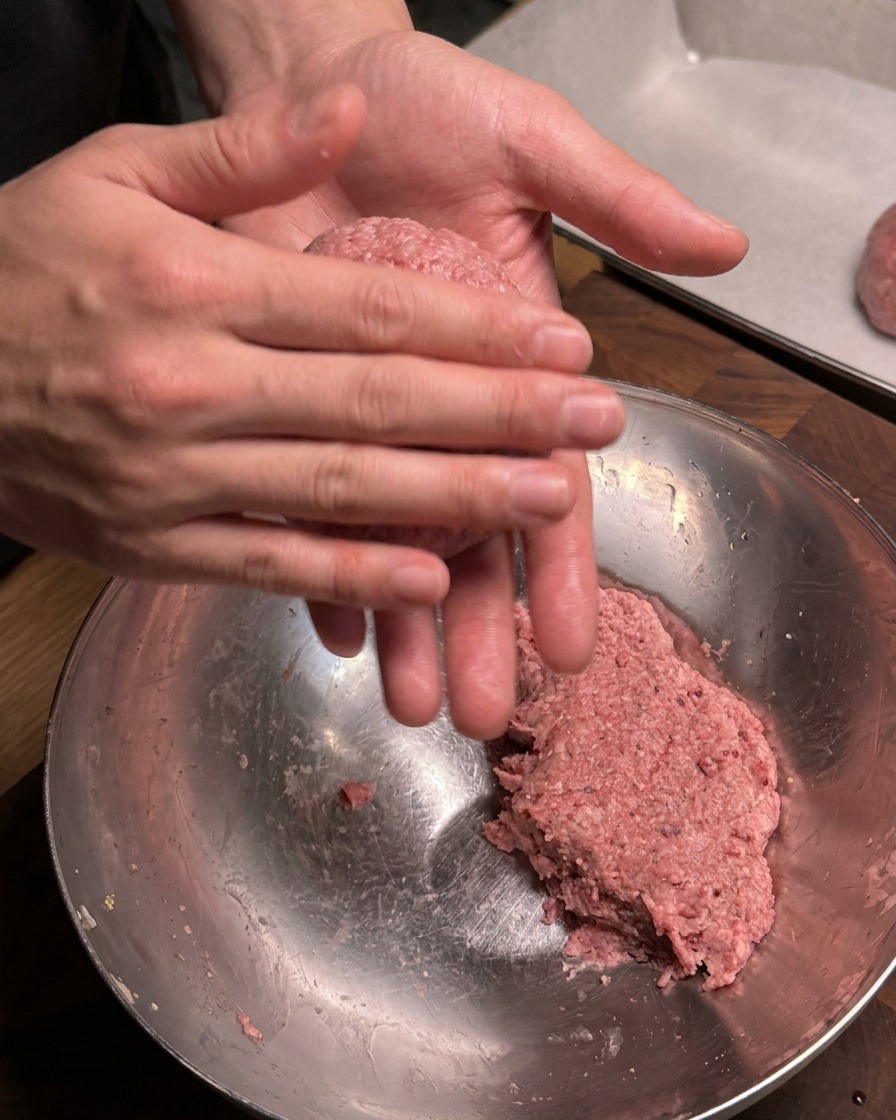
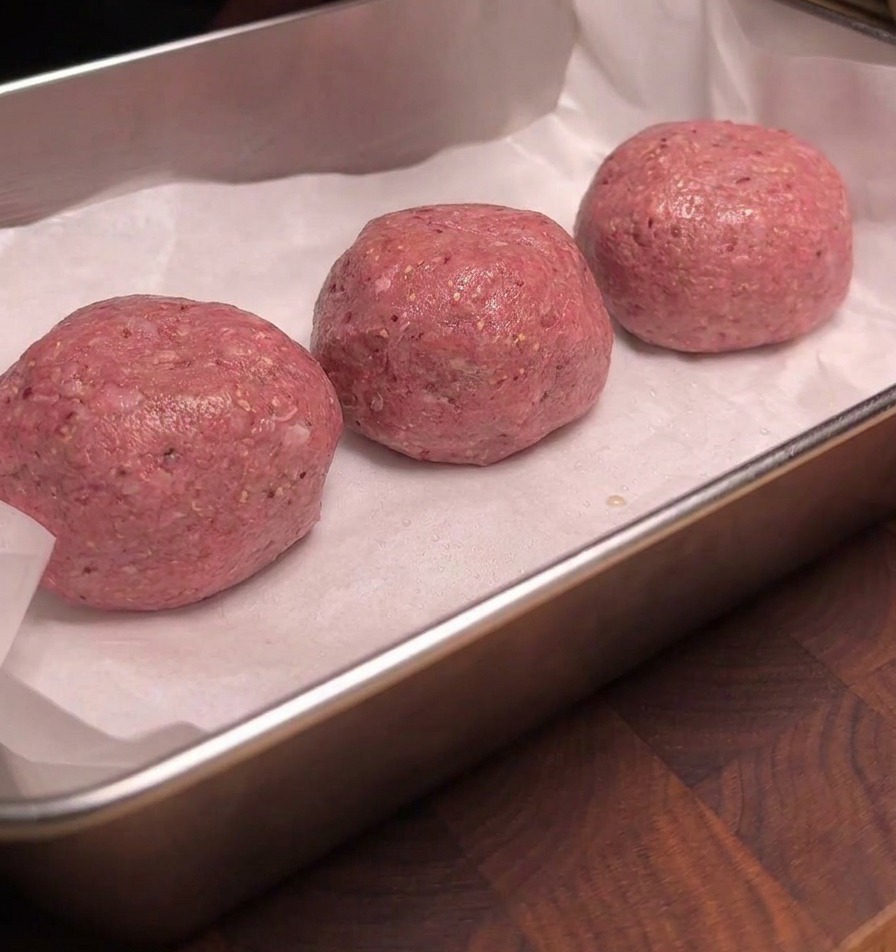
Divide the seasoned ground beef mixture evenly into three equal portions. Roll each portion firmly between your hands to shape them into smooth, compact round meatballs, then place them onto a tray lined with parchment paper.
Tip: Shaping the meatballs tightly ensures they hold their structure well and do not crack or break apart when pressed firmly in the hot pan later. - 14Infuse the meatballs with liquid smoke
Dilute the fruitwood liquid smoke with water at a 1:1 ratio until it turns a golden yellow hue. Uniformly spray this mixture onto the surface of the shaped raw beef meatballs. This step infuses the meat with a rich, authentic smoky aroma, perfectly preparing them to be seared and smashed.
Tip: Ensure the liquid smoke is distributed evenly across all sides of the meatballs so that the smoky flavor profile remains consistent throughout each patty. - 15Toast the burger buns
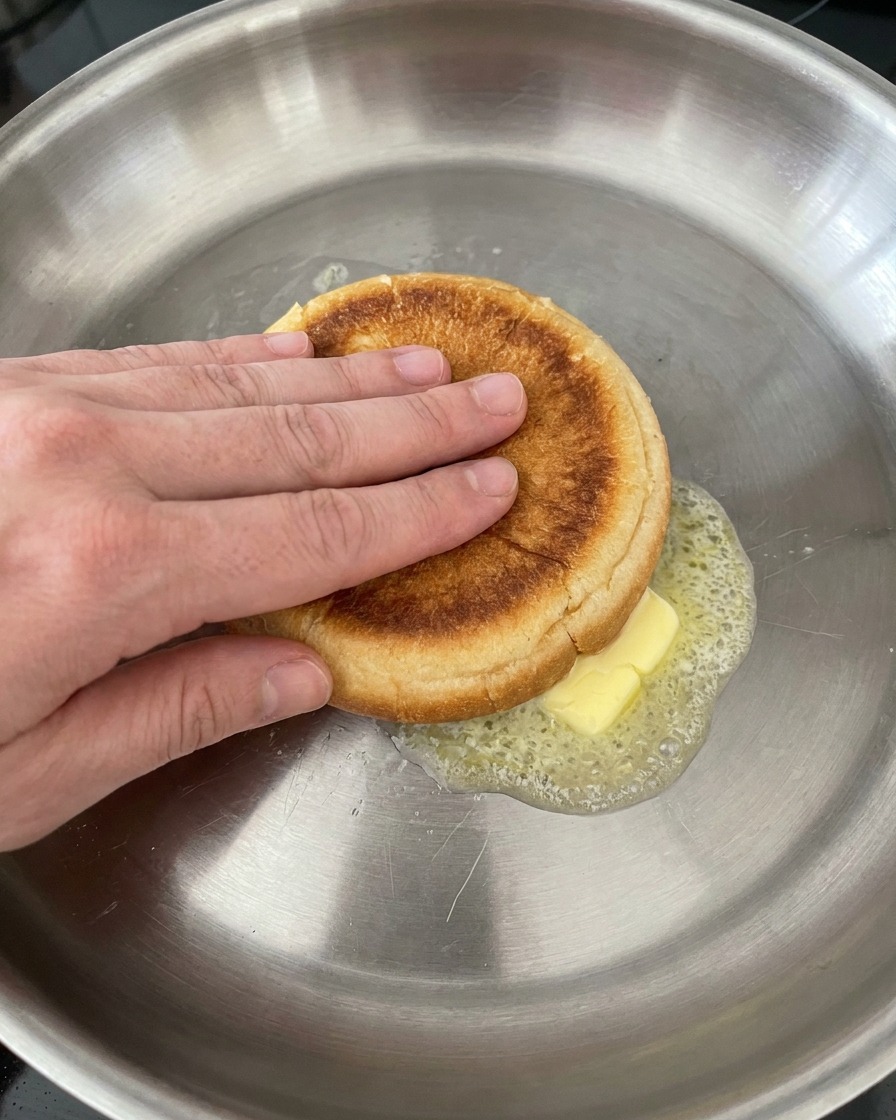
Melt a generous pat of butter in a pan over low heat. Place the burger bun halves cut-side down into the foaming melted butter and press down gently with your hand, toasting them until the surfaces develop a beautiful golden-brown, crispy crust.
Tip: Toasting the buns in butter creates a delicious crispy barrier that prevents the bread from absorbing too much juice from the hot patties and turning soggy. - 16Smash the burger patties
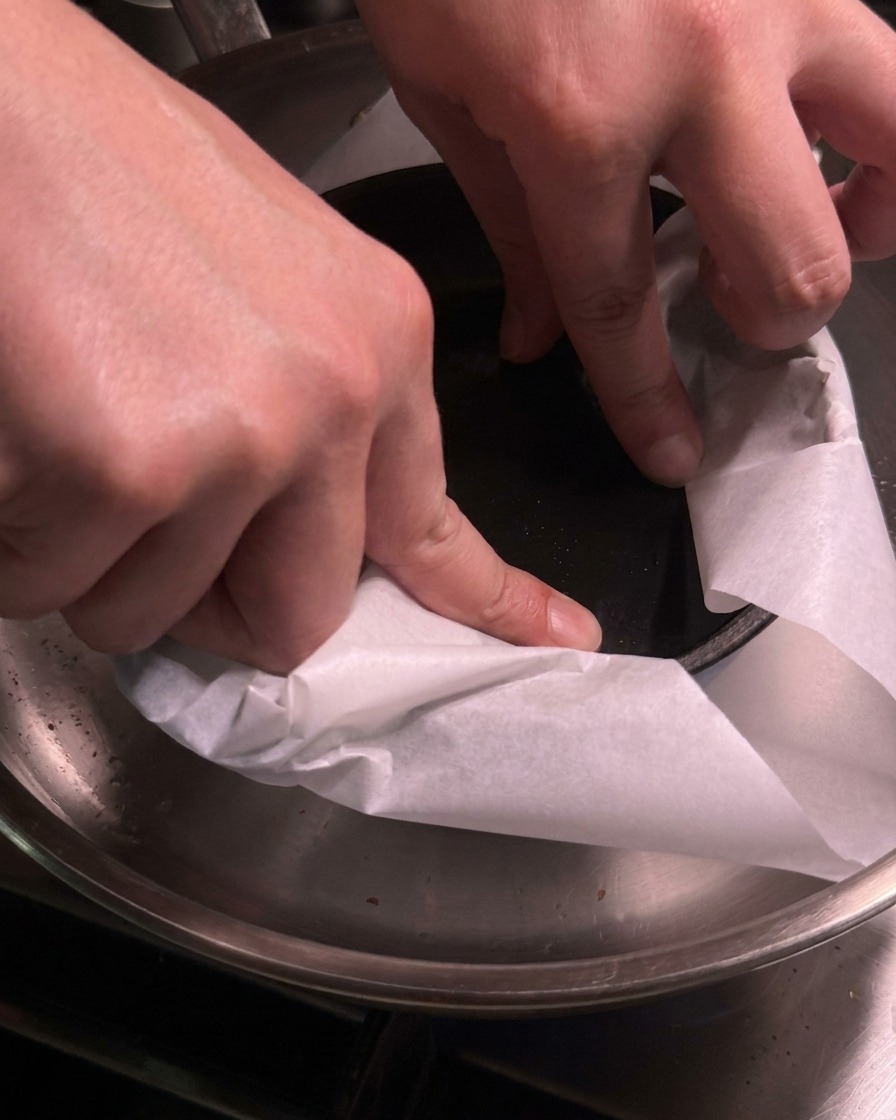
Place a beef meatball into the hot pan and cover it with a sheet of parchment paper. Use a heavy flat-bottomed pot or press to push down firmly and evenly, smashing the meatball into a thin patty to maximize pan contact and create a rich Maillard reaction crust.
Tip: Press down firmly immediately after placing the meat in the pan to achieve ultra-thin, crispy edges before the fat begins to render.