Dehydrated Okra
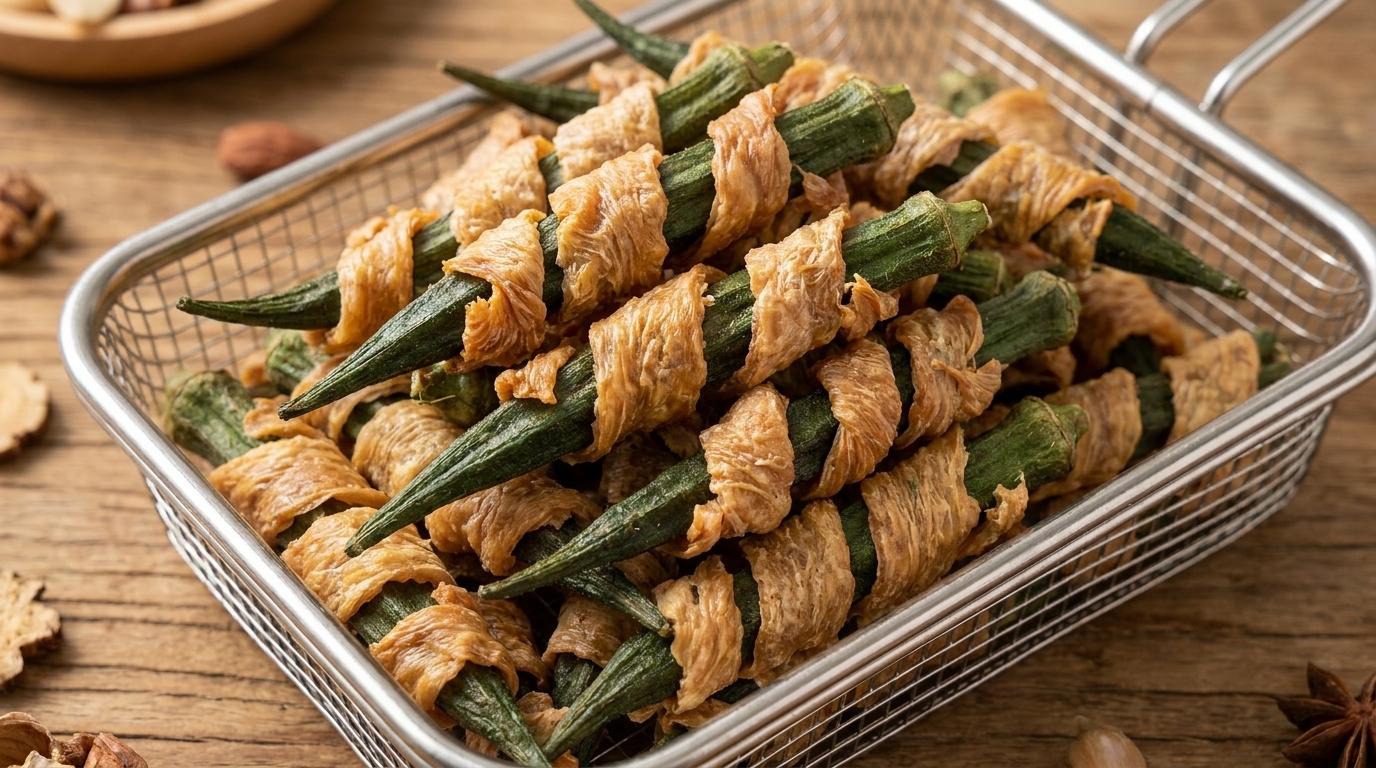
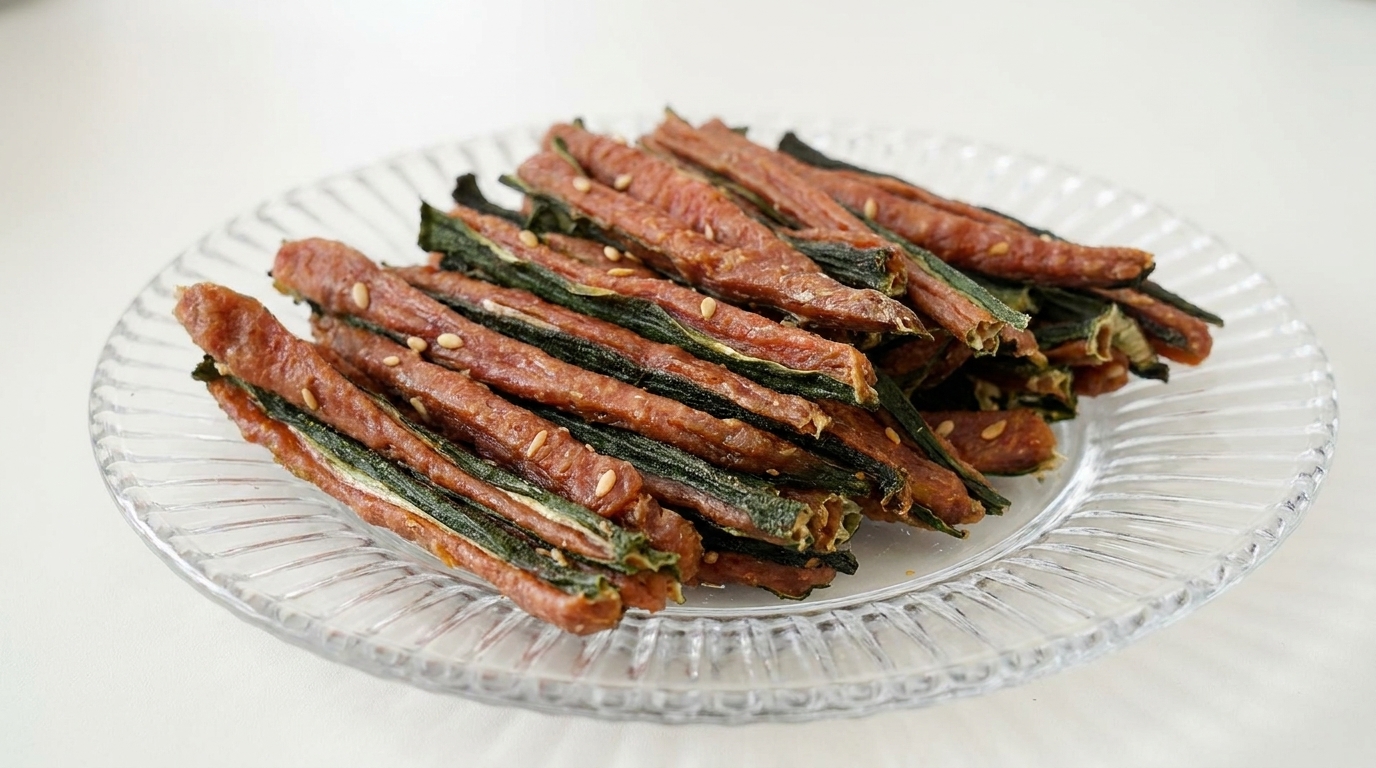
Chicken Pet Treats
A nutritious pet snack featuring crunchy okra pods stuffed with lean chicken breast and dehydrated for a healthy teething treat furry friends will love
Pet owners looking for clean-label alternatives to commercial snacks will appreciate these okra chicken strips. This recipe combines the dietary fiber of okra with high-quality lean protein, creating a satisfyingly crunchy treat that supports dental health and provides a natural boost of vitamins and oils.
Ingredients
- 250 g chicken breast
- 12 pieces fresh okra
- 1 tsp white sesame seeds
Instructions
- 1Blanch the okra
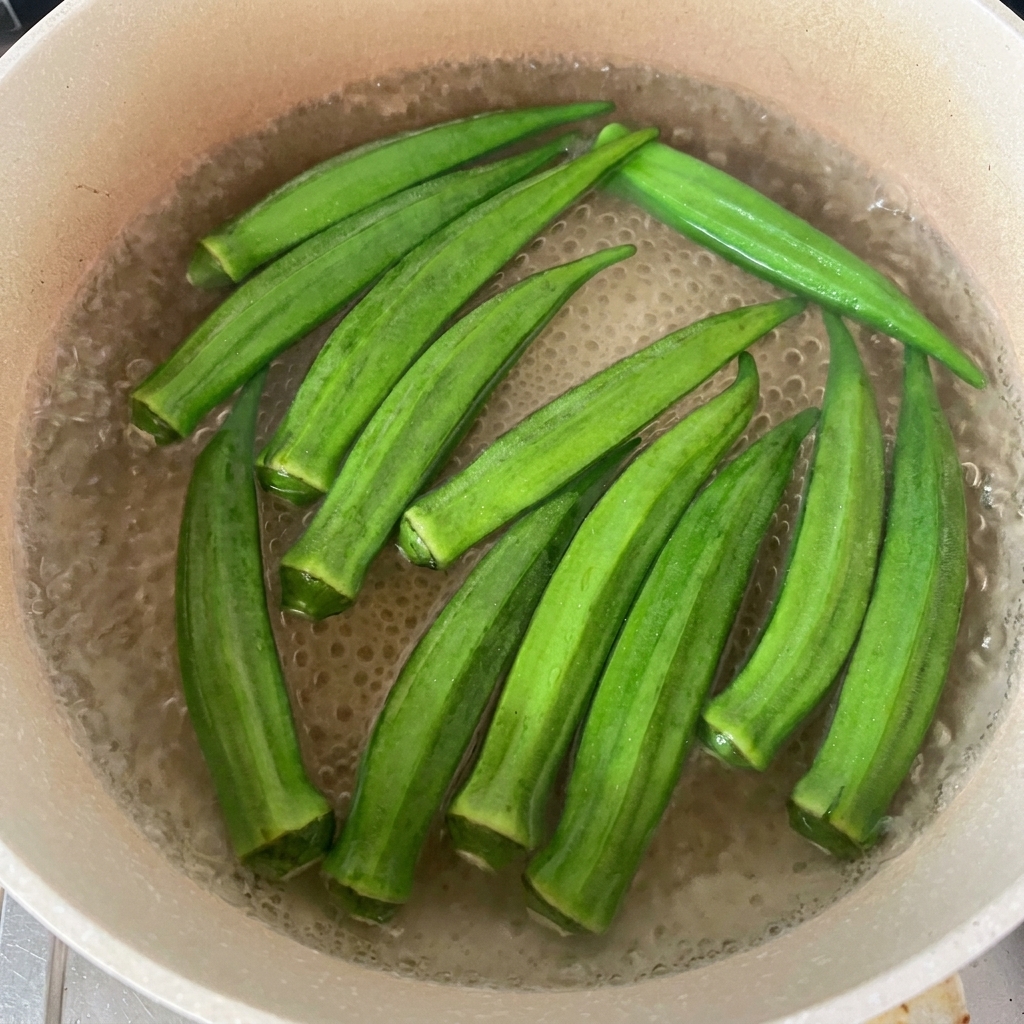
Place the whole okra pods into a pot of boiling water. Blanching helps remove oxalic acid and softens the pods slightly, making them easier to handle and prepare for the filling.
Tip: Do not overcook as a quick blanch is all that is needed to preserve the color and texture. - 2Trim the ends
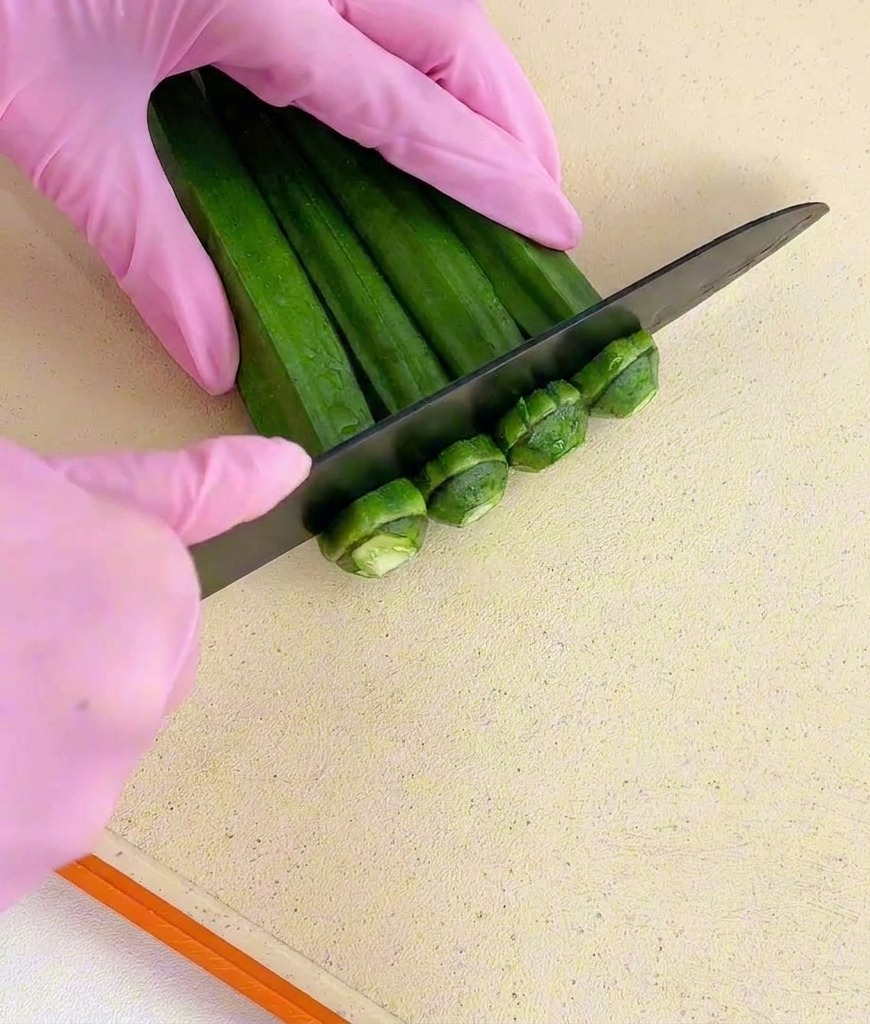
After blanching and cooling the okra, place them on a cutting board. Use a sharp knife to carefully trim off the stem ends and the small tips at the bottom.
Tip: Trimming the ends makes the okra pieces uniform and ready for slicing and hollowing. - 3Hollow out the okra
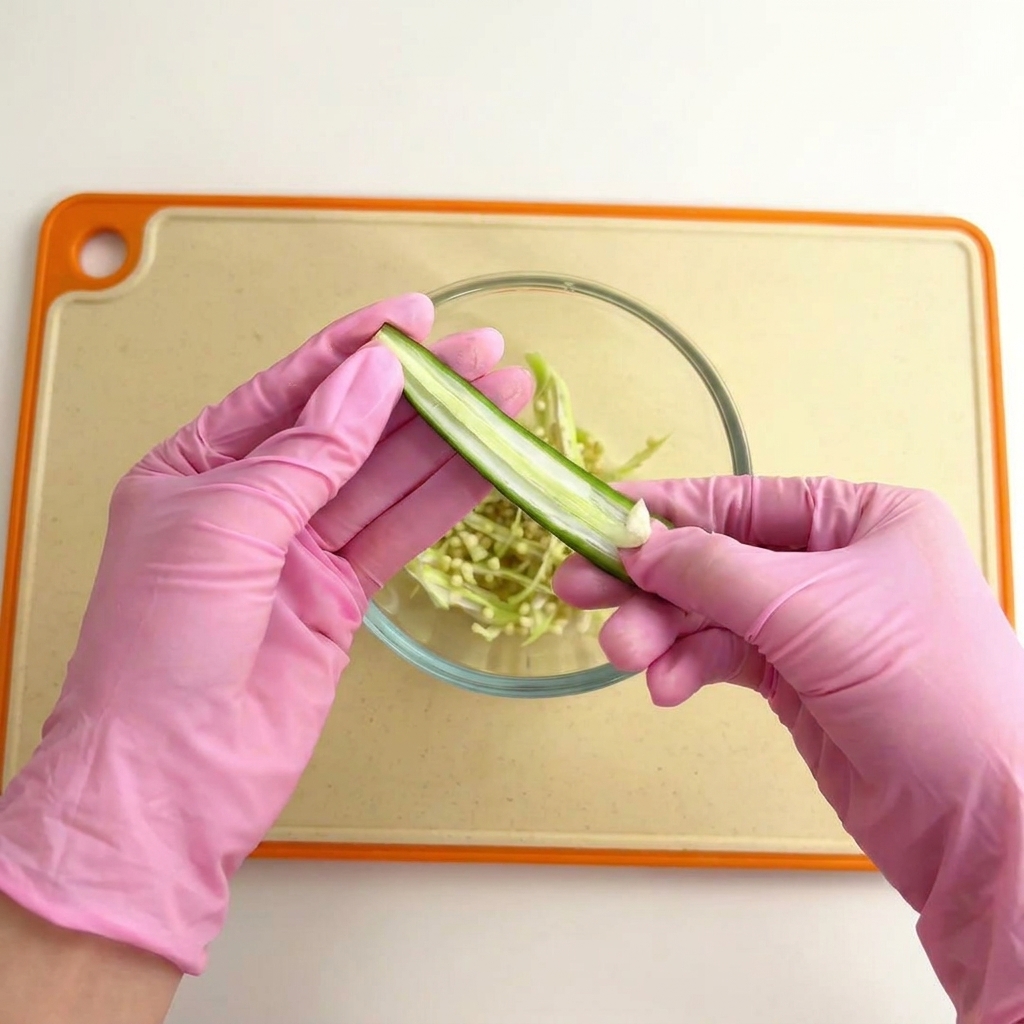
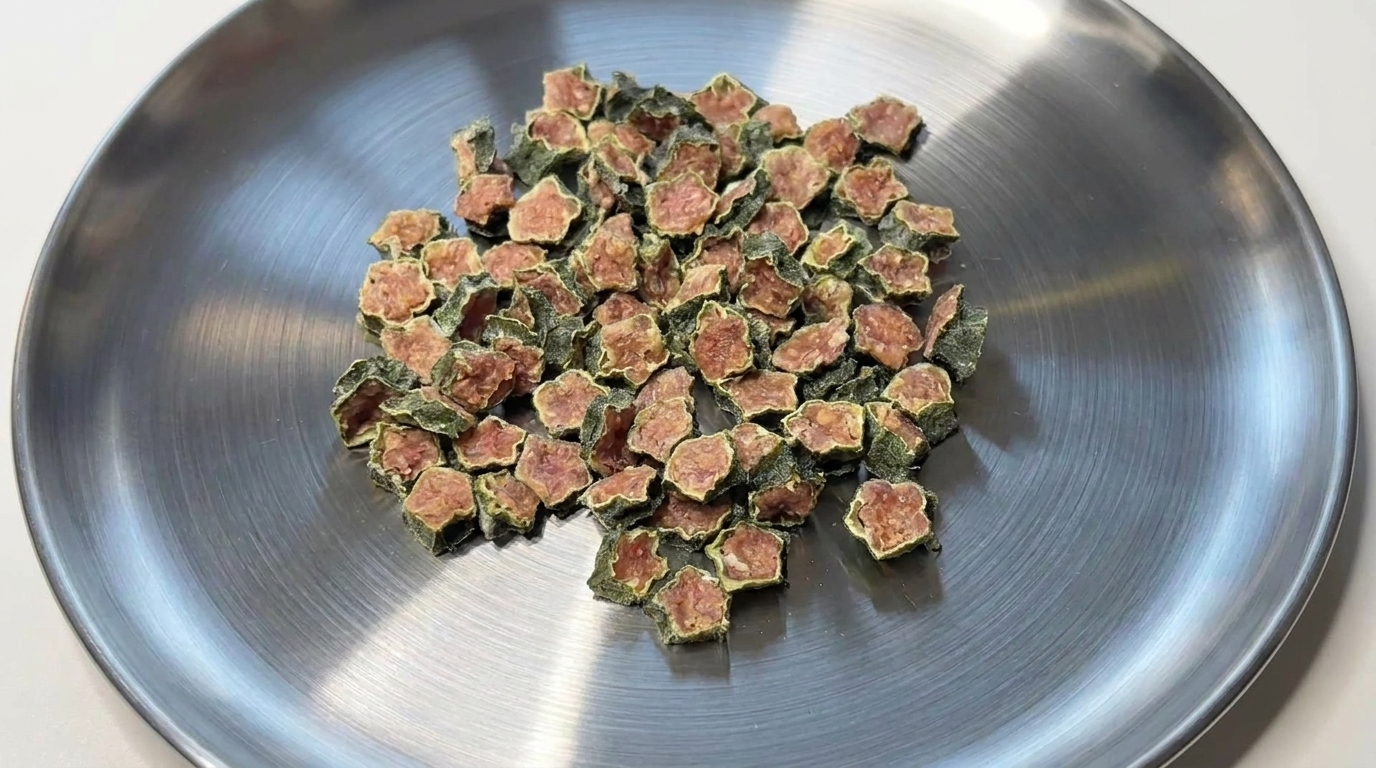
Slice each okra pod in half longitudinally. Use your fingers or a small spoon to gently scoop out the white seeds and the soft inner core, creating a hollow space for the chicken filling.
Tip: Be careful not to tear the walls of the okra so they can hold the meat paste effectively. - 4Slice the chicken breast
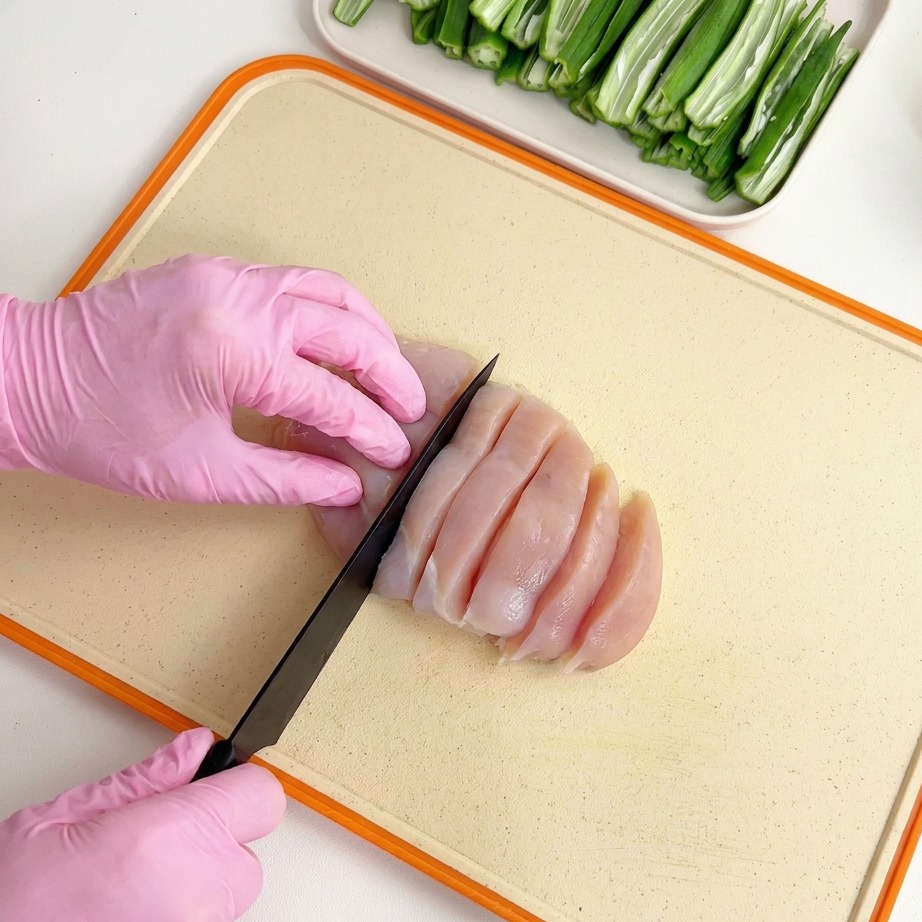
Clean the chicken breast by removing any excess fat. Slice the meat into smaller pieces or strips to prepare them for blending in the food processor.
Tip: Smaller, uniform pieces will blend into a smoother paste more quickly. - 5Load the food processor
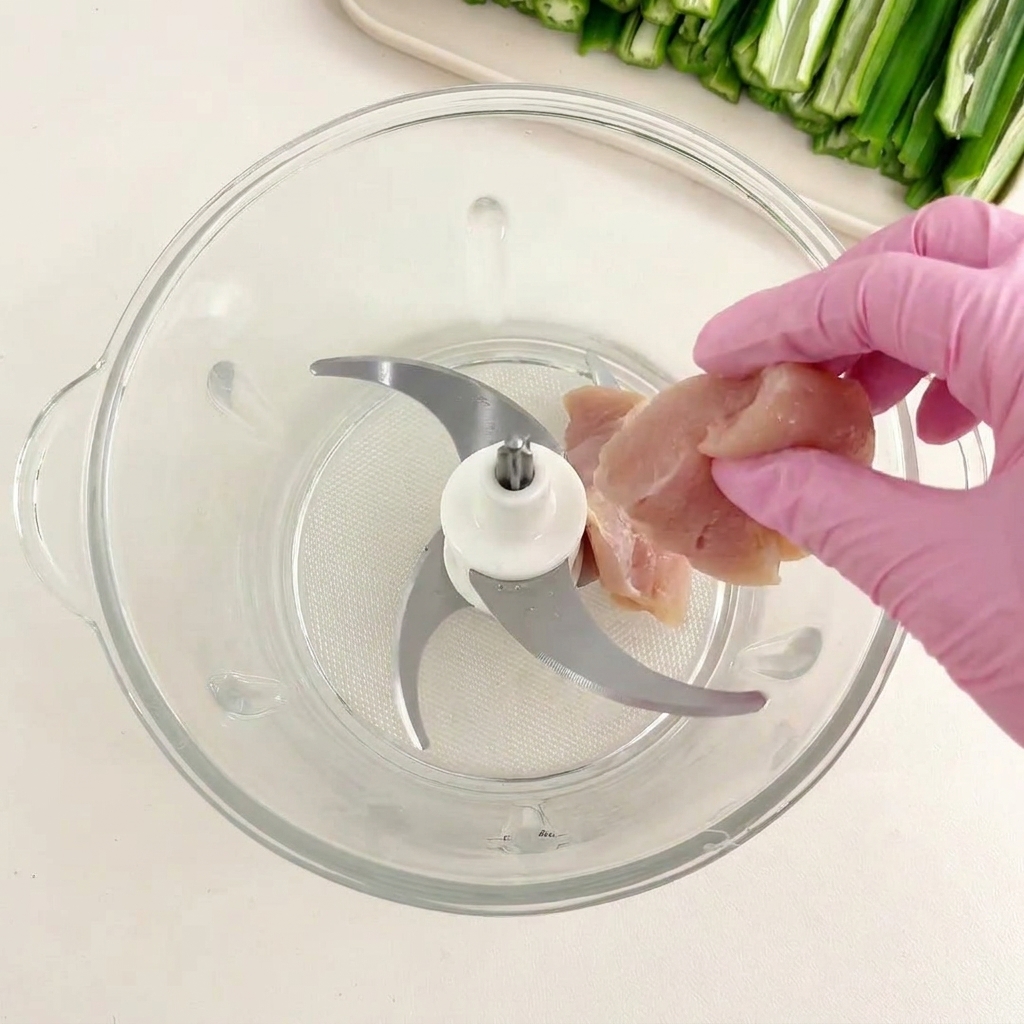
Transfer the sliced chicken breast pieces into the bowl of a food processor. Ensure the blades are properly seated before adding the meat.
Tip: Keeping the chicken cold helps achieve a better, more consistent texture when processing. - 6Combine chicken and seeds
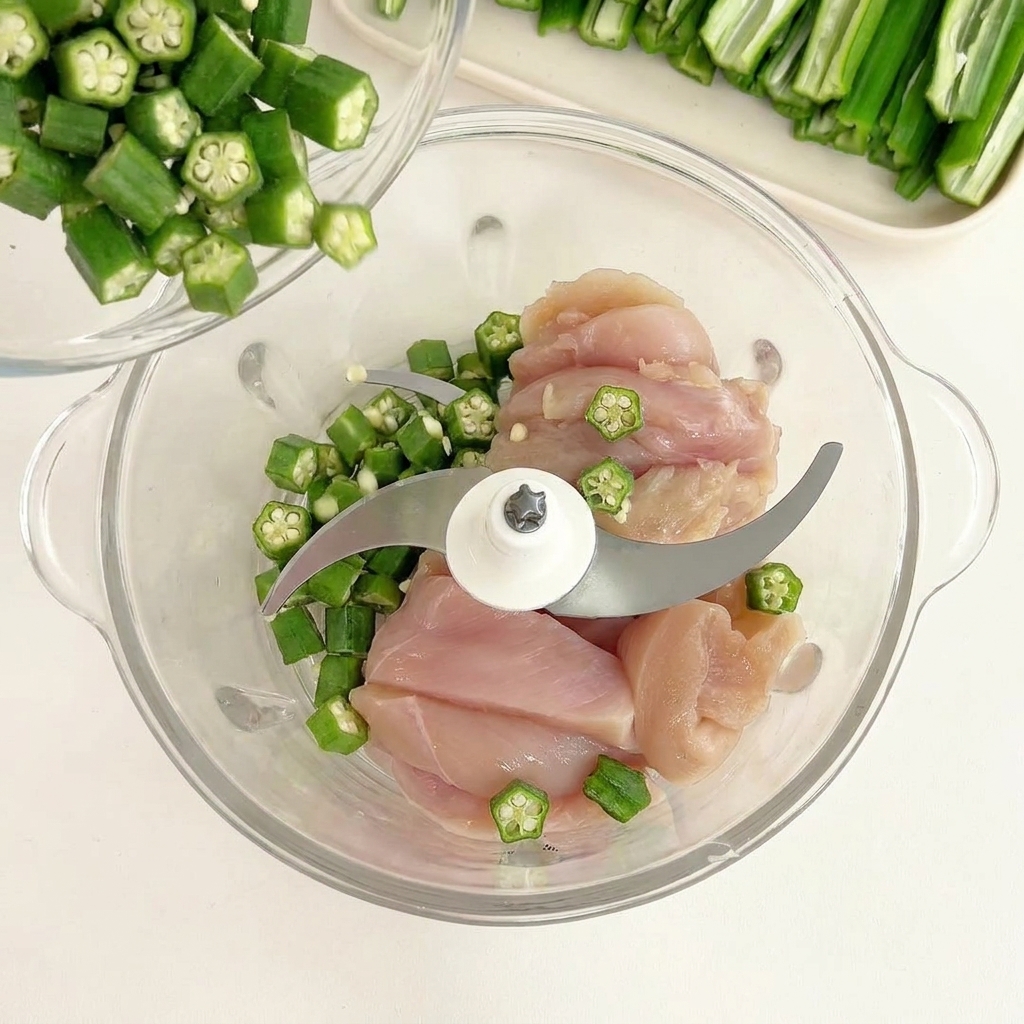
Add a small amount of the reserved okra seeds into the food processor bowl with the chicken. These seeds provide beneficial dietary fiber and natural oils for your pet.
Tip: You can adjust the amount of seeds included based on specific dietary needs and digestive health for your pet. - 7Pulse into a smooth paste
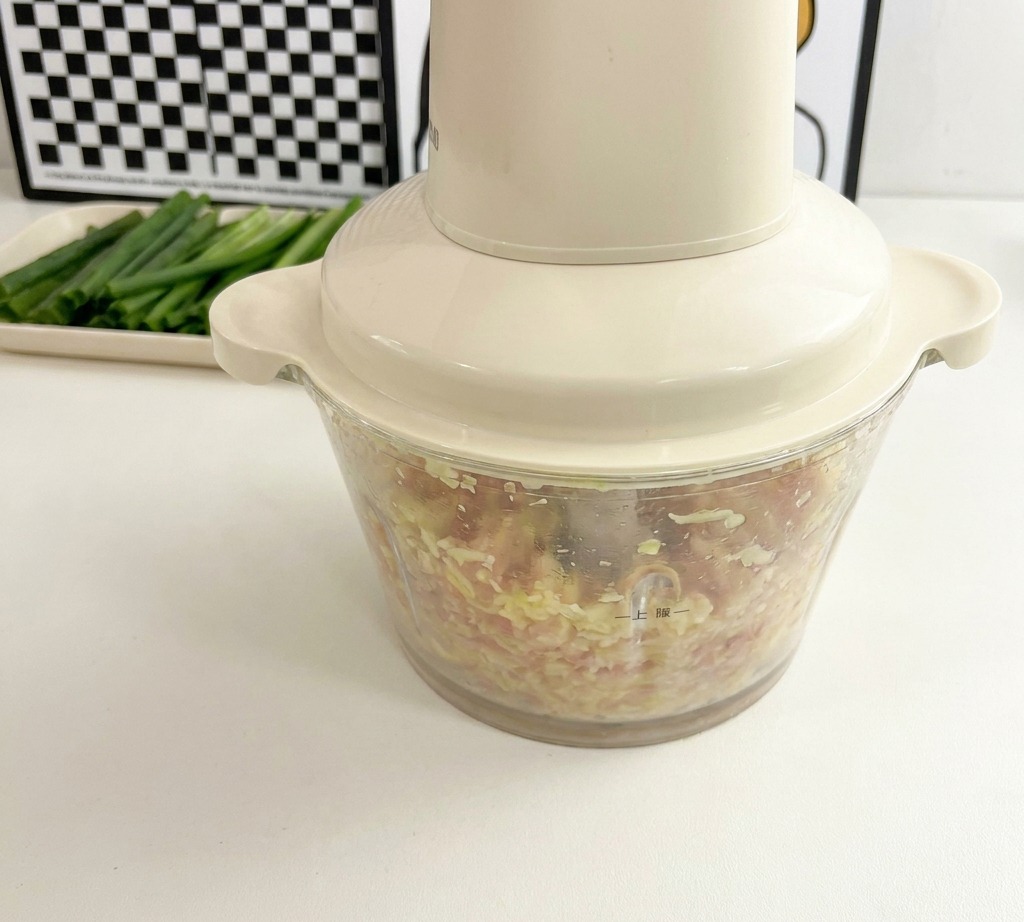
Process the chicken and reserved seeds on high speed. Continue blending until the mixture transforms into a uniform, fine-textured pink paste that is smooth enough to pass through a piping tip.
Tip: Make sure to remove all fat and connective tissue from the chicken breast beforehand to ensure the paste is smooth enough to be piped easily. - 8Prepare the piping bag
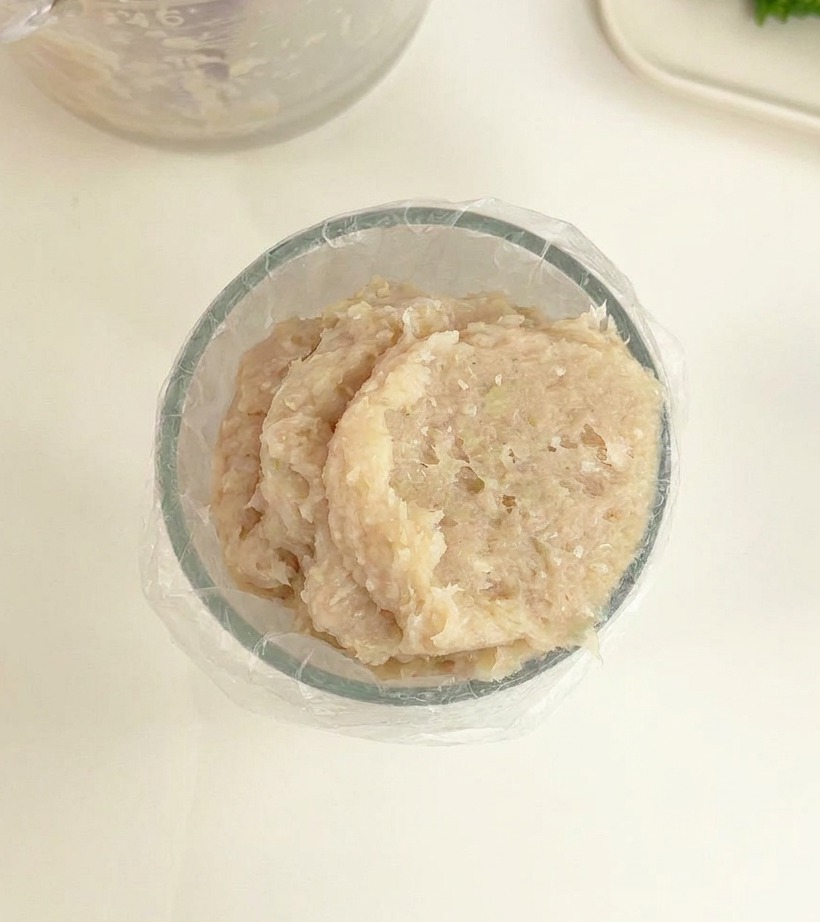
Transfer the finely blended chicken and okra seed mixture into a plastic piping bag. Using a bowl as a stabilizer helps you fill the bag cleanly and efficiently. Ensure the paste is pushed toward the tip to eliminate any air pockets, which allows for a smooth and controlled flow when stuffing the vegetables.
Tip: Twist the top of the bag tightly after filling to maintain internal pressure, making the thick meat paste much easier to squeeze out. - 9Stuff the okra strips
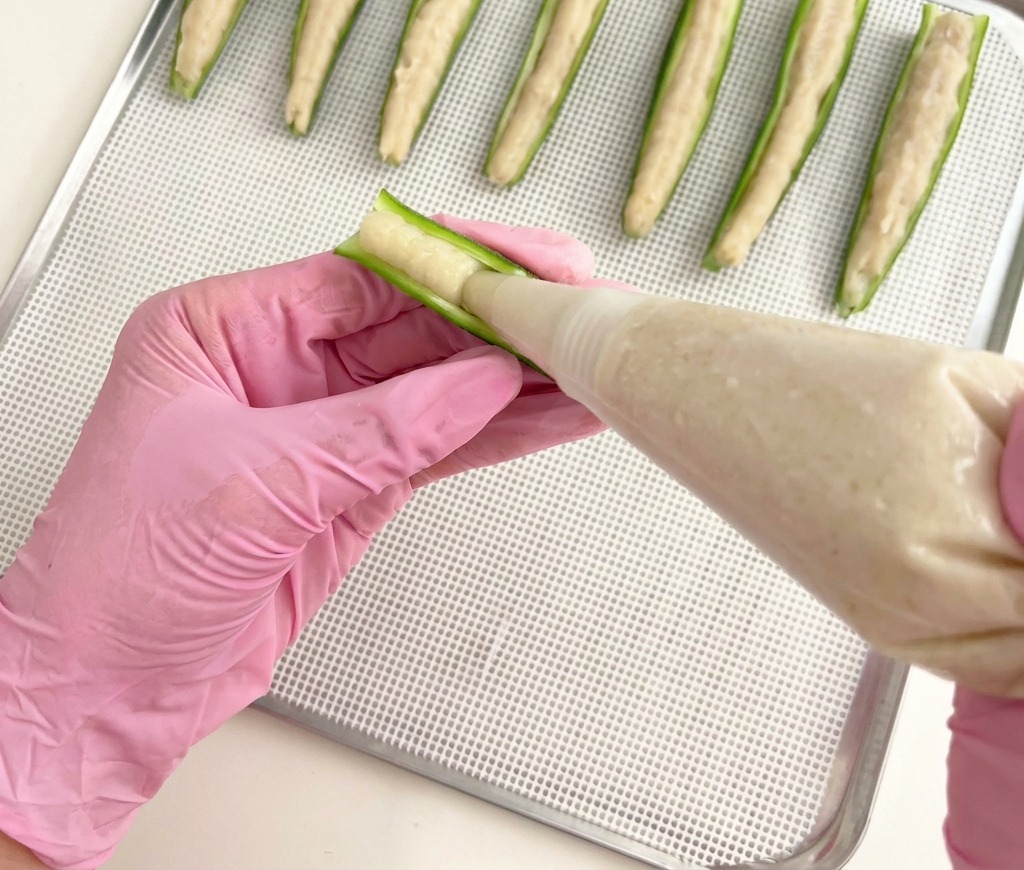
Carefully squeeze the piping bag to fill the hollowed-out centers of the okra halves with the chicken meat paste. Aim to fill them evenly so the meat is flush with the edges. Arrange the stuffed okra in neat rows on a perforated dehydrator tray to ensure optimal airflow during the drying process.
Tip: If the meat paste is very sticky, you can use a damp finger or the back of a spoon to smooth down the surface of the filling. - 10Garnish with sesame seeds
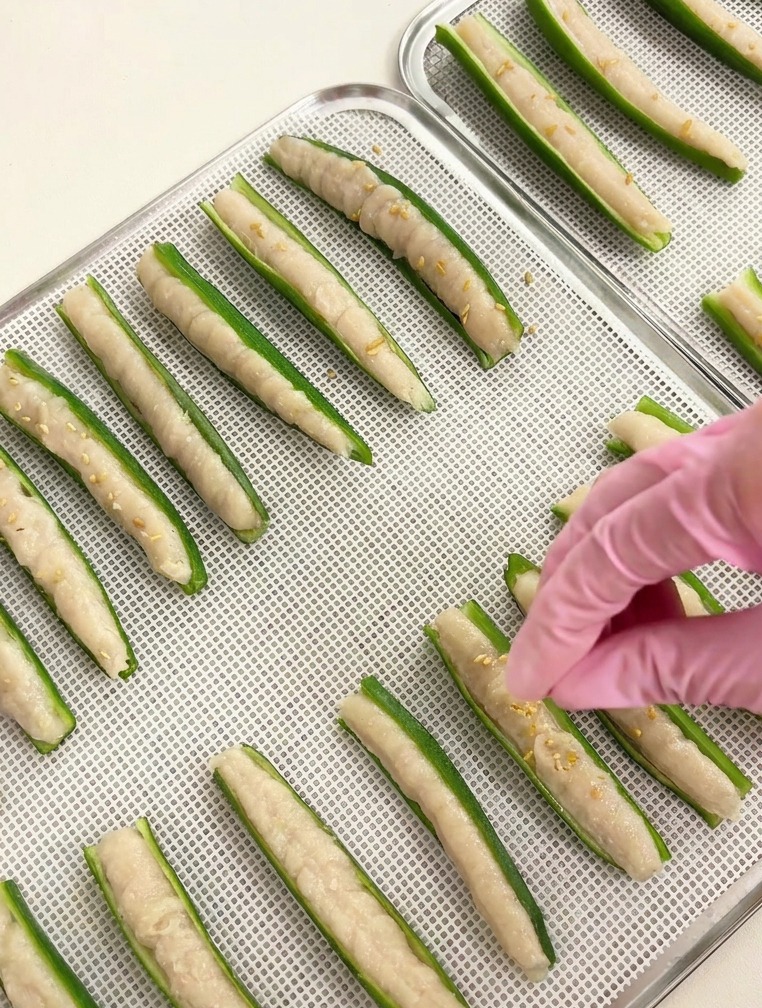
Sprinkle a light coating of white sesame seeds over the top of each stuffed okra strip. These seeds add a pleasant nutty aroma and provide healthy fats that contribute to a shiny coat for your pet. The seeds will adhere easily to the moist meat paste before it goes into the dehydrator.
Tip: Press the sesame seeds very lightly into the paste to make sure they stay in place once the treats are fully dried and crunchy. - 11Dehydrate until crispy
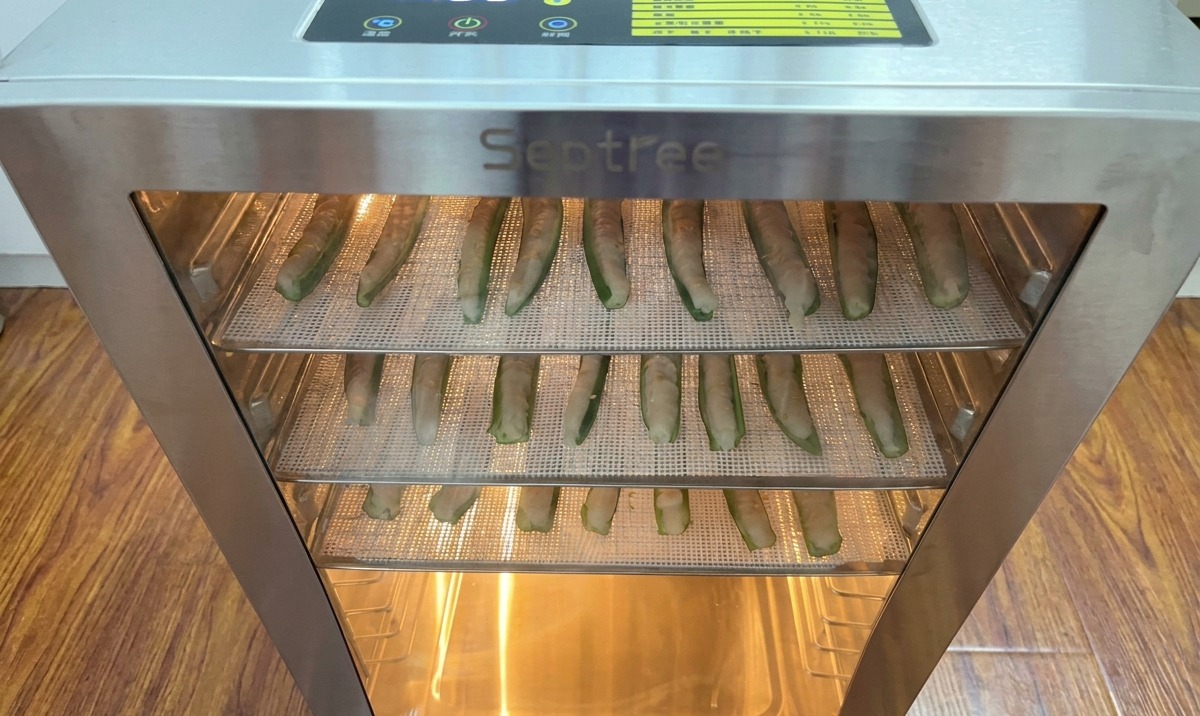
Slide the trays into the dehydrator and set the unit to 65°C. Allow the treats to dry for a full 15 hours. The snacks are ready when the chicken center is firm and the okra shell feels light and leathery.
Tip: If your dehydrator has uneven heat distribution, rotate the trays halfway through the process to ensure every piece dries perfectly.