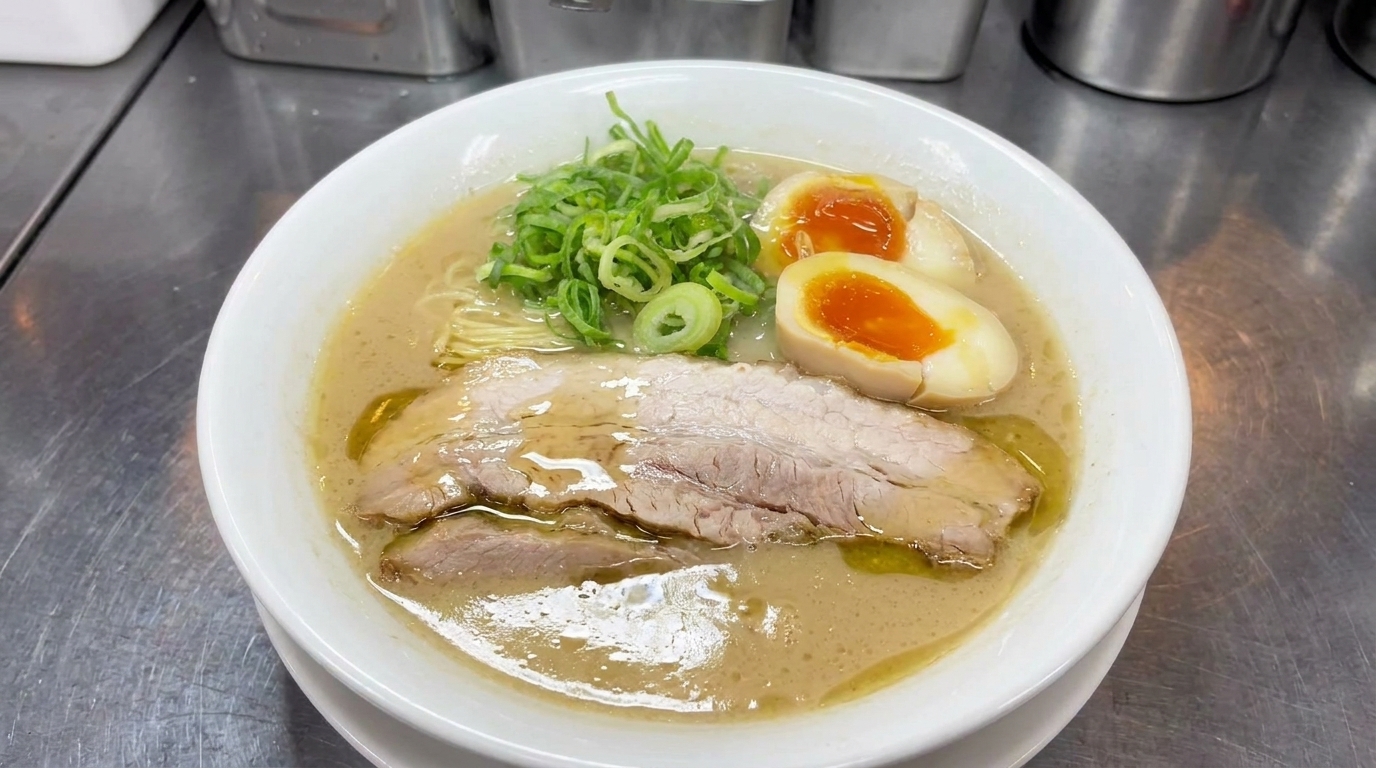
Authentic Japanese Tonkotsu Ramen (Pork Bone Broth)
Master the art of Japanese Tonkotsu ramen at home. This recipe yields a rich, milky pork bone broth paired with aromatic garlic oil, tender chashu, and classic toppings.
Tonkotsu ramen is a true labor of love, defined by its rich, cloudy, and deeply savory broth. Achieved by boiling pork bones, trotters, and chicken feet until the collagen and fat completely emulsify, this uncompromising method uses no artificial shortcuts—relying purely on time, heat, and a masterful aromatic garlic oil to elevate the bowl. While the process is involved, the resulting creamy texture and profound flavor make it well worth the effort.
Ingredients
- 1.5 kg pork marrow bones and neck bones
- 1 pigs trotter
- 250 g chicken feet
- 1 large potato
- 1 large onion
- 1 whole head garlic
- 1 large piece ginger
- 100 g chicken fat
- 100 g pork fat
- 4 cloves garlic (minced, for aromatic oil)
- 4 portions fresh ramen noodles
- to taste salt or soy-based tare
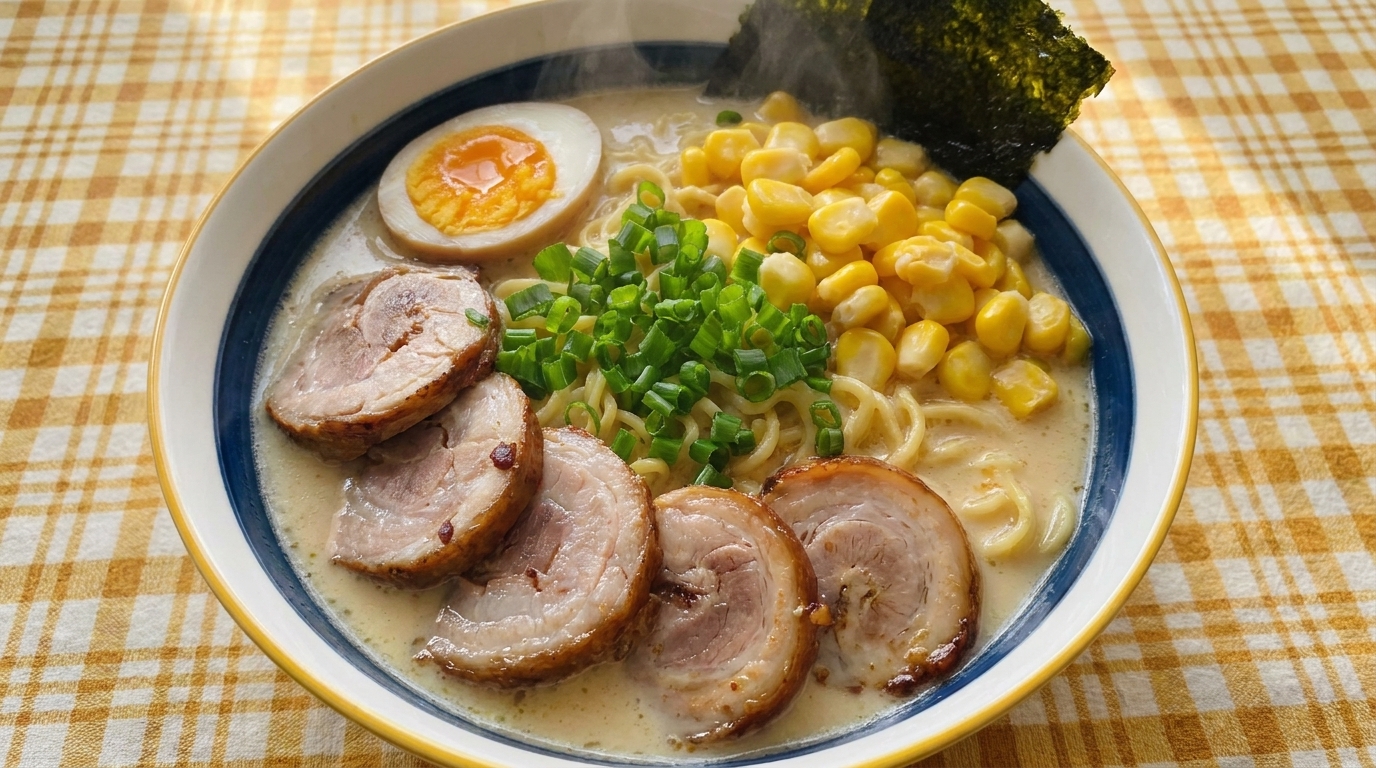
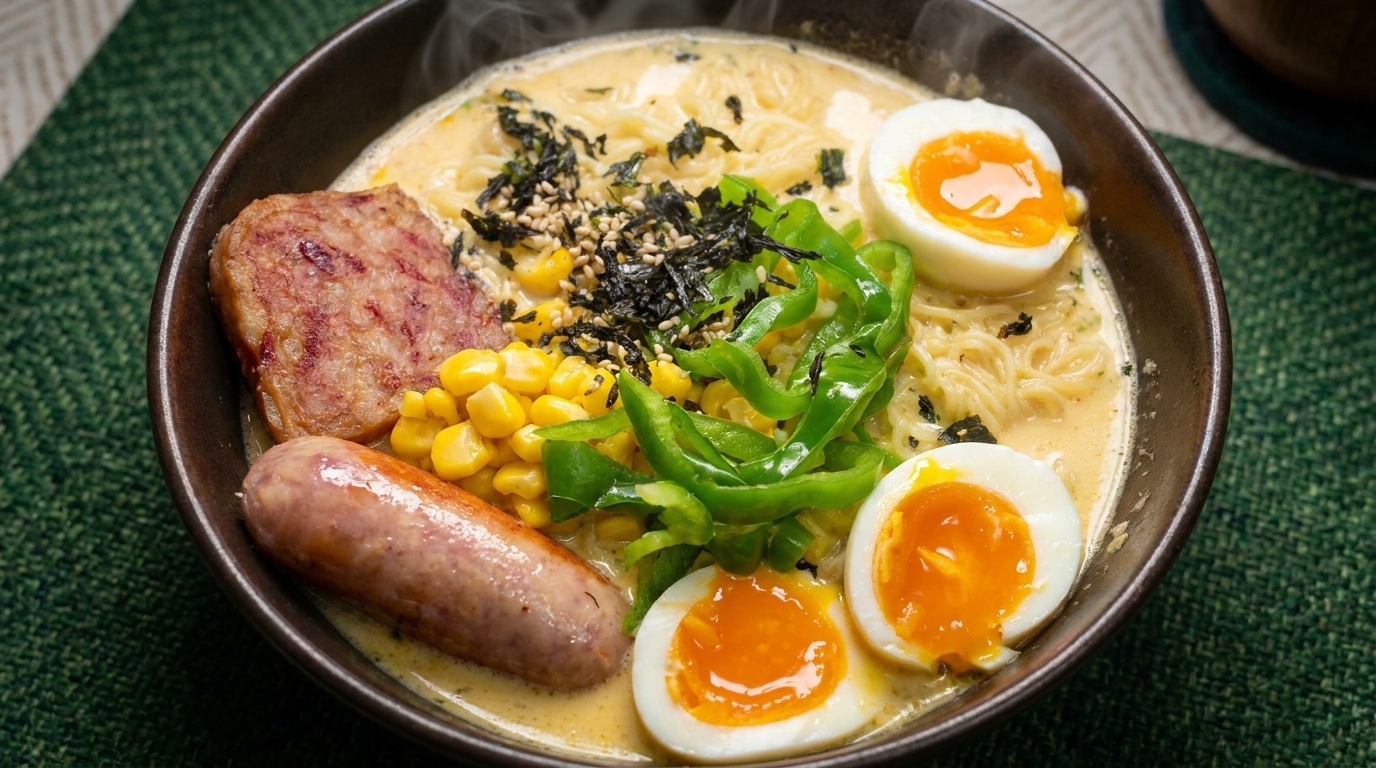
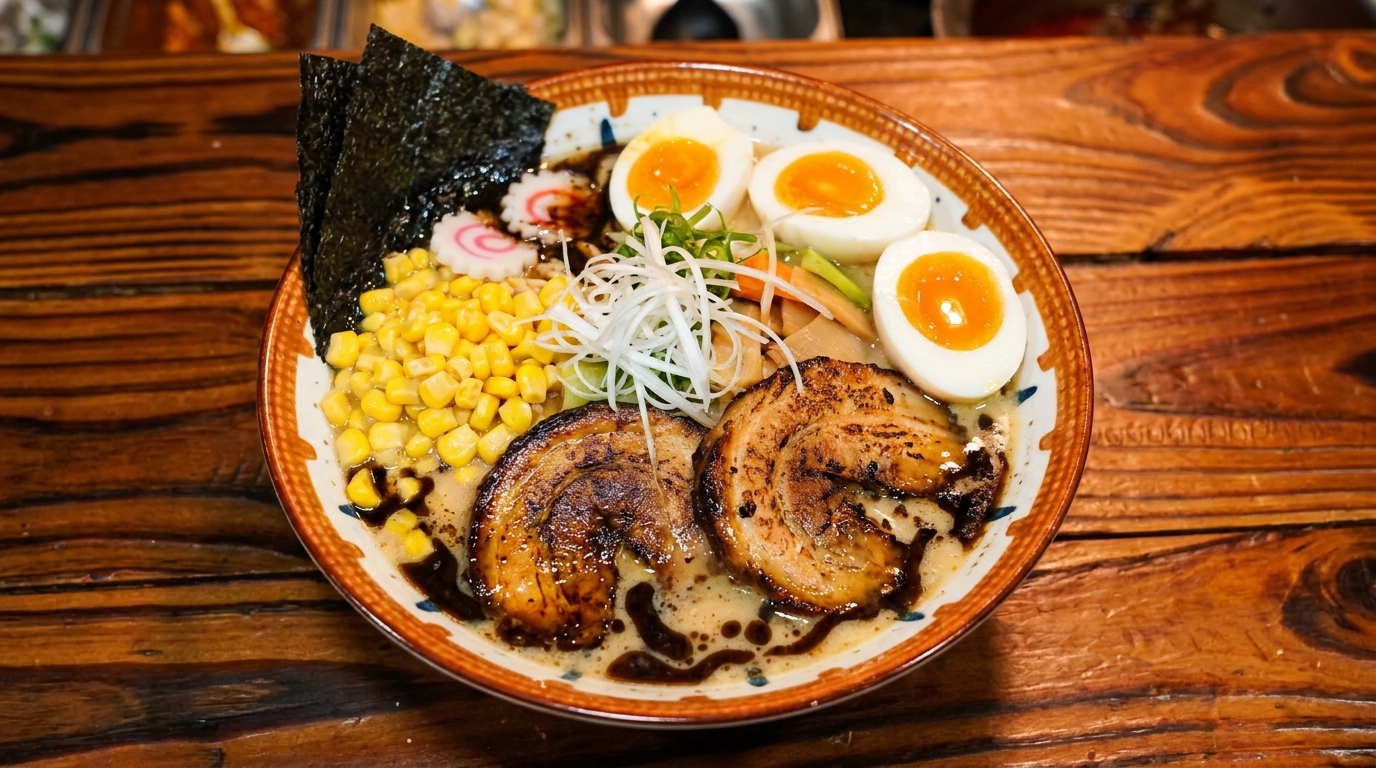
- 4 thick slices braised chashu pork belly
- 2 soft-boiled ramen eggs (Ajitsuke Tamago)
- 1 bunch fresh scallions (chopped)
Instructions
- 1Add bones to the pot
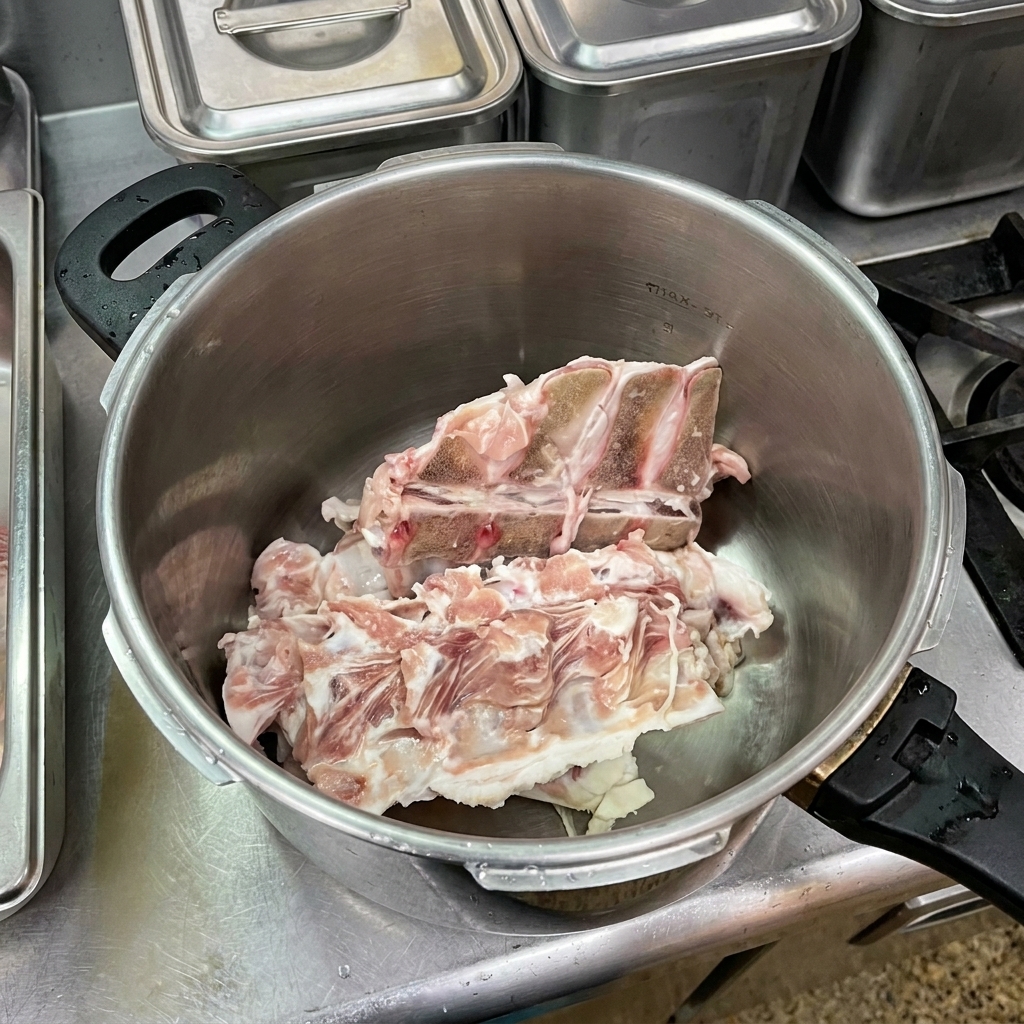
Place the raw pork bones into a large, heavy-bottomed pot or pressure cooker. To build the foundation of a rich, gelatinous Tonkotsu broth, you will also want to include a pigs trotter and a handful of chicken feet alongside the pork bones.
Tip: Using a combination of marrow-rich pork bones, trotters, and chicken feet is the secret to achieving that signature sticky, collagen-heavy texture of authentic Japanese ramen broth. - 2Cover with cold water
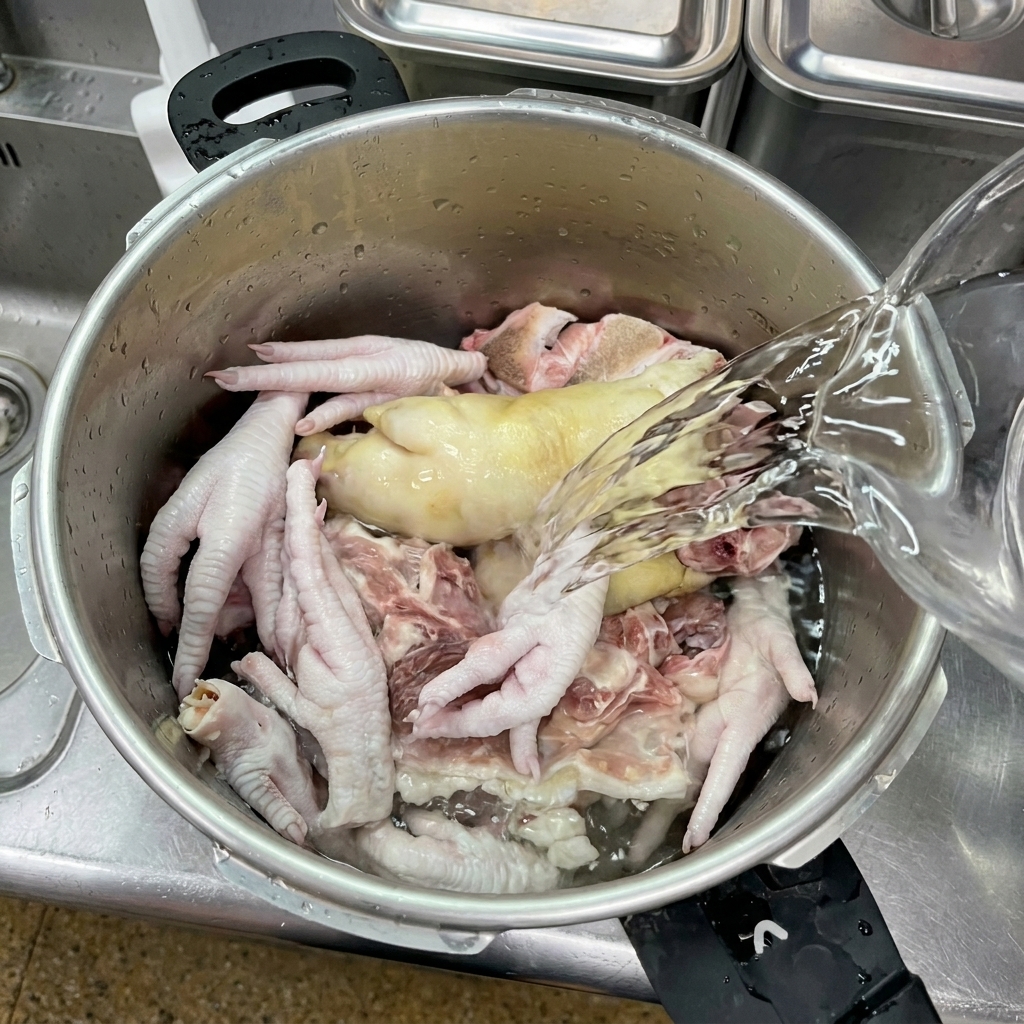
Once all your bones and meat are in the pot, pour in enough clean water to fully submerge them. It is crucial to start with cold water, which gently draws the blood and impurities out of the marrow as the temperature slowly rises.
Tip: Mineral or filtered water is highly recommended for soup stocks, as chlorine or hard minerals in tap water can negatively impact the final flavor. - 3Skim the impurities
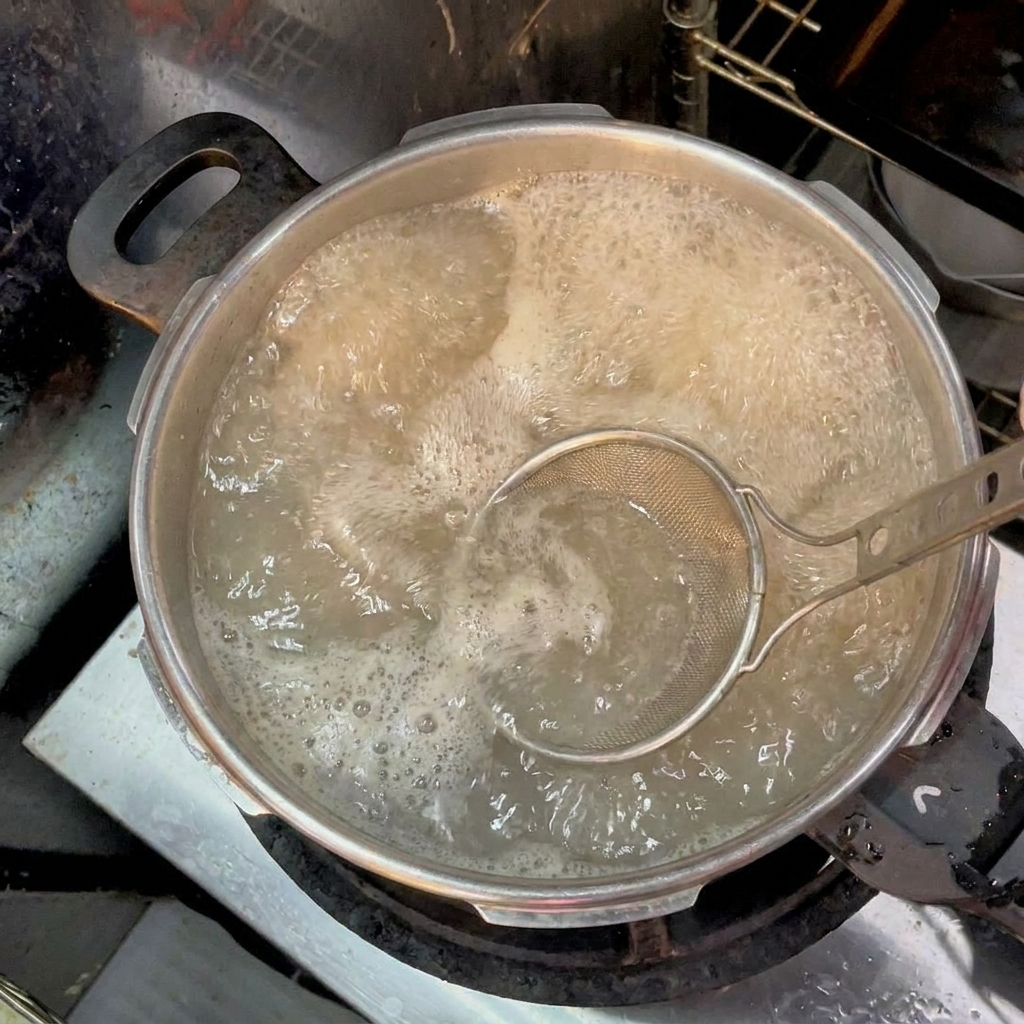
Turn the heat on high and bring the pot to a vigorous boil. As the water heats up, blood and proteins will coagulate and float to the top as a brownish foam. Carefully skim off all this scum using a fine mesh strainer to ensure a pure, clean-tasting broth.
Tip: Do not rush this step. Thoroughly removing the scum before sealing the pressure cooker prevents the broth from developing a muddy color and a sour or overly funky taste. - 4Pressure cook the bones
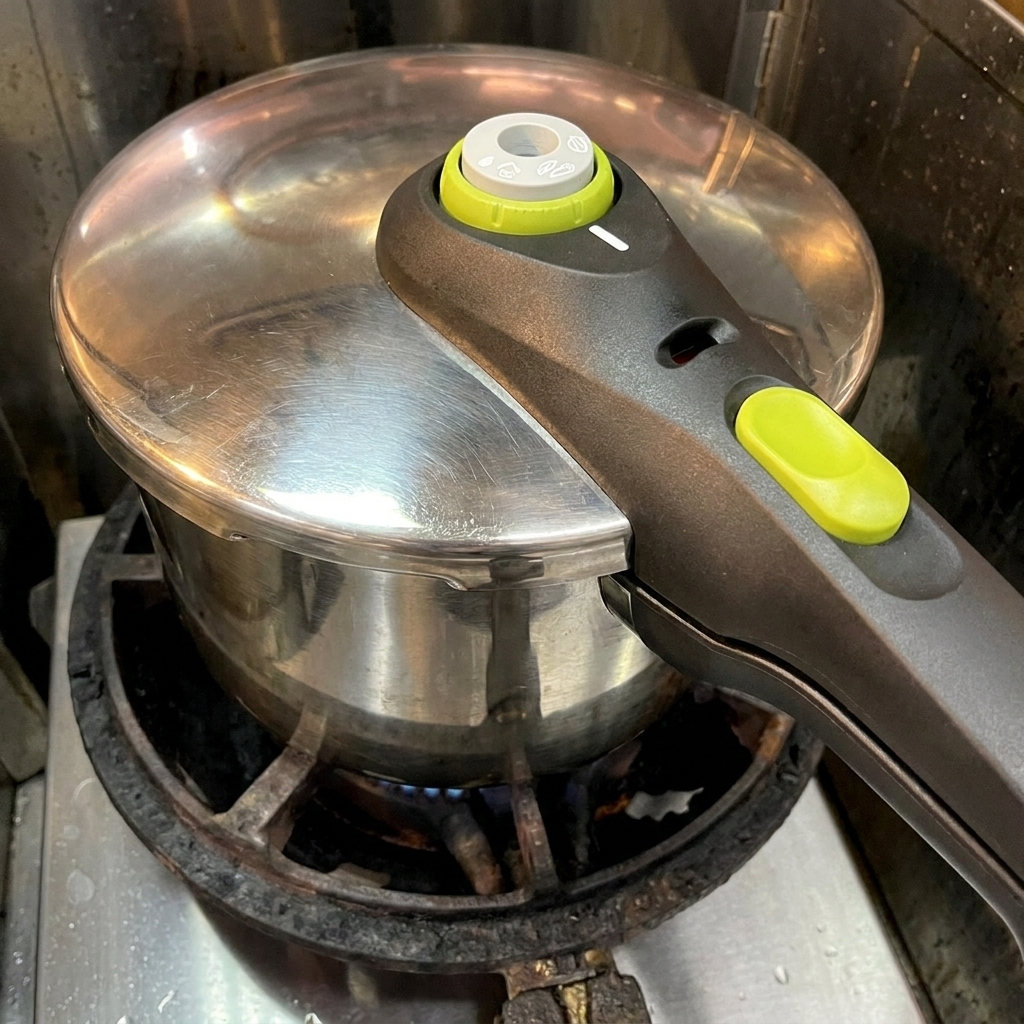
Once the surface of the liquid is relatively clear of scum, secure the lid tightly onto your pressure cooker. Bring the cooker up to full pressure, then reduce the heat to low and let it simmer steadily for 40 minutes to rapidly break down the bones.
Tip: A pressure cooker dramatically cuts down the time needed to extract flavor, but if using a standard stockpot, you will need to simmer the bones for 4 to 6 hours for a similar yield. - 5Check the initial broth

After 40 minutes of pressure cooking, turn off the heat and safely release the steam. Open the lid to reveal the progress: the bones and meat will be partially broken down, and the liquid will have transformed into a pale, cloudy base broth.
Tip: Always follow your pressure cookers safety instructions and ensure the pressure valve has completely dropped before attempting to twist off the lid. - 6Add aromatics and vegetables
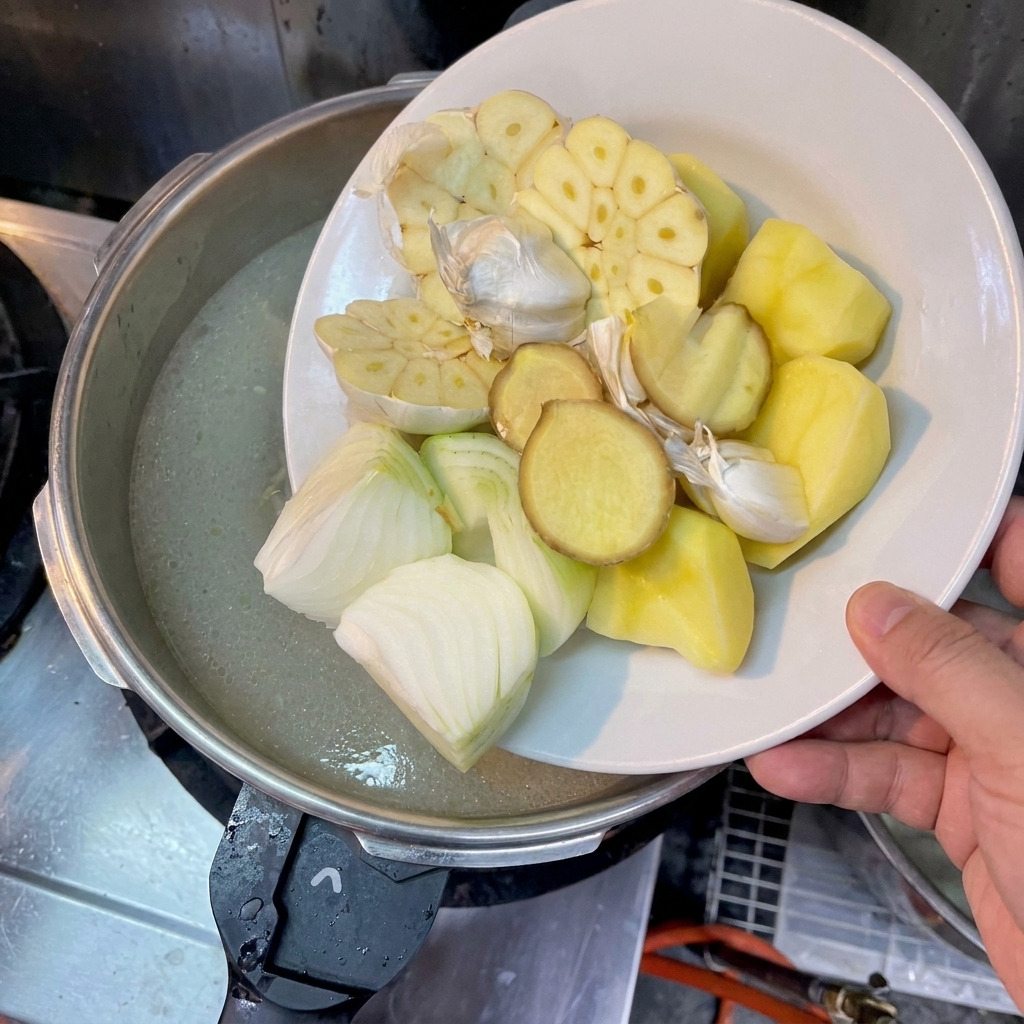
To build the flavor profile of the soup, slide in large chunks of peeled potatoes, halved onions, thick slices of ginger, and whole heads of garlic that have been cut crosswise. These aromatics will provide natural sweetness and neutralize any remaining heaviness from the pork fat.
Tip: Keeping the garlic in larger pieces or halves prevents it from completely disintegrating into the broth during the second round of pressure cooking, keeping the soup texture smooth. - 7Pressure cook the broth
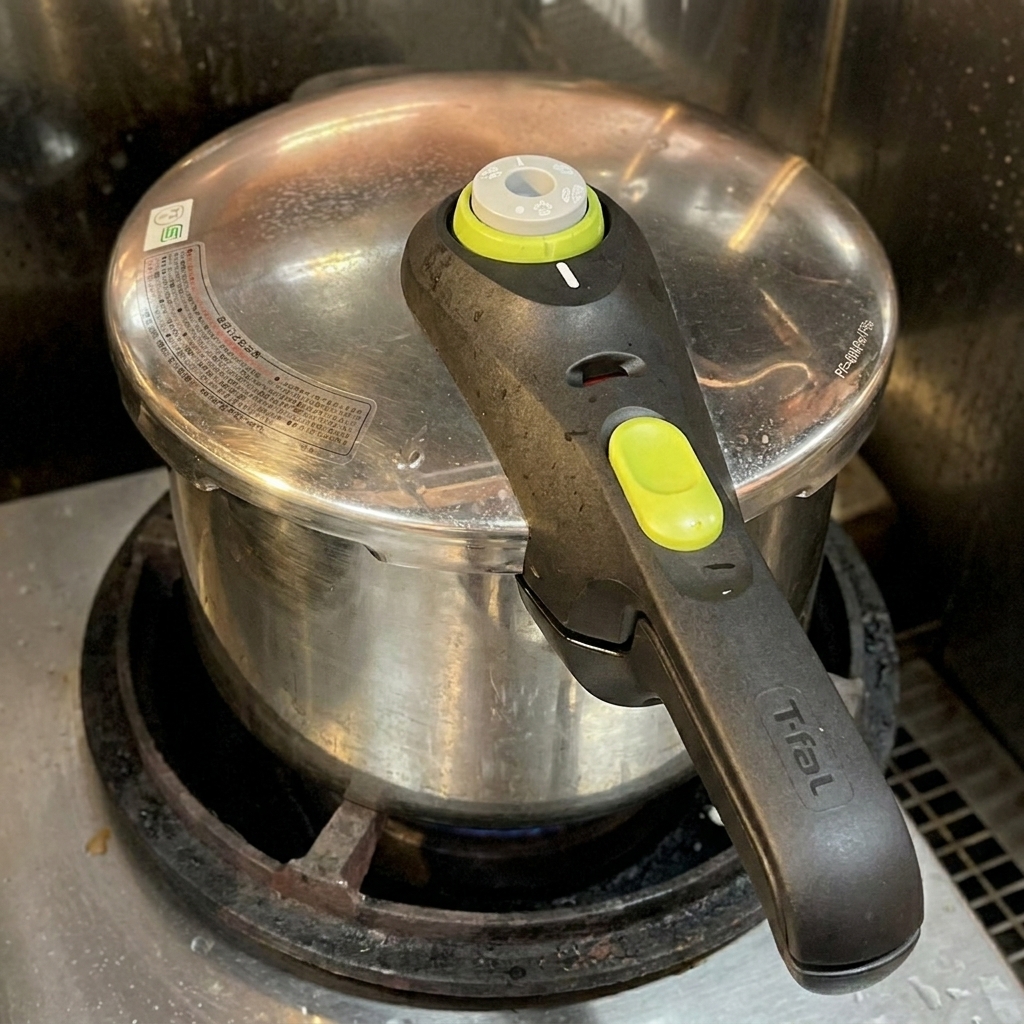
Secure the lid firmly on the pressure cooker to begin the second round of cooking. Bring the cooker back up to pressure and cook for another two hours. This extended, pressurized simmer breaks down the collagen, fat, and marrow from the bones, which is essential for developing the signature rich and milky texture of authentic Tonkotsu broth.
Tip: Ensure the pressure cooker is completely sealed and locked before bringing it up to pressure to prevent steam from escaping. - 8Rapid boil to emulsify

After releasing the pressure, bring the broth back to a vigorous, rolling boil for about 15 minutes. This high-heat rapid boiling is a crucial technique that forcefully emulsifies the rendered fat with the water, resulting in a perfectly thick, opaque, and creamy soup base.
Tip: Stir the pot occasionally during this rapid boil to prevent the softened vegetables and meat from sticking to the bottom and burning. - 9Strain the broth
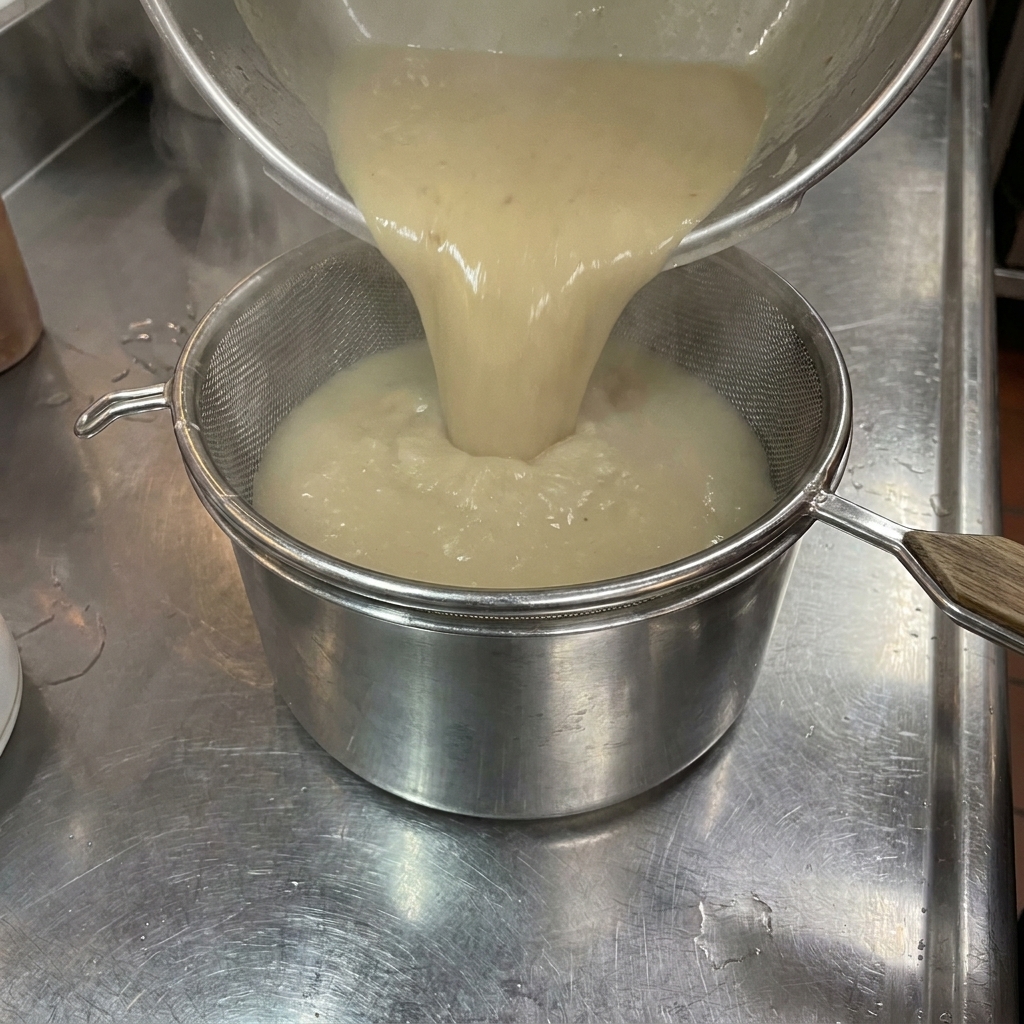
Carefully pour the finished, hot broth through a fine mesh strainer into a clean, large pot. This step filters out all the bone fragments, softened vegetables, and aromatics, leaving you with a silky smooth and luxurious Tonkotsu soup.
Tip: Press down on the remaining solids in the strainer with the back of a ladle to extract every last drop of flavorful liquid before discarding them. - 10Render the fat
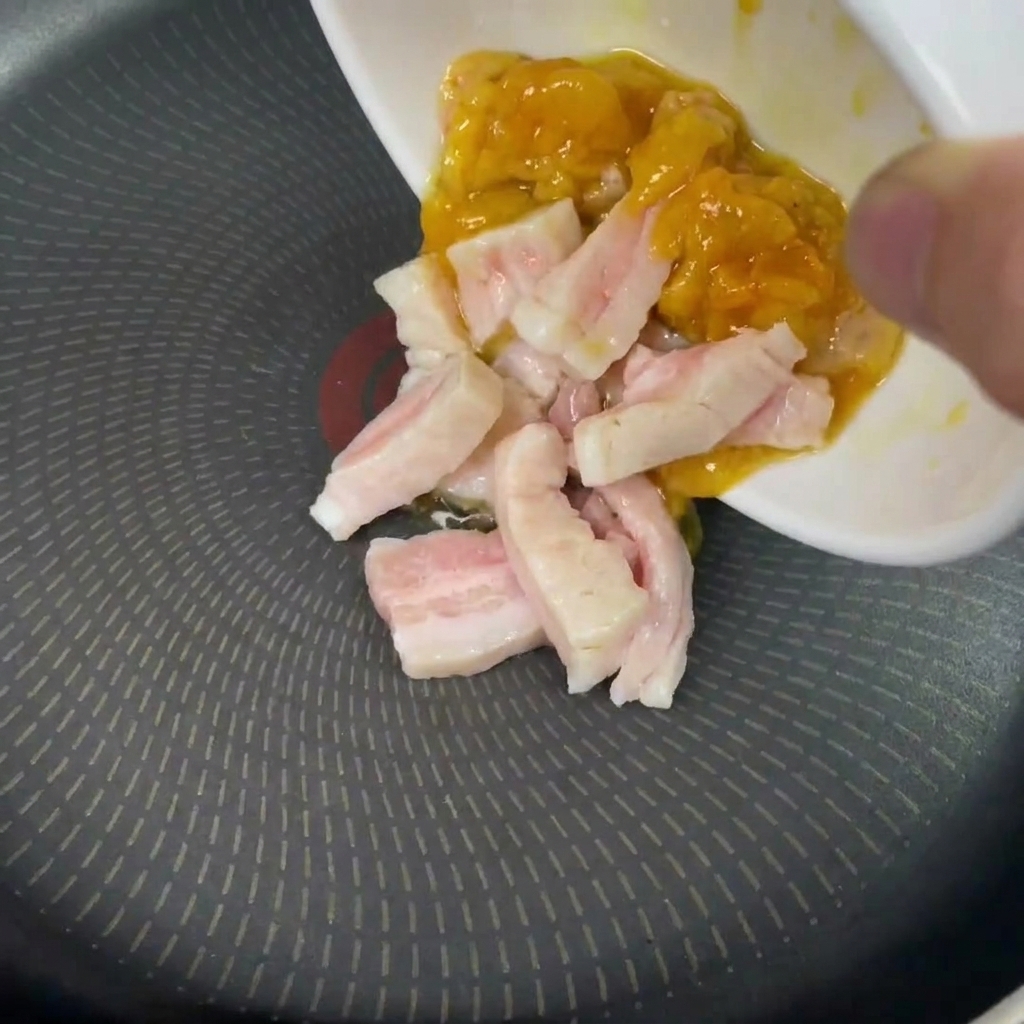
To start making the aromatic oil, place pieces of raw chicken fat and pork fat directly into a cold frying pan. Starting with a cold pan and gradually heating it allows the fat to render out slowly and completely without burning the solids.
Tip: If you cannot find chicken fat, using entirely pork fat works well, though a mixture creates a more complex and savory aroma. - 11Add minced garlic
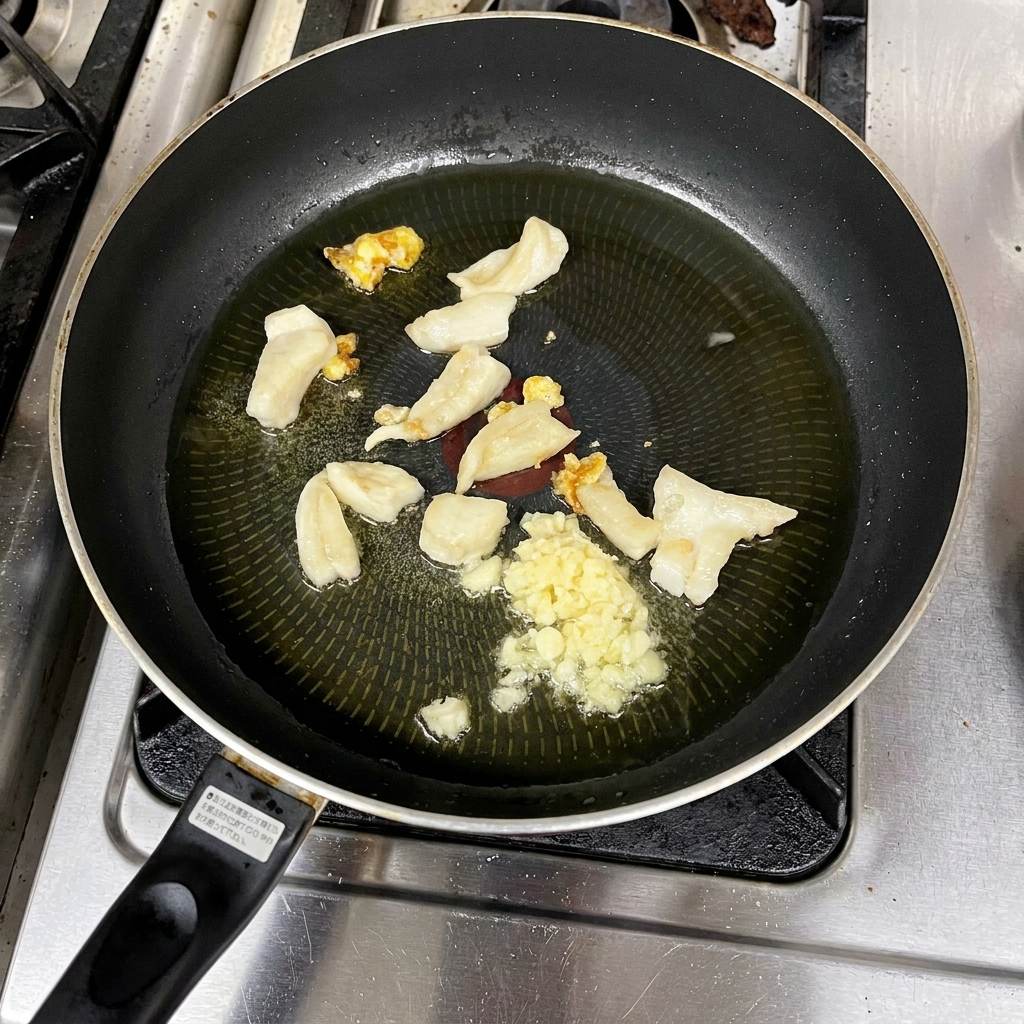
Once the fat has rendered and created a generous pool of hot oil in the pan, add the finely minced garlic. Let the garlic gently fry in the rendered animal fat over low heat to infuse the oil with its robust aroma.
Tip: Maintain a low heat during this step so the garlic infuses gently into the oil rather than browning too quickly, which can make it bitter. - 12Fry until golden

Continue gently frying the pieces of fat and minced garlic in the rendered oil. Stir frequently and watch closely until the garlic turns a deep, crispy golden brown. This aromatic oil will be drizzled over the finished ramen to enhance the flavor and keep the soup hot.
Tip: Garlic can go from perfectly toasted to burnt very quickly. As soon as it reaches a rich golden color, immediately remove the pan from the heat and strain the oil. - 13Strain the aromatic oil
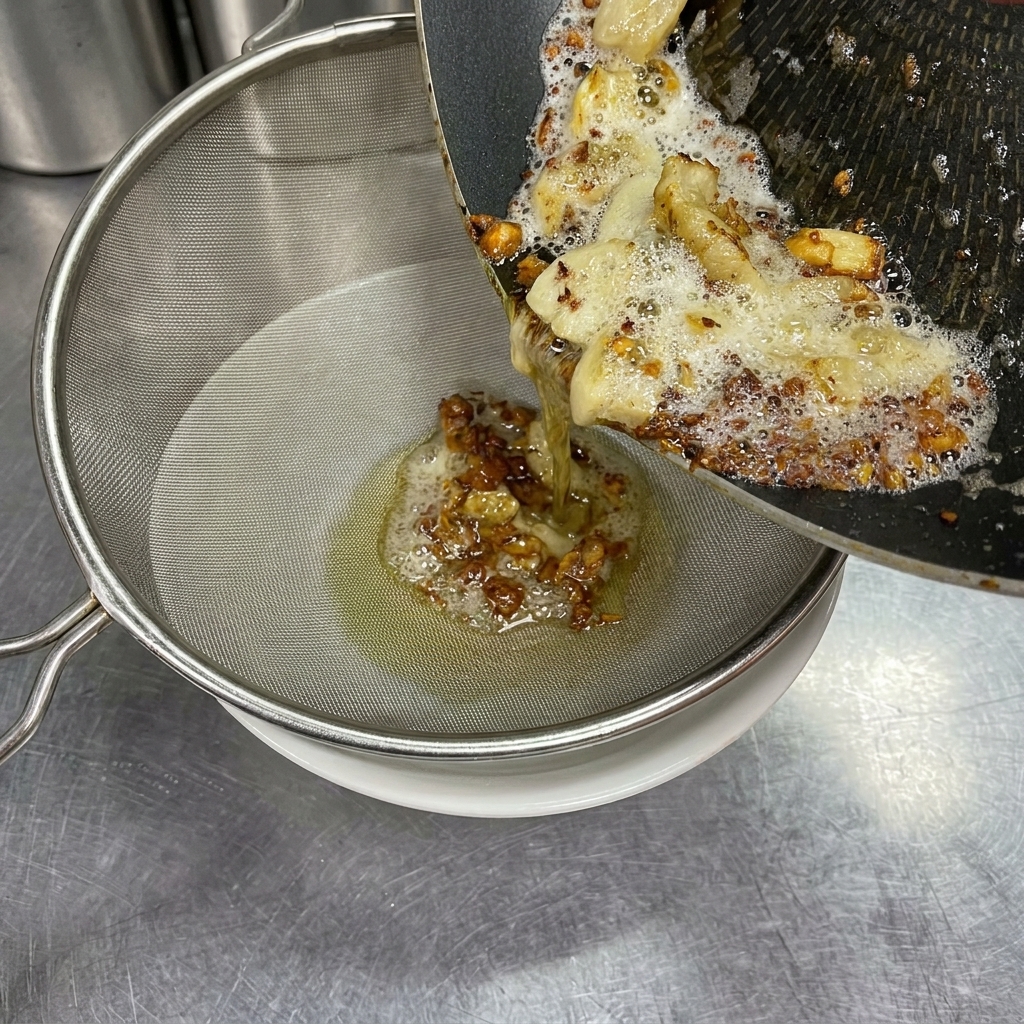
Carefully pour the golden infused oil and crispy garlic bits through a fine-mesh strainer into a clean bowl. This separates the fragrant oil from the solids, giving you a smooth, flavorful oil ready to finish your ramen.
Tip: Keep the crispy garlic bits! They make an excellent topping for the finished ramen or other dishes. - 14Prepare the chashu
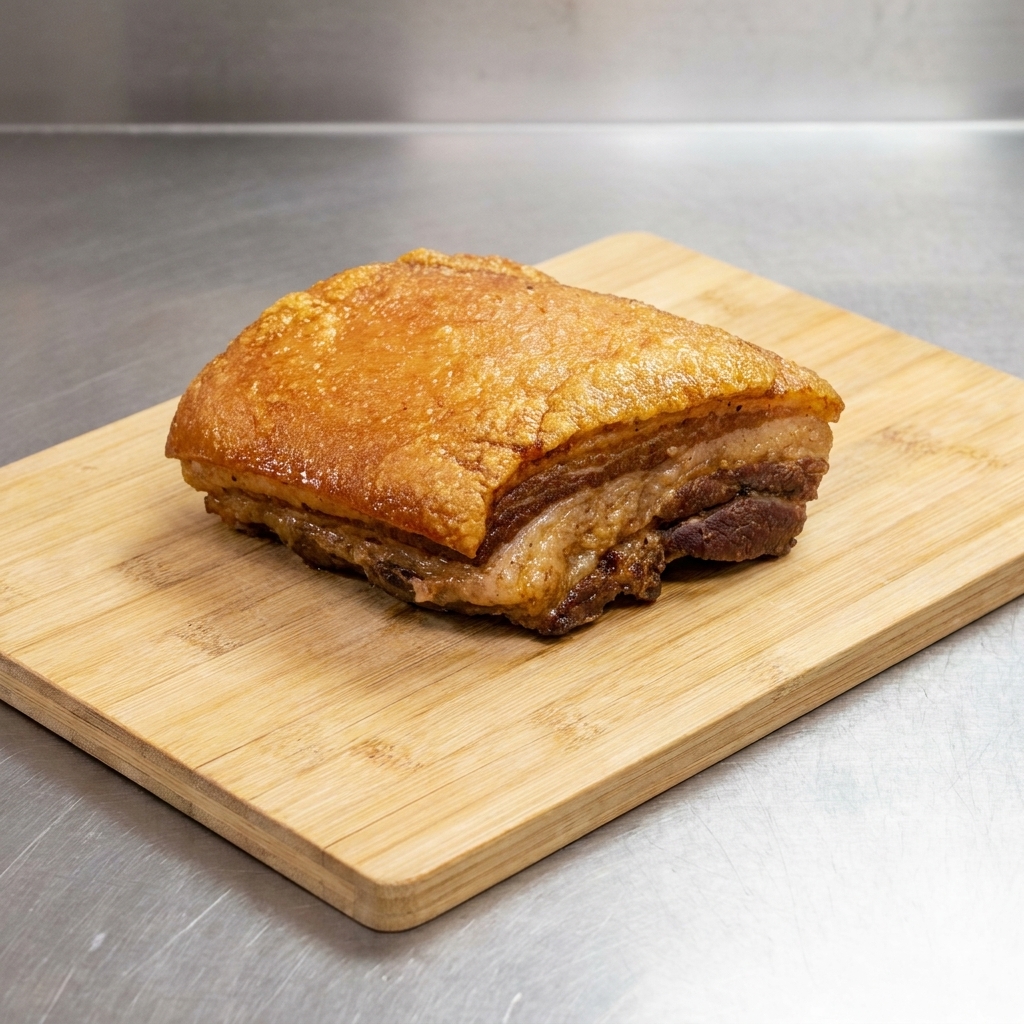
Place your prepared block of cooked, braised pork belly on a wooden cutting board. Cut it into thick, generous slices to serve as the signature topping for your tonkotsu ramen.
Tip: Slicing the pork while it is slightly chilled makes it easier to get clean, even slices without the tender meat falling apart. - 15Season the ramen base
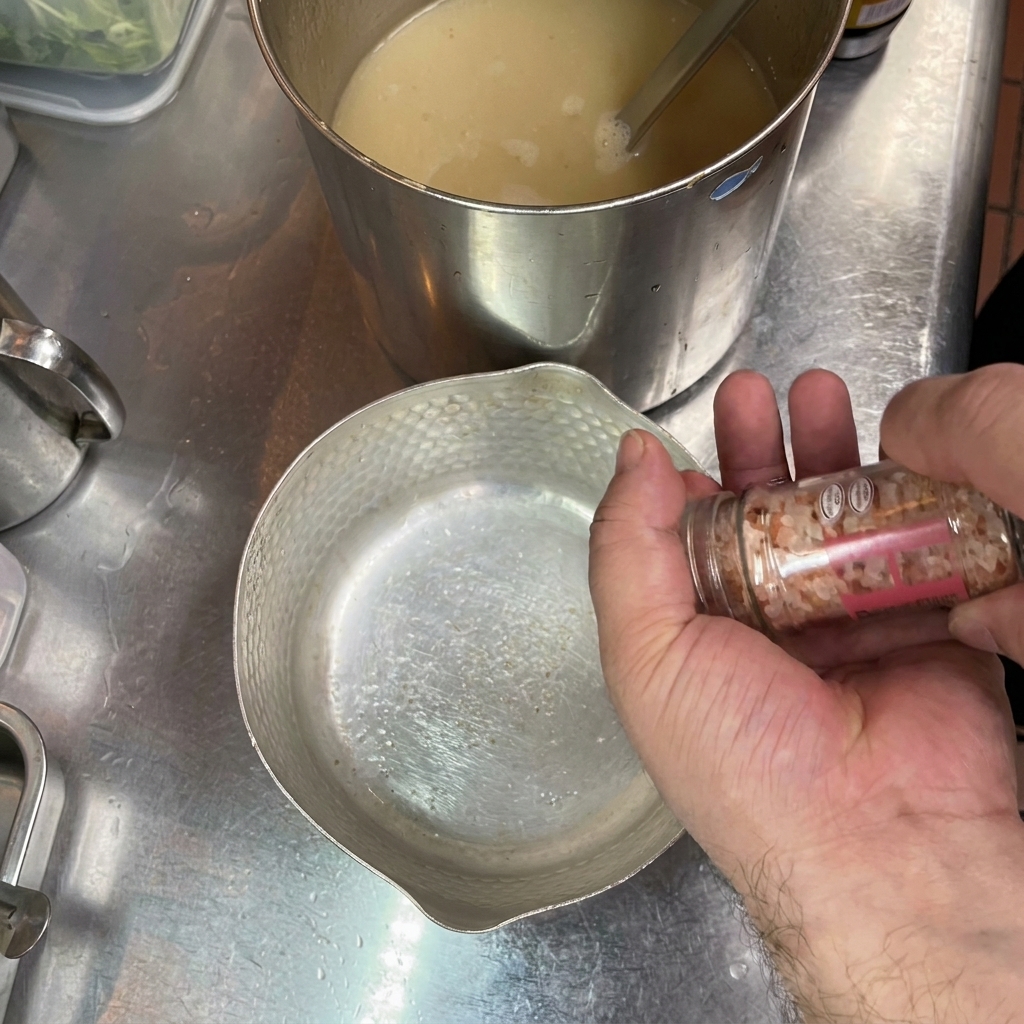
Begin assembling your ramen by adding your base seasonings to your serving bowl or prep pot. A simple seasoning of salt and soy-based tare will combine with the rich broth to create a deeply flavorful soup base.
Tip: You can customize the saltiness and flavor profile of each bowl by adjusting these base seasonings before adding the hot broth. - 16Add the hot broth
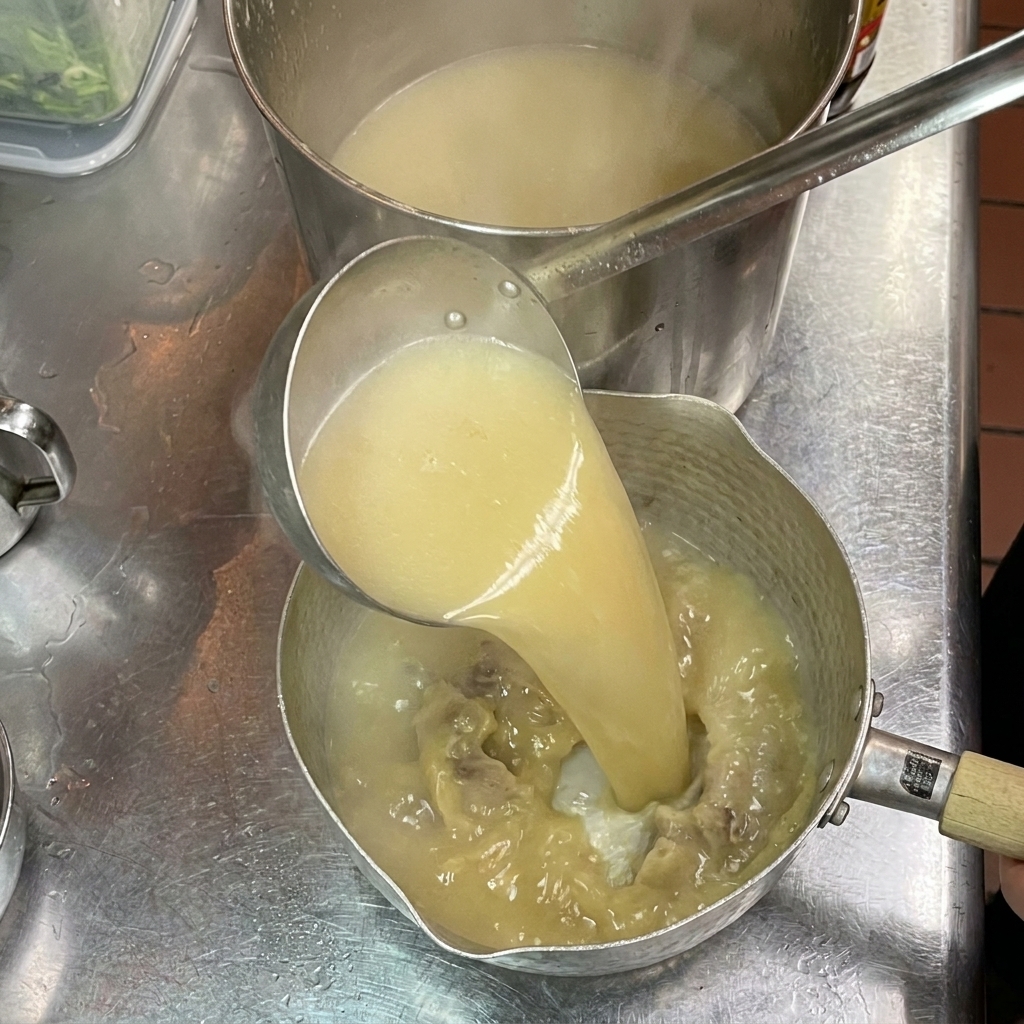
Ladle the piping hot, creamy tonkotsu broth into your seasoned bowl or pot. The rich, slow-simmered pork broth will seamlessly mix with the base seasonings to create an intensely savory and aromatic ramen soup.
Tip: Ensure your broth is boiling hot when poured over the seasonings; this helps release their aromas and keeps the final bowl of ramen perfectly hot.