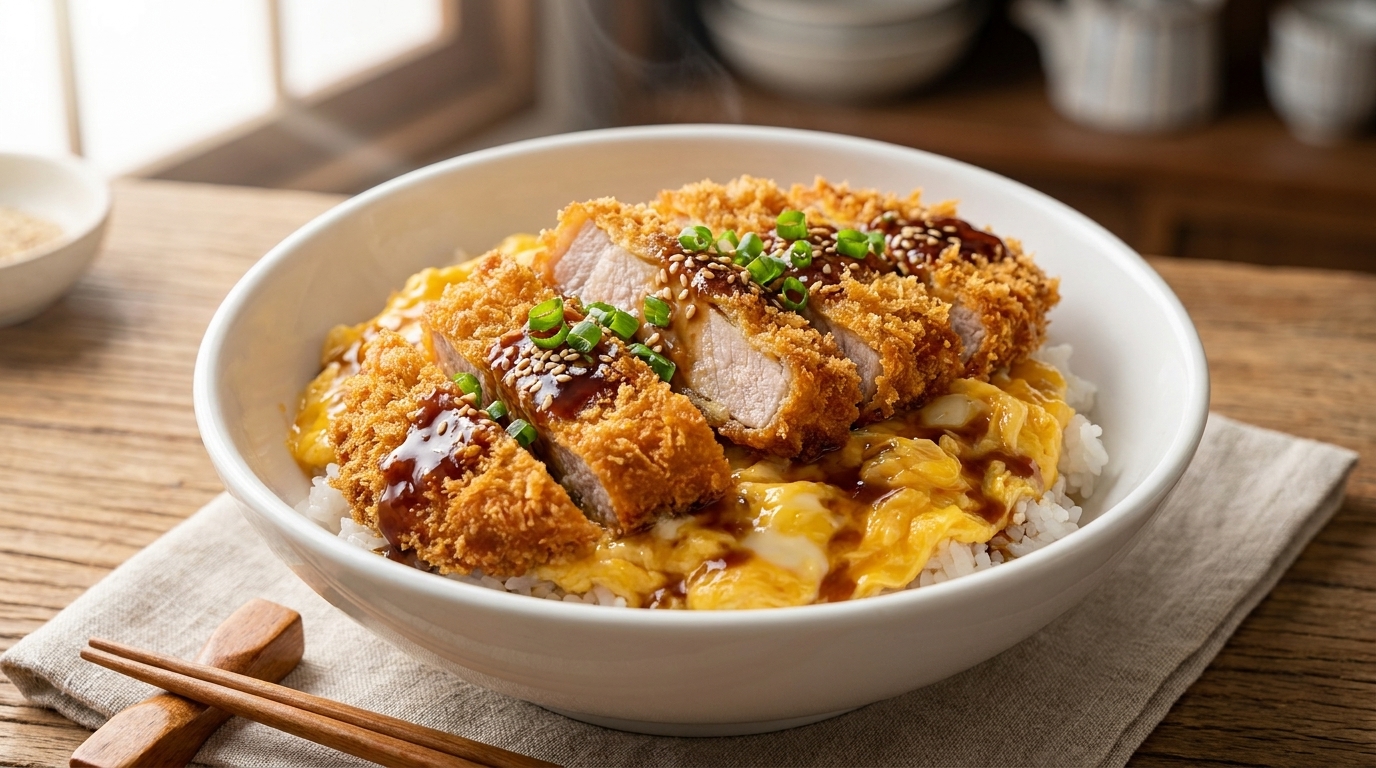
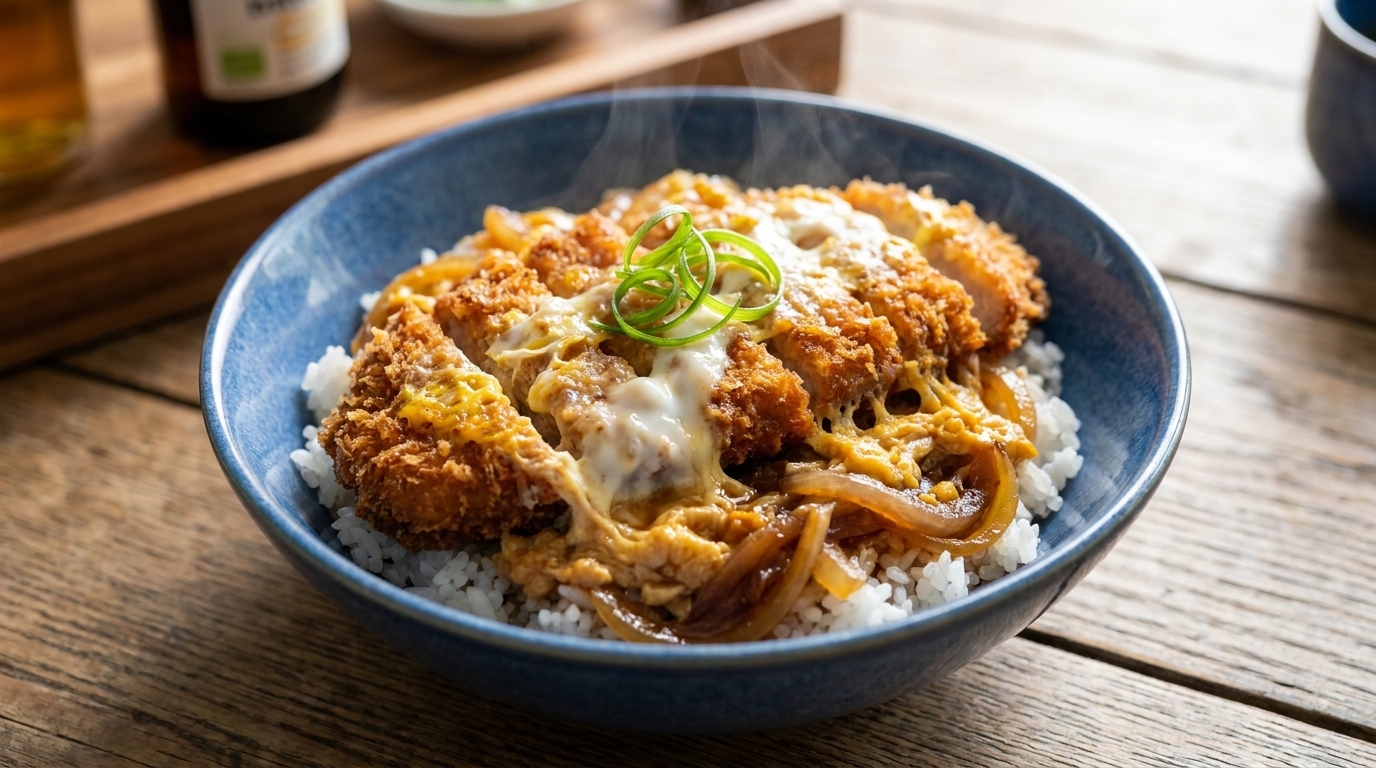
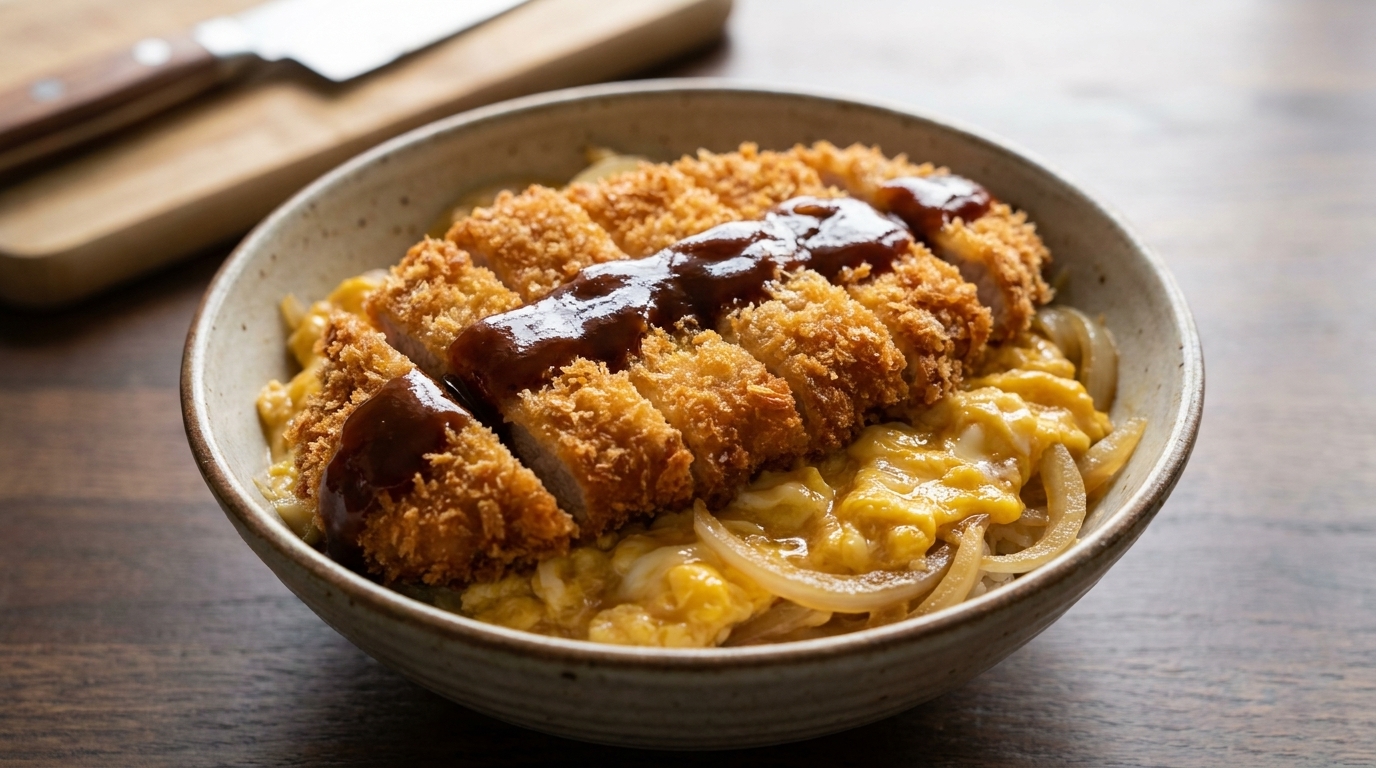
Crispy Katsudon (Japanese Pork Cutlet
Silky Eggs)
Experience the ultimate comfort bowl: a crunchy panko-breaded pork cutlet resting on a bed of dashi-simmered onions and soft, custardy eggs over steamed rice.
Katsudon is a beloved Japanese staple that masterfully balances textures. The name is a portmanteau of tonkatsu for pork cutlet and donburi for rice bowl dish. While the cutlet is famously crispy, it is the brief simmer with onions and eggs that creates the soul warming savory harmony this dish is famous for.
Ingredients
- 1 piece pork loin
- 2 whole eggs
- 12 cup Panko breadcrumbs
- 2 tbsp cornstarch
- 12 medium white onion
- 5 tbsp soy sauce
- 4 tbsp mirin
- 3 tbsp rock sugar
- 1 tbsp cooking wine
- 1 tbsp oyster sauce
- 1 tbsp sugar
- to taste salt
- to taste black pepper
- for frying cooking oil
- 1 bowl steamed white rice
Instructions
- 1Start the sauce base
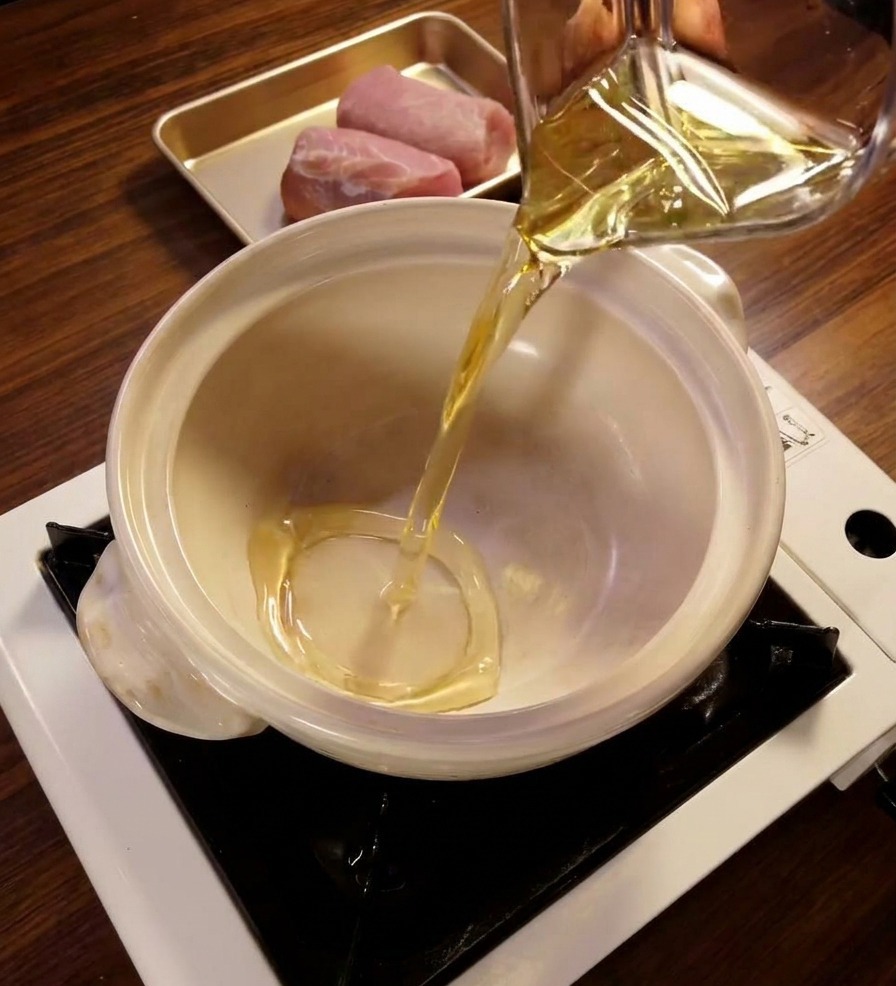
Begin the homemade sauce by pouring 4 spoons of mirin into a white ceramic pot. This provides the essential sweet and tangy foundation that will eventually thicken into a rich glaze.
Tip: If you do not have mirin a dry sherry or sweet marsala wine can work as a substitute in a pinch - 2Add rock sugar for sweetness
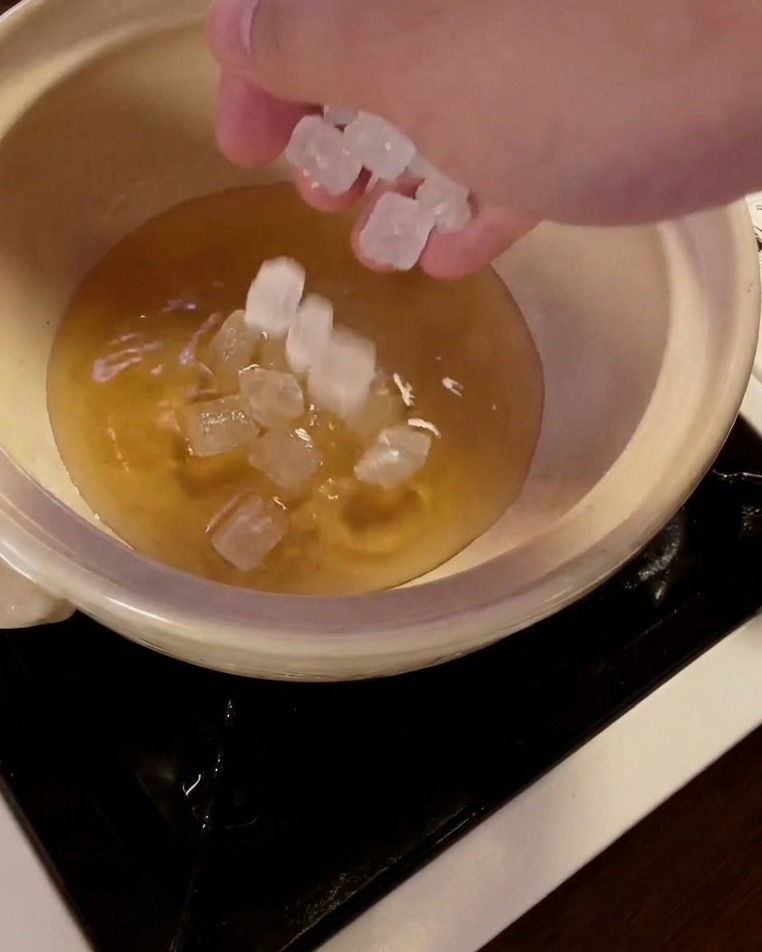
Add 3 spoons of rock sugar crystals into the pot with the mirin. Rock sugar is preferred for teriyaki sauce as it creates a cleaner, glossier finish compared to standard granulated sugar.
Tip: Rock sugar takes a bit longer to dissolve, so be patient while it simmers on low heat. - 3Combine with soy sauce
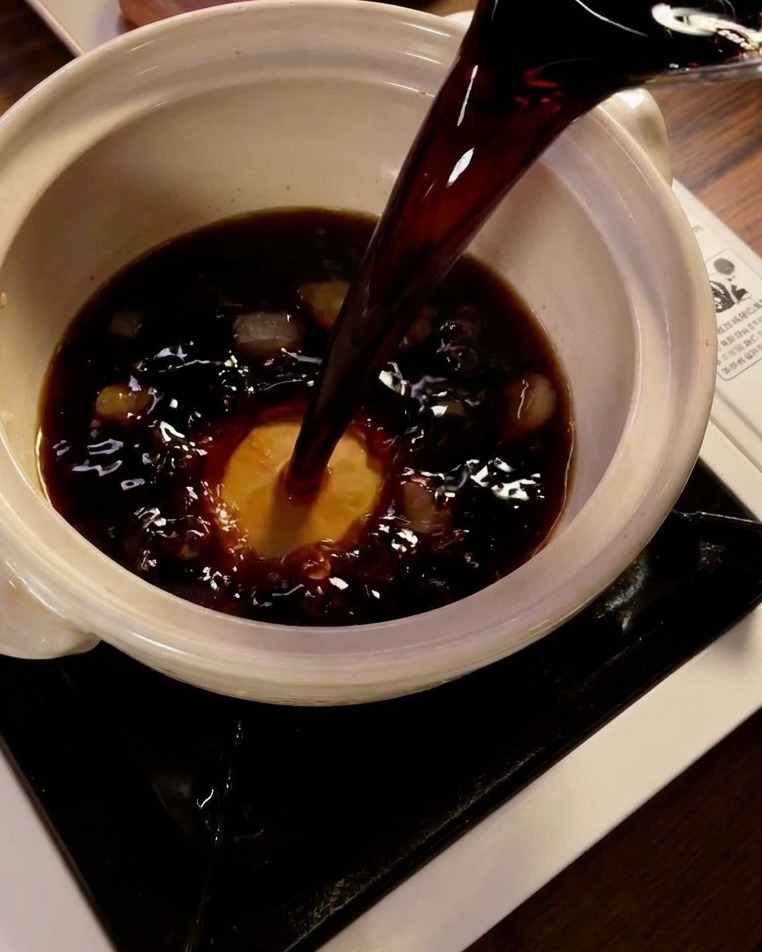
Incorporate 5 spoons of soy sauce into the mixture. This adds the necessary savory depth and dark color required for an authentic teriyaki glaze, balancing out the previous sweet ingredients.
Tip: Simmer this mixture on low heat for about 20 minutes until it thickens to a syrupy consistency. - 4Prepare the pork loin
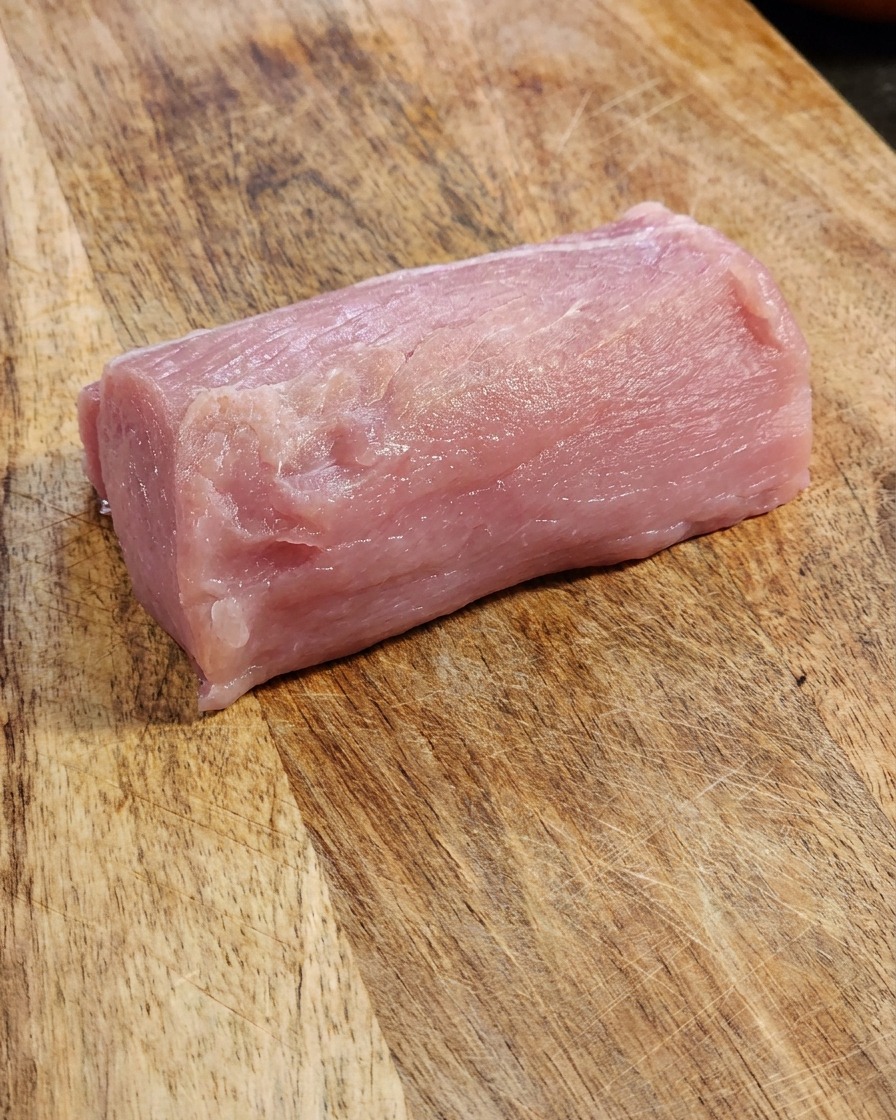
Place a fresh piece of raw pork loin on a wooden cutting board. Carefully slice the loin into portions suitable for a cutlet, ensuring even thickness for consistent cooking later.
Tip: Using a sharp knife will help you get clean, even slices without tearing the muscle fibers. - 5Tenderize the pork
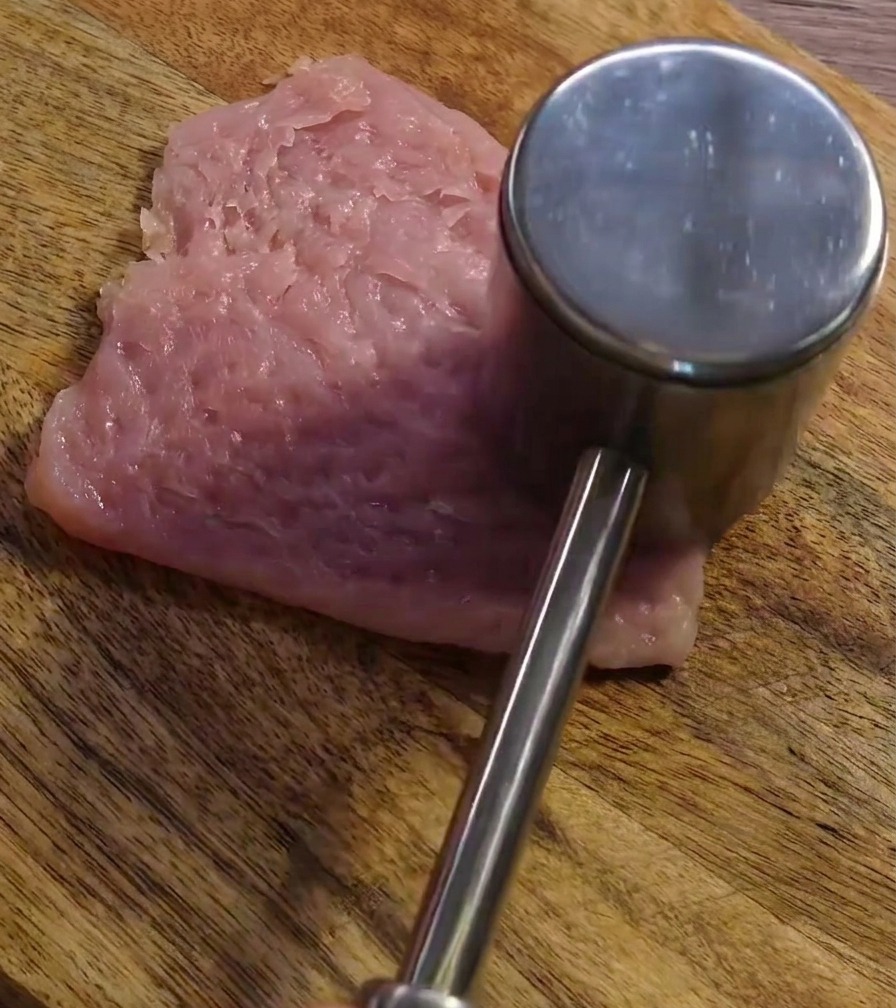
Use a metal meat mallet to thoroughly pound the raw pork slice. This process breaks down the connective tissues and flattens the meat, resulting in a much more tender and uniform pork cutlet.
Tip: Place a piece of plastic wrap over the meat before pounding to prevent mess and keep the meat surface intact. - 6Season the flattened pork
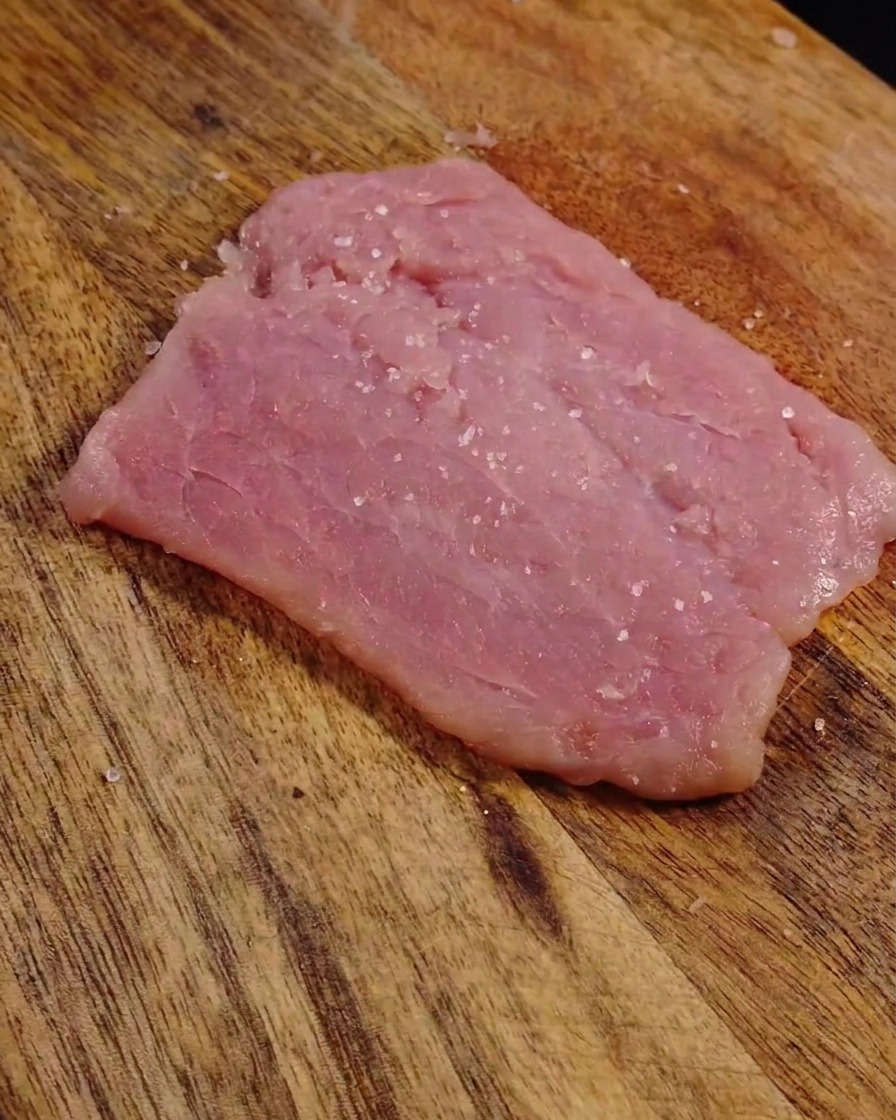
Sprinkle an even layer of salt and black pepper over the surface of the flattened pork. Proper seasoning at this stage ensures the flavors are locked in during the breading and frying process.
Tip: Dont forget to flip the meat and season the other side to ensure every bite is flavorful. - 7Beat the eggs
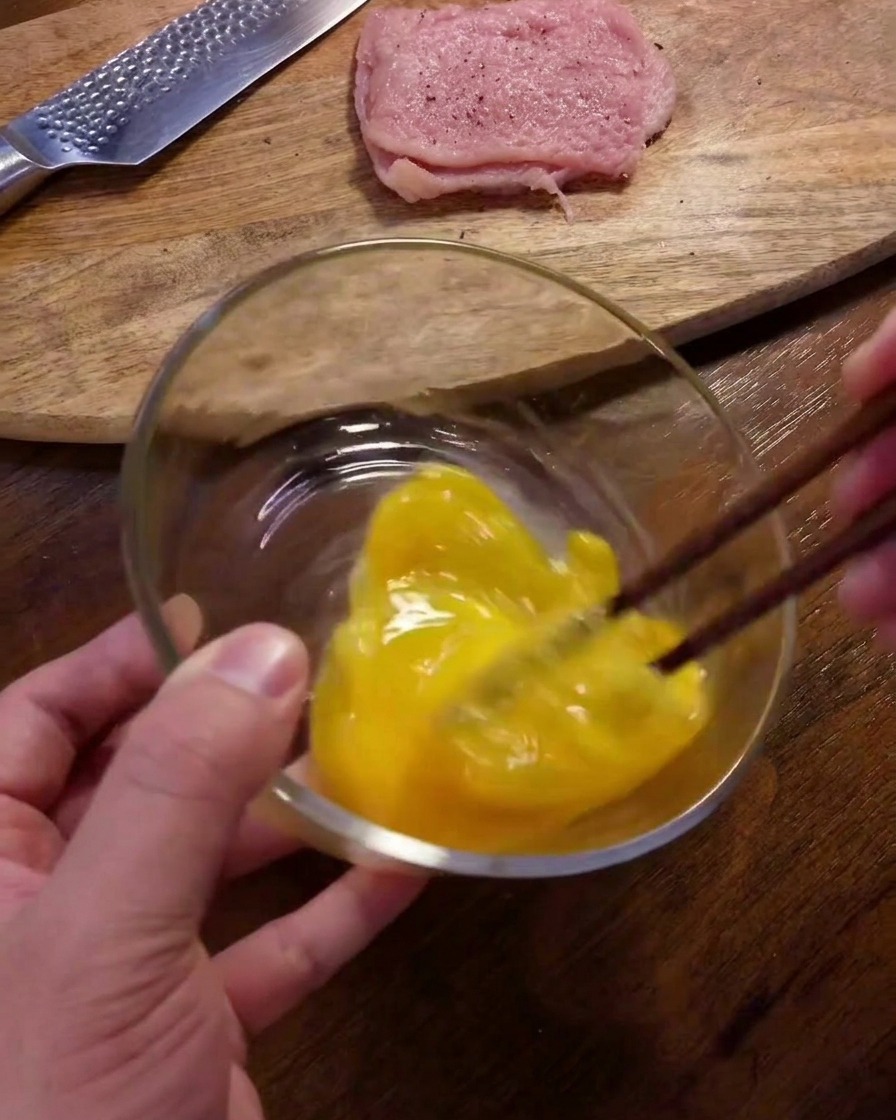
Crack two eggs into a glass bowl and beat them thoroughly using chopsticks until the yolks and whites are fully combined. This beaten egg mixture will be used for both the breading station and the final silky egg topping.
Tip: For a smoother texture in the final dish, try to avoid creating too many air bubbles while beating. - 8Dredge in cornstarch
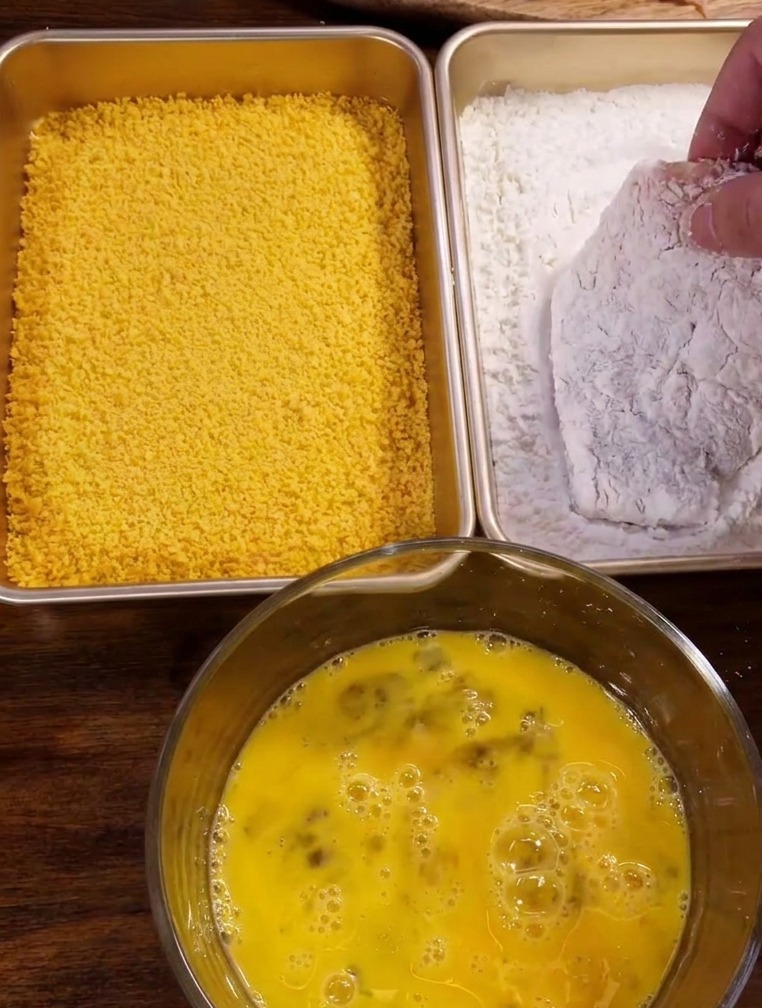
Take the seasoned pork loin and dredge it thoroughly in white cornstarch. Ensure the entire surface is evenly coated with a thin layer of starch, then gently shake off any excess. This creates a dry surface that helps the egg wash and breadcrumbs adhere better.
Tip: A light, even coating is best; too much starch can lead to a heavy, doughy crust. - 9Dip in egg wash
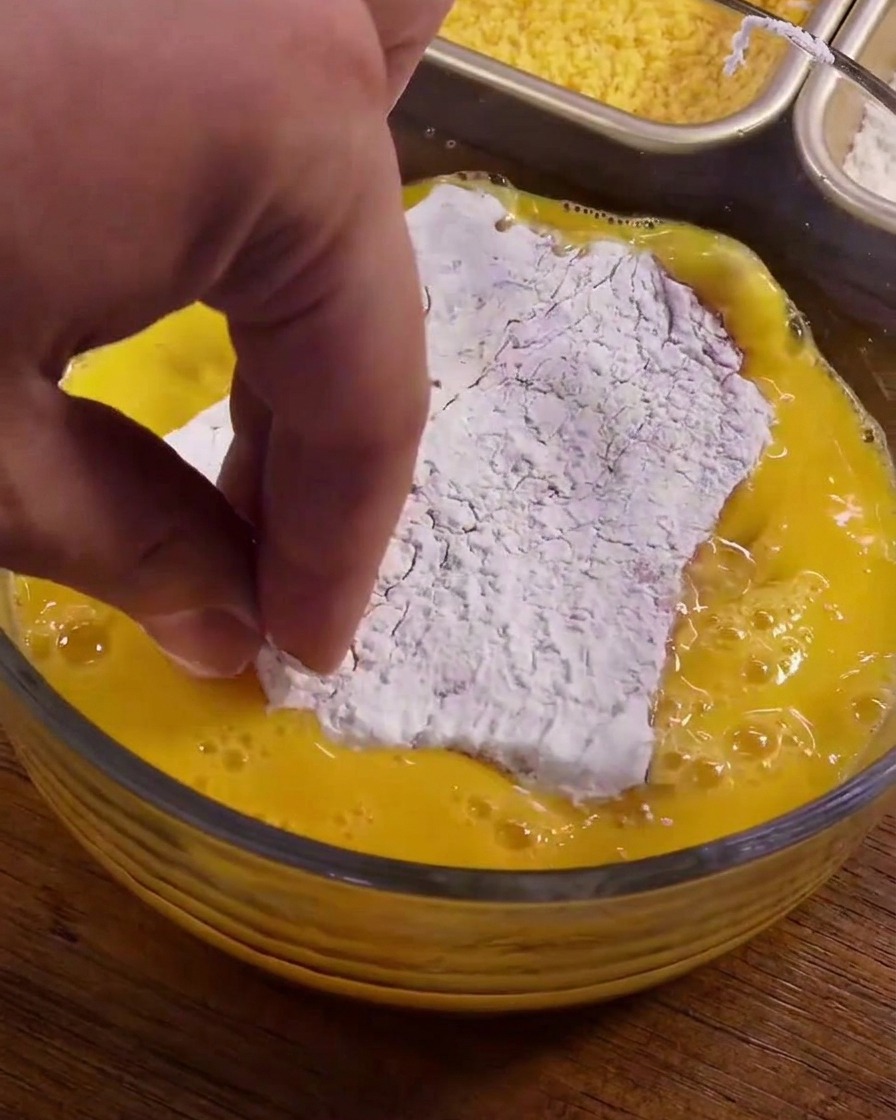
Submerge the floured pork slice into the bowl of beaten eggs. Turn the pork to ensure every part is moistened by the egg wash, which will act as the essential binding agent for the final layer of crispy breadcrumbs.
Tip: Allow any excess egg to drip off before moving the pork to the breadcrumb tray to keep the crumbs from clumping. - 10Coat with breadcrumbs
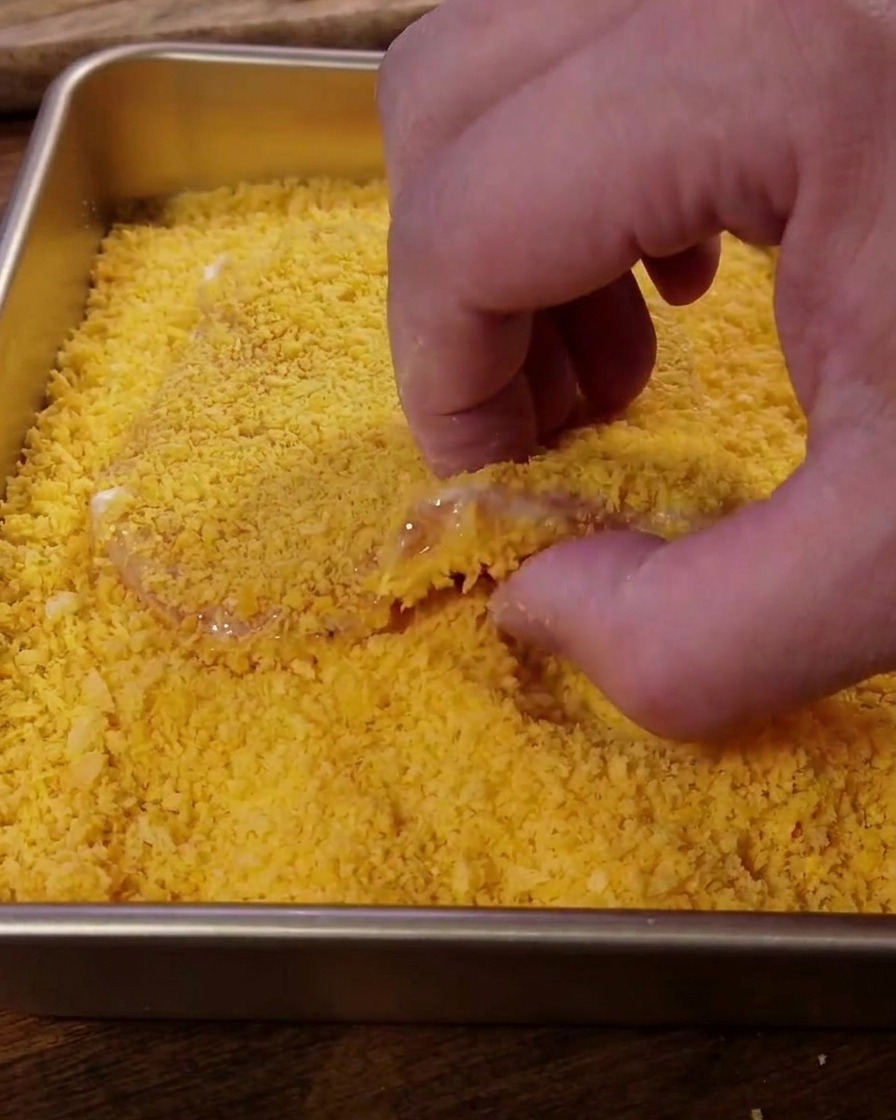
Place the egg-washed pork into the tray of Panko breadcrumbs. Press down firmly on both sides to ensure the crumbs stick well, creating a thick and uniform layer that will provide a satisfying crunch after frying.
Tip: Using one hand for wet ingredients and the other for dry breadcrumbs helps keep your fingers clean and the coating even. - 11Deep fry until golden
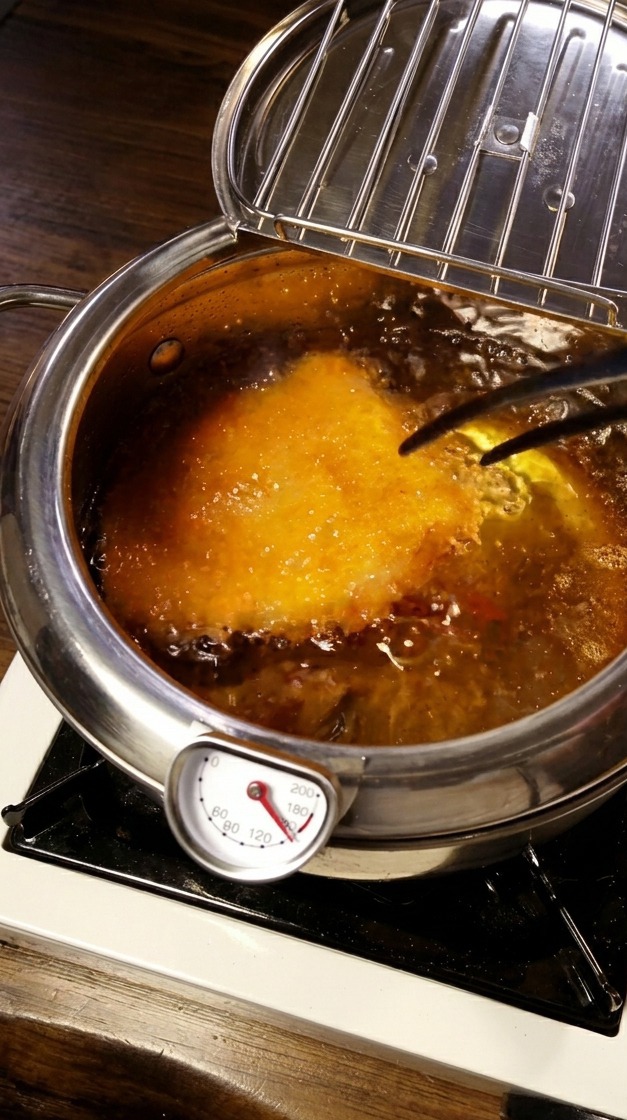
Heat oil to 160°C and carefully place the breaded pork cutlet into the pot. Fry until the exterior is deeply golden brown and crispy, ensuring the pork is cooked through while remaining tender and juicy inside.
Tip: Use a thermometer to maintain the oil at 160°C; if the oil is too cool, the breading will absorb too much fat and become greasy. - 12Slice the pork cutlet
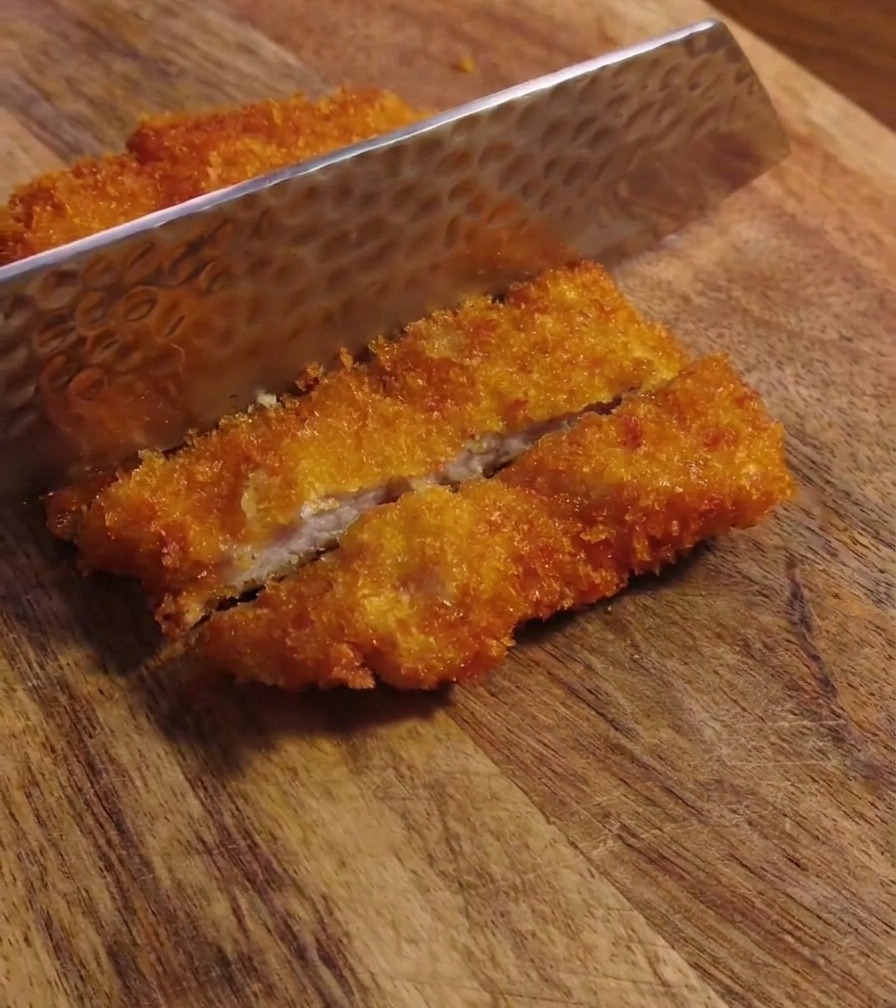
Once the pork cutlet is fried to a perfect golden brown, place it on a cutting board. Use a sharp knife to slice the crispy cutlet into uniform strips, making it easy to layer over the rice bowl later.
Tip: Let the pork rest for a minute before slicing to keep the meat juicy and ensure the breading stays attached. - 13Saute the onions
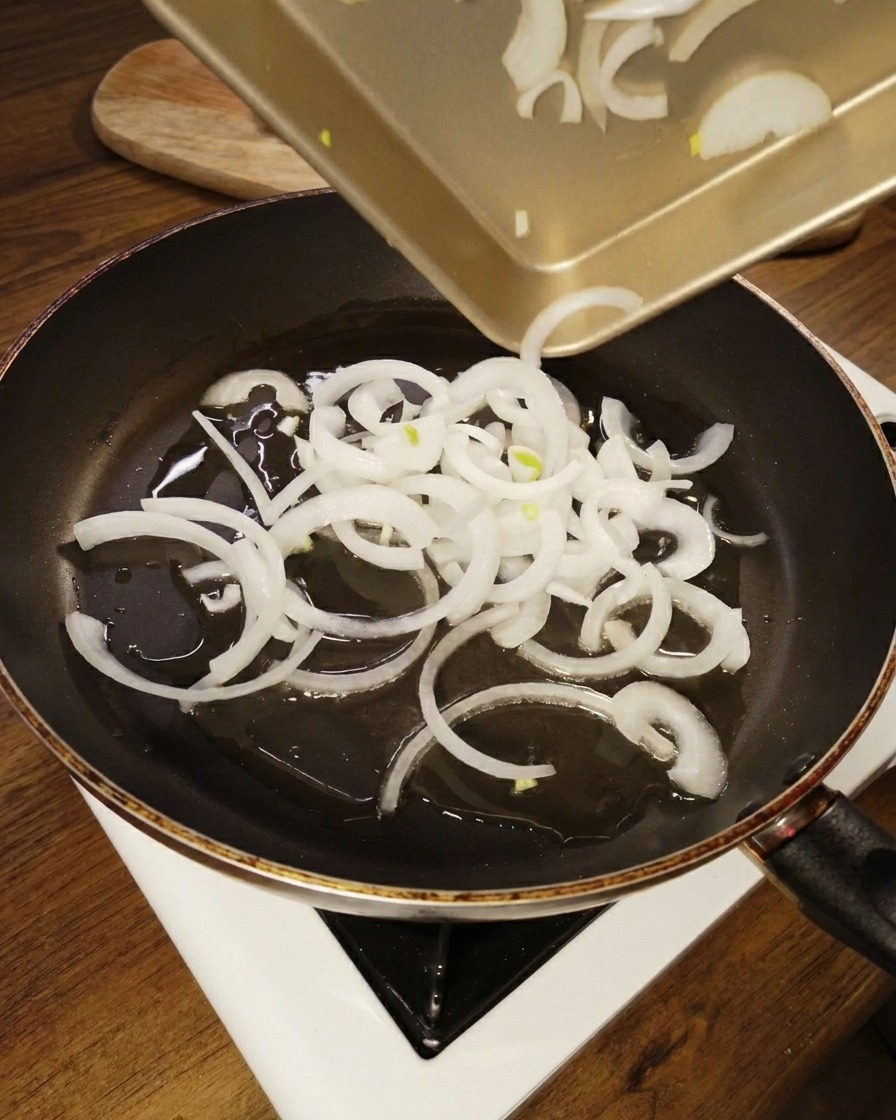
Heat a small amount of oil in a frying pan and add the thinly sliced white onions. Saute them over medium heat until they become soft and translucent which provides a sweet base for the egg mixture.
Tip: Keep the heat at medium to prevent the onions from browning too quickly because you want them soft and sweet not crispy - 14Season the onions
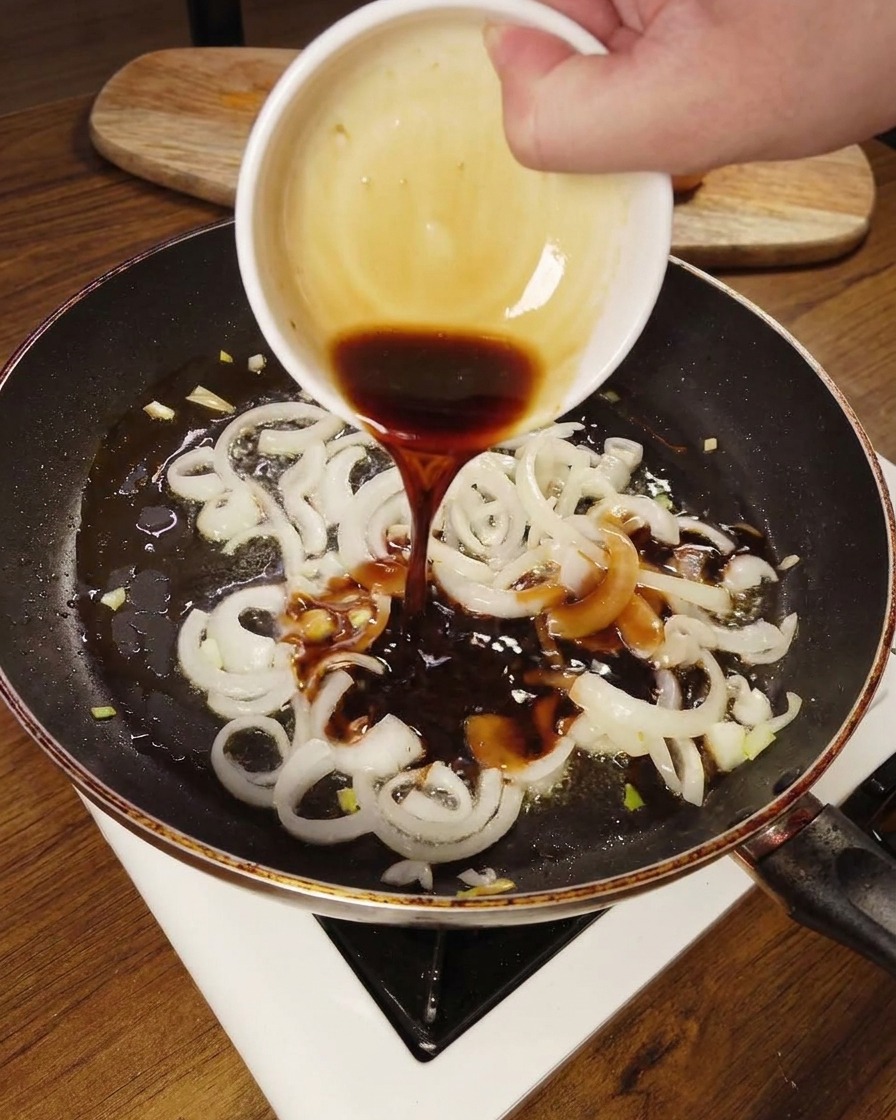
Add a mixture of cooking wine, light soy sauce, oyster sauce, and sugar to the softened onions. This savory-sweet liquid will season the onions and provide the flavor base for the eggs that follow.
Tip: Stir the onions briefly after adding the sauce to ensure everything is evenly coated before adding the eggs. - 15Cook the silky eggs
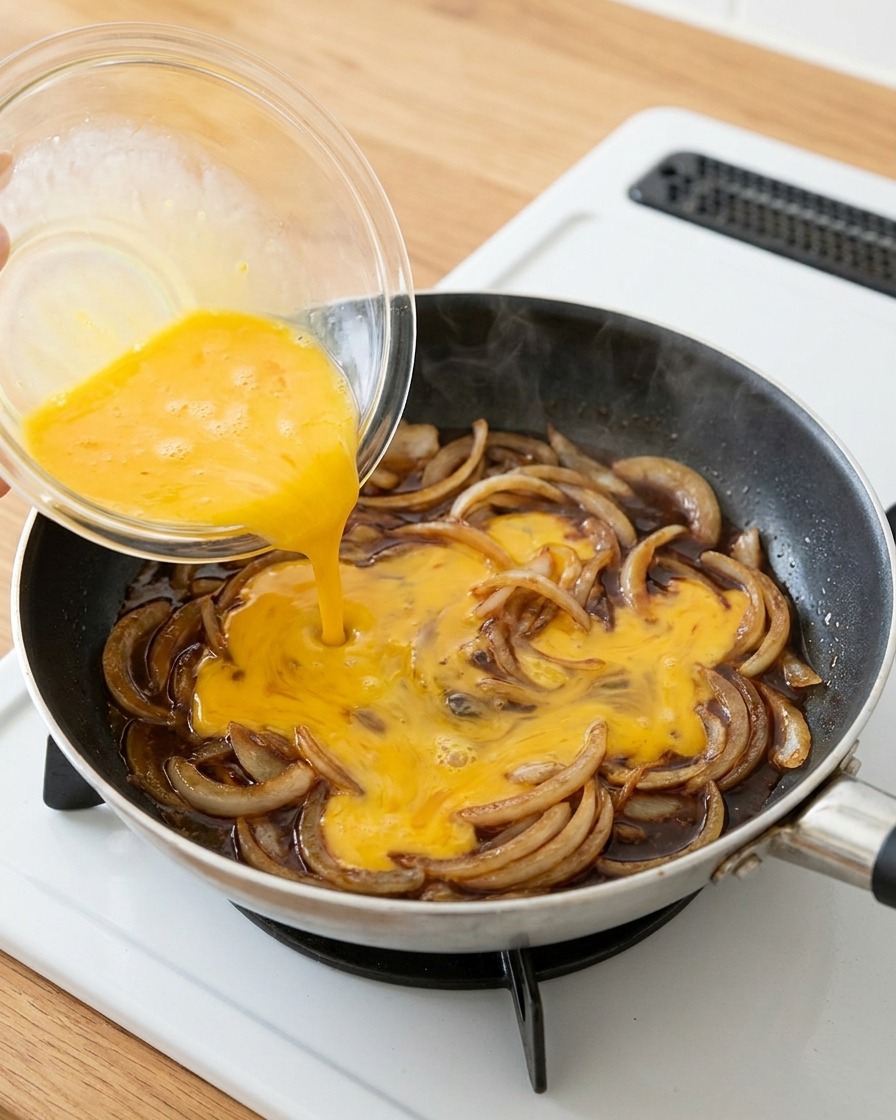
Pour the remaining beaten eggs over the simmering onions and sauce. Cook gently until the eggs are just set but still silky and moist. This creates the signature soft texture of the rice bowl topping.
Tip: Do not overcook the eggs as they should be slightly runny when you remove them from the heat since they will continue to firm up on top of the hot rice