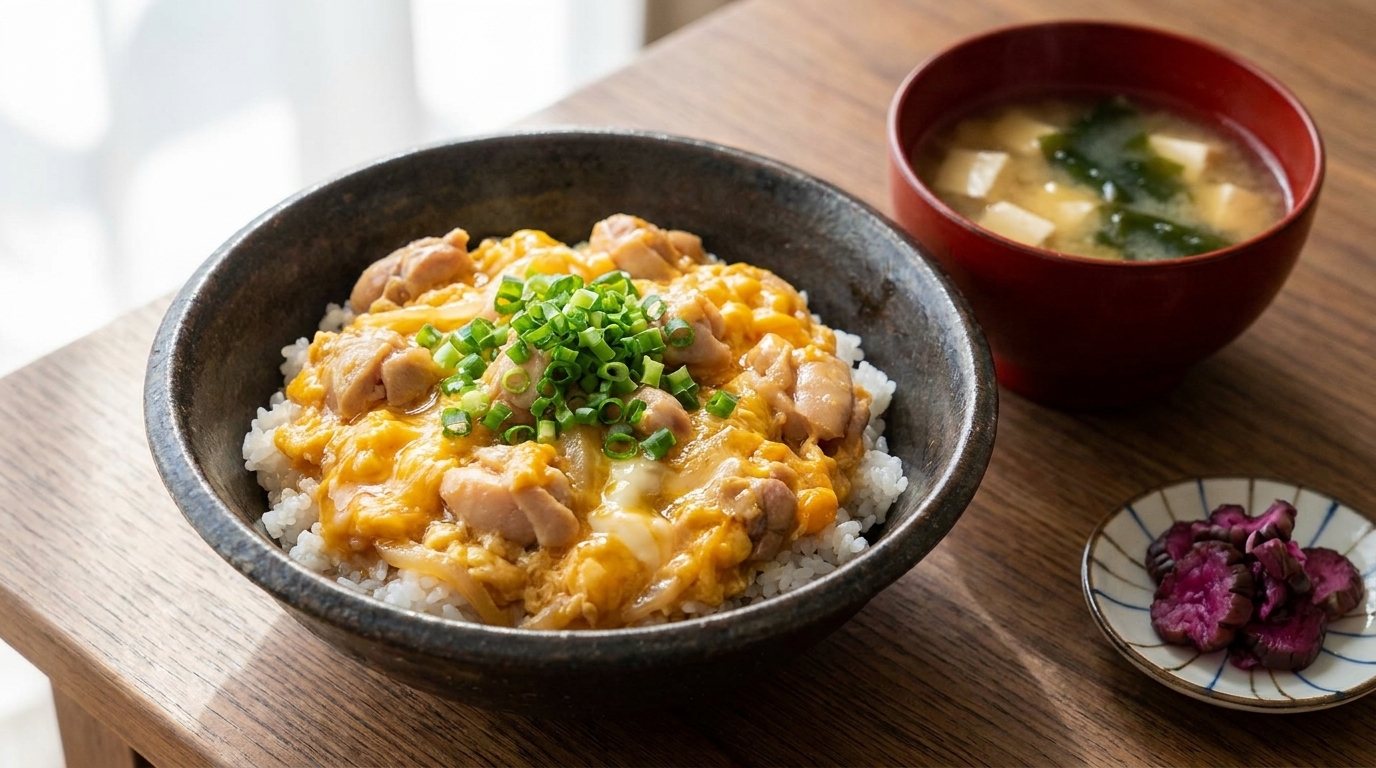
Japanese Oyakodon (Chicken
Egg Bowl)
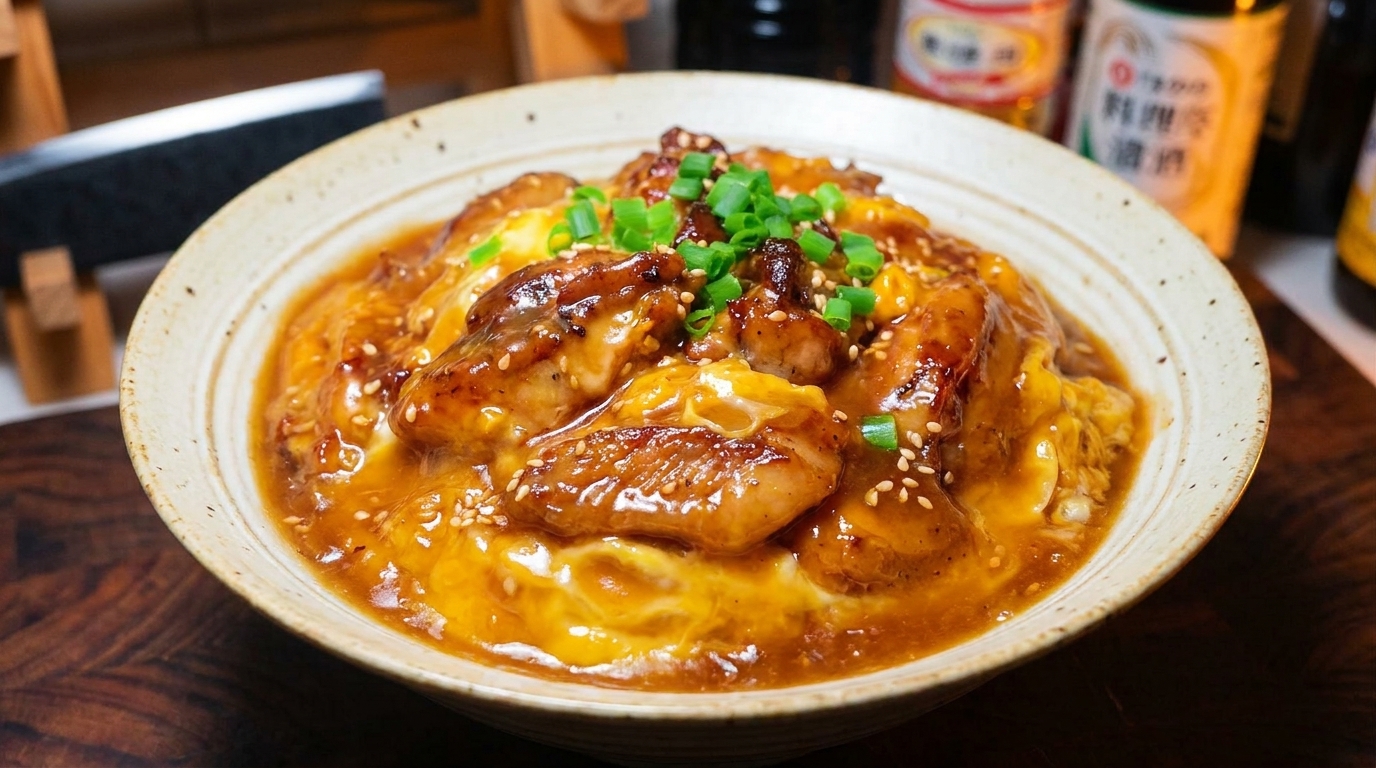
Master the art of the perfect Oyakodon with this Tokyo-style method featuring tender seared chicken and silky, semi-set eggs in a balanced dashi-soy glaze.
Oyakodon literally translates to parent-and-child bowl, a poetic reference to the use of both chicken and egg. This humble comfort food is a staple of Japanese home cooking and specialized Tokyo lunch shops, prized for its delicate balance of sweet mirin and savory dashi broth.
Ingredients
- 2 pieces chicken thighs, boneless
- 2 large eggs
- 0.5 piece yellow onion
- 20 g mirin
- 10 g sake
- 10 g soy sauce
- 8 g white sugar
- 0.5 bowl chicken broth
- to taste black pepper
- optional white sesame seeds
- optional green onions
Instructions
- 1Debone the chicken thighs
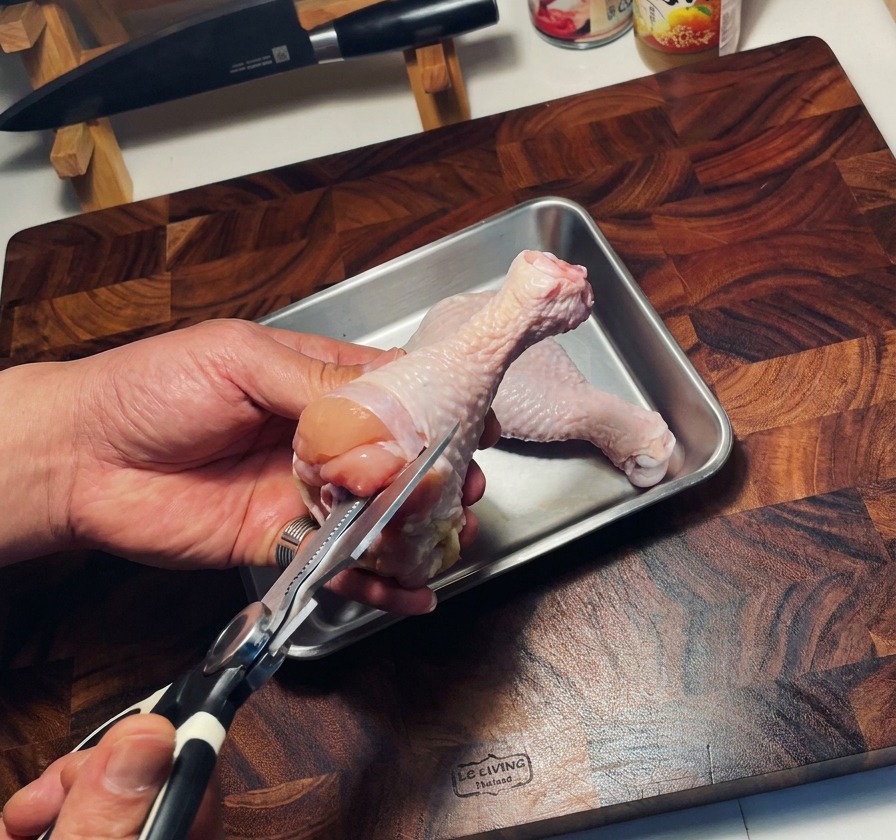
Using kitchen shears, carefully cut along the bone of the raw chicken thighs to remove it. Removing the bone ensures the meat cooks quickly and evenly, making it much easier to eat once served in the bowl.
Tip: Kitchen shears provide better control and safety than a knife when deboning small poultry pieces. - 2Season and marinate
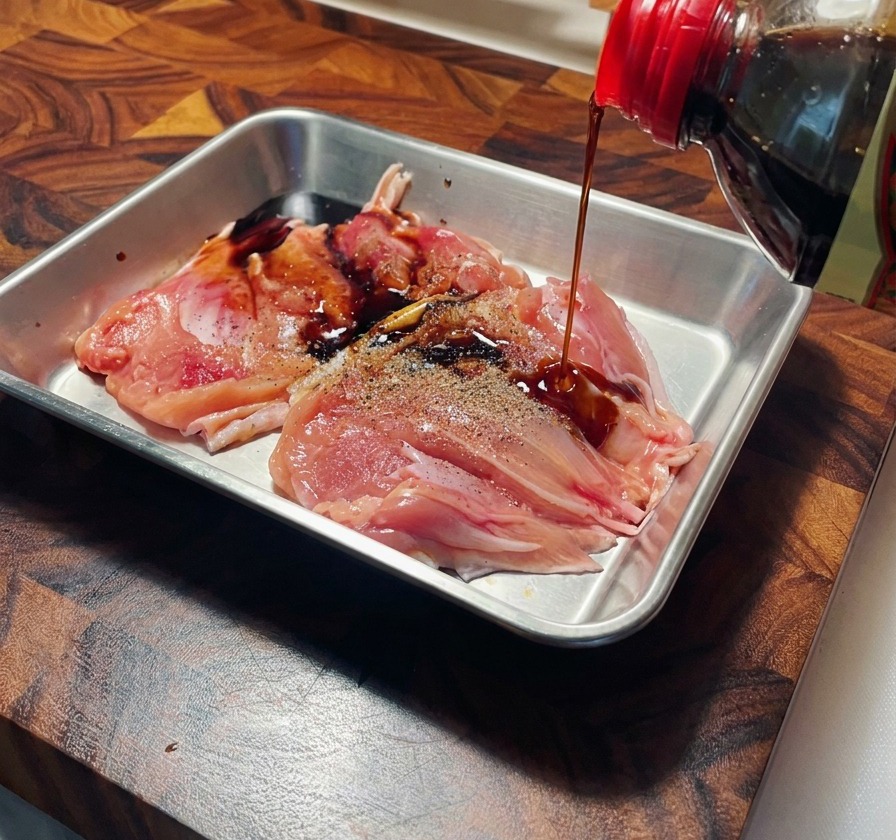
Season the deboned chicken with a pinch of black pepper and a splash of soy sauce. Massage the seasonings into the meat thoroughly to ensure the flavors are well-distributed and can penetrate the chicken.
Tip: Let the chicken marinate for about 10 minutes to allow the soy sauce to fully season the meat. - 3Slice the onion
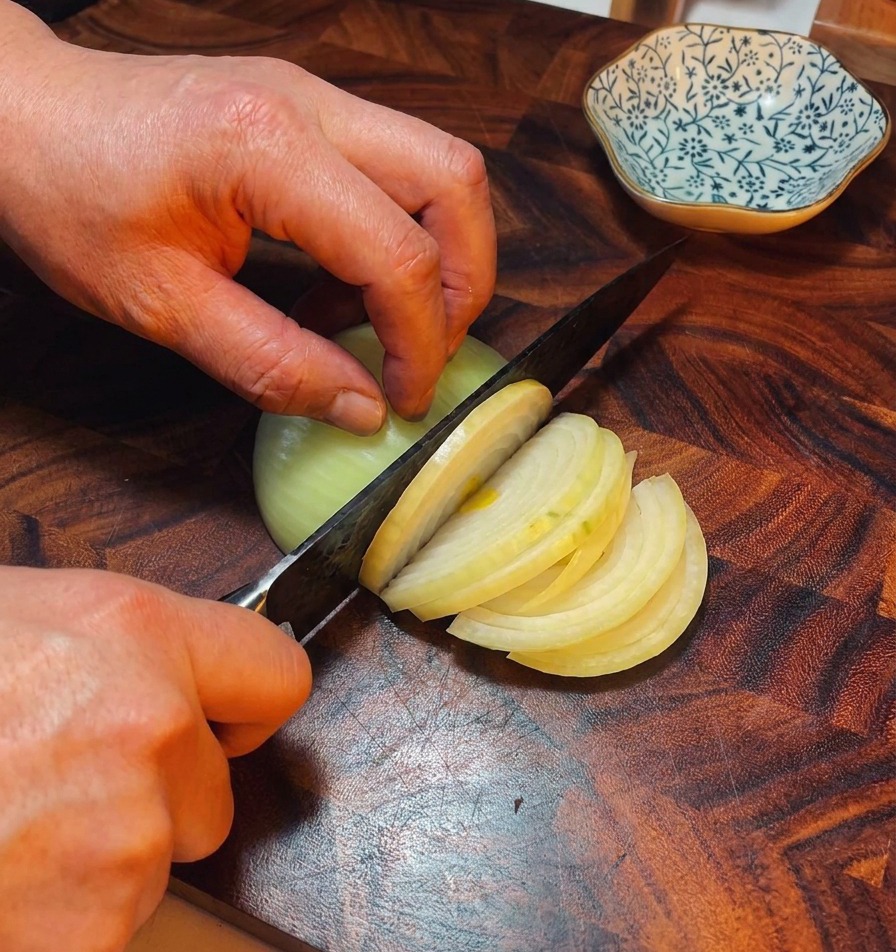
Peel half a yellow onion and slice it into thin, uniform strips. These will be sautéed until soft and sweet, providing the aromatic base for the Oyakodon simmering liquid.
Tip: Slicing the onion thinly allows it to soften quickly and blend better with the texture of the eggs. - 4Prepare the egg mixture
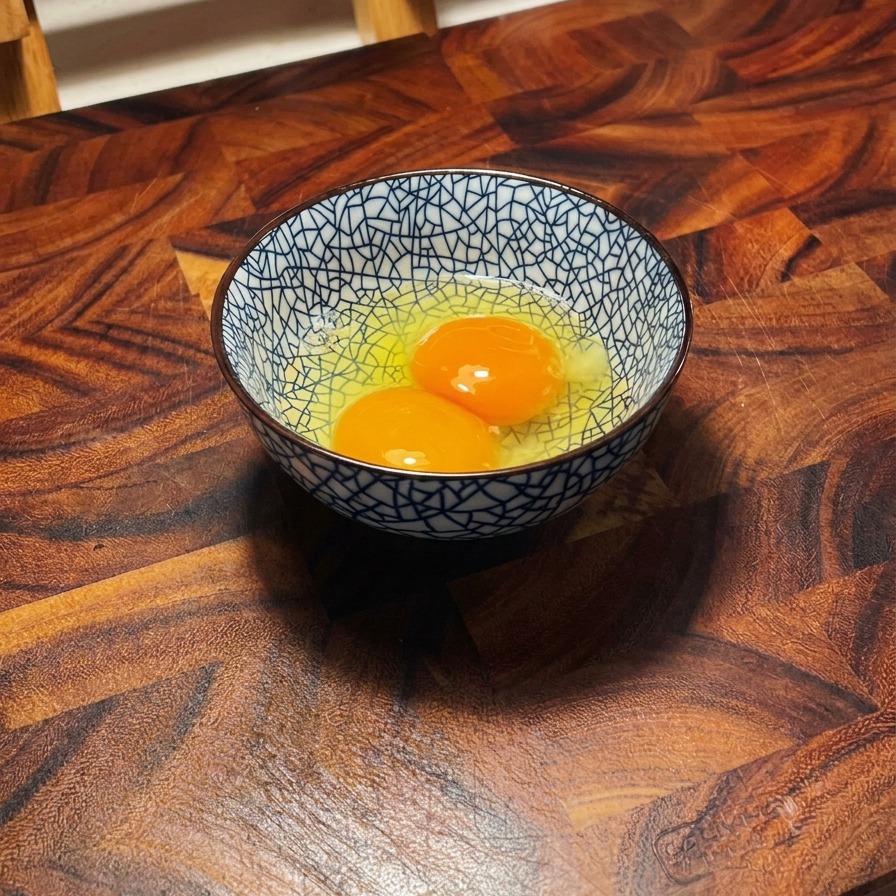
Crack two eggs into a small bowl. For an authentic Oyakodon texture, beat the eggs only slightly; you want the whites and yolks to remain somewhat distinct rather than fully homogenized.
Tip: A lightly beaten egg mixture creates a beautiful marbled white and yellow appearance in the final dish. - 5Prepare the sauce
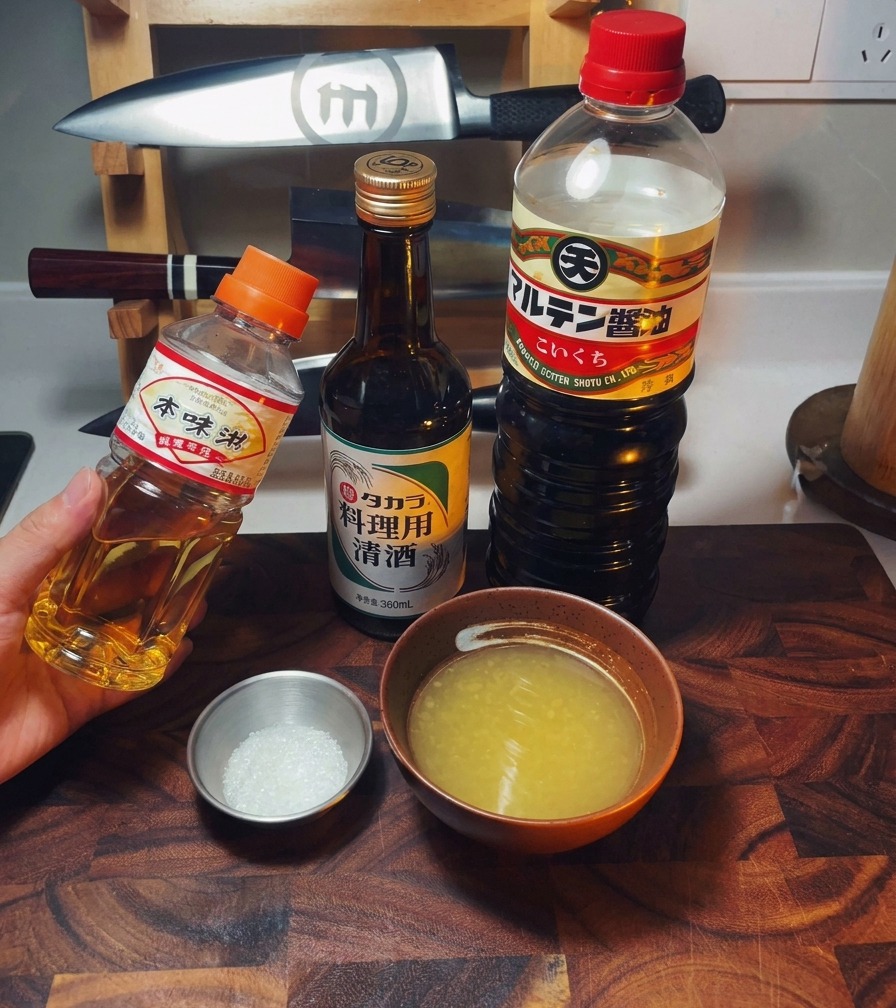
In a small bowl, combine the mirin, sake, soy sauce, white sugar, and chicken broth. Stir the ingredients together until the sugar is dissolved to create a balanced sweet and savory simmering sauce.
Tip: Using a savory chicken broth as the base adds a rich depth of flavor compared to using plain water. - 6Sear the chicken
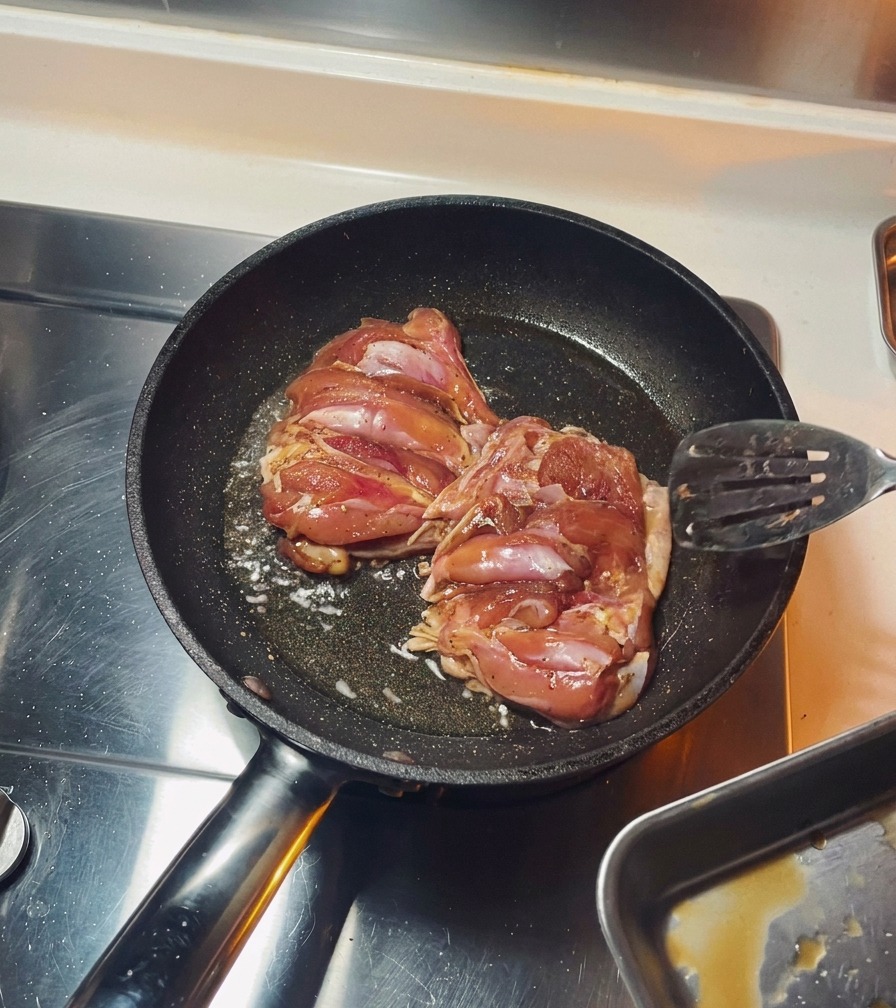
Heat a small amount of oil in a pan over medium heat. Place the chicken thighs skin-side down and fry until the skin is golden brown and crispy before flipping them over to finish cooking.
Tip: Searing the skin first renders out the fat and adds a delicious toasted flavor to the chicken. - 7Cut chicken into bite-sized pieces
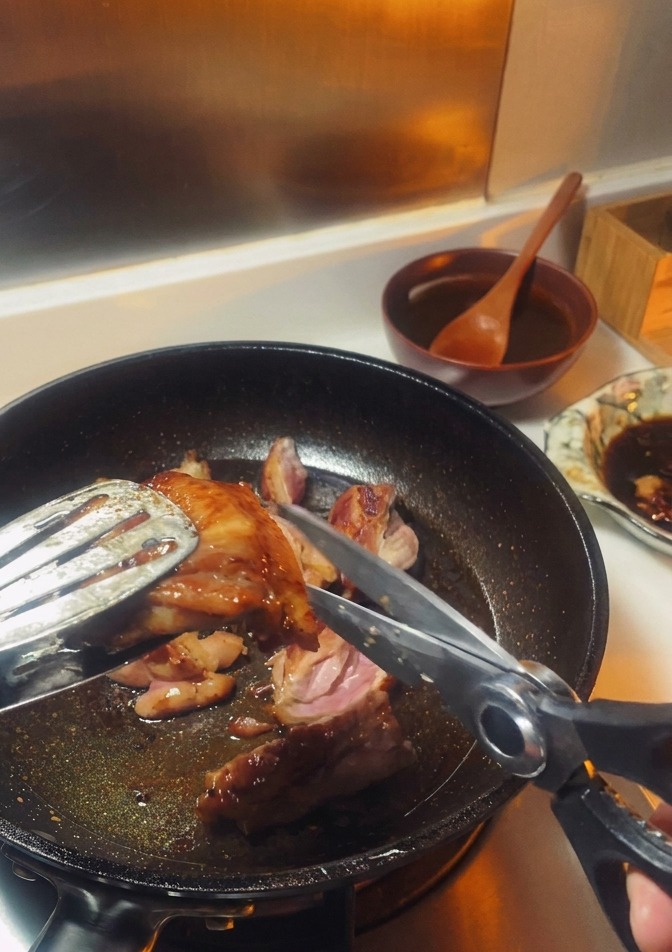
While the chicken thighs are frying, use kitchen shears to cut them into smaller, bite-sized pieces directly in the pan. Continue to fry the chicken pieces over medium heat until the surfaces are golden brown and the meat is no longer pink inside. This technique ensures the chicken cooks quickly and evenly.
Tip: Using shears instead of a knife allows you to cut the meat without removing it from the pan, saving time and keeping the heat consistent. - 8Sauté the onions
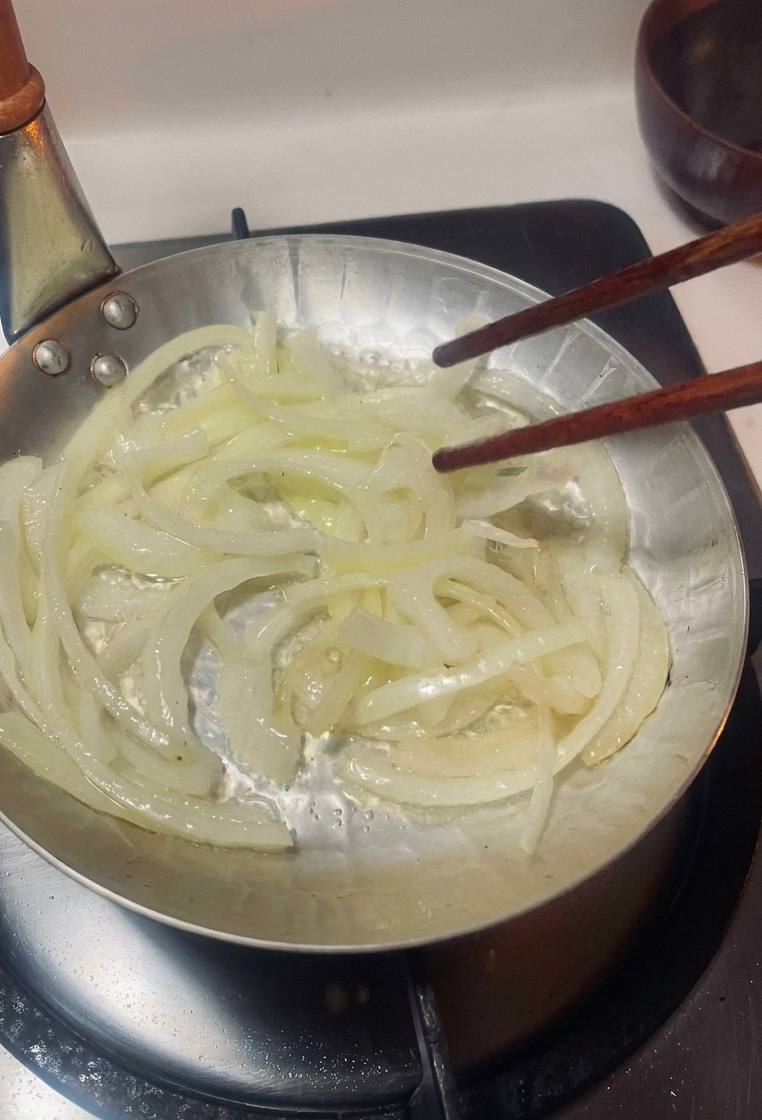
In a specialized Oyakodon pan or a small skillet, add a small amount of oil and the sliced onions. Sauté over low heat, using chopsticks to stir occasionally, until the onions become soft and translucent. This creates a sweet, flavorful base for the chicken and eggs.
Tip: Keep the heat low to soften the onions without browning them; you want them to release their natural sugars for a delicate sweetness. - 9Layer chicken over onions
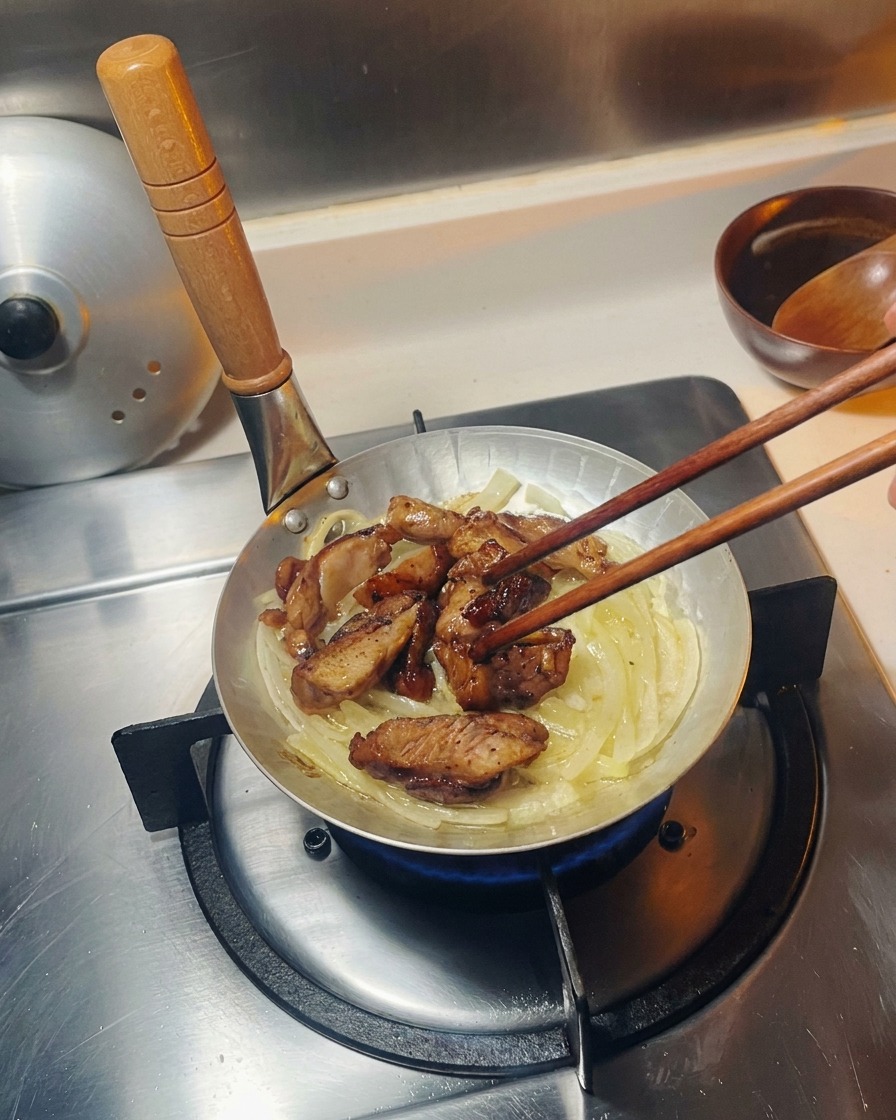
Once the onions are softened, carefully arrange the browned chicken pieces on top of them in the small pan. Distribute the chicken evenly across the surface so that every serving will have a perfect ratio of meat and onions.
Tip: Placing the chicken skin-side up helps maintain its golden color while the bottom soaks up the flavors from the onions and sauce. - 10Add the savory sauce
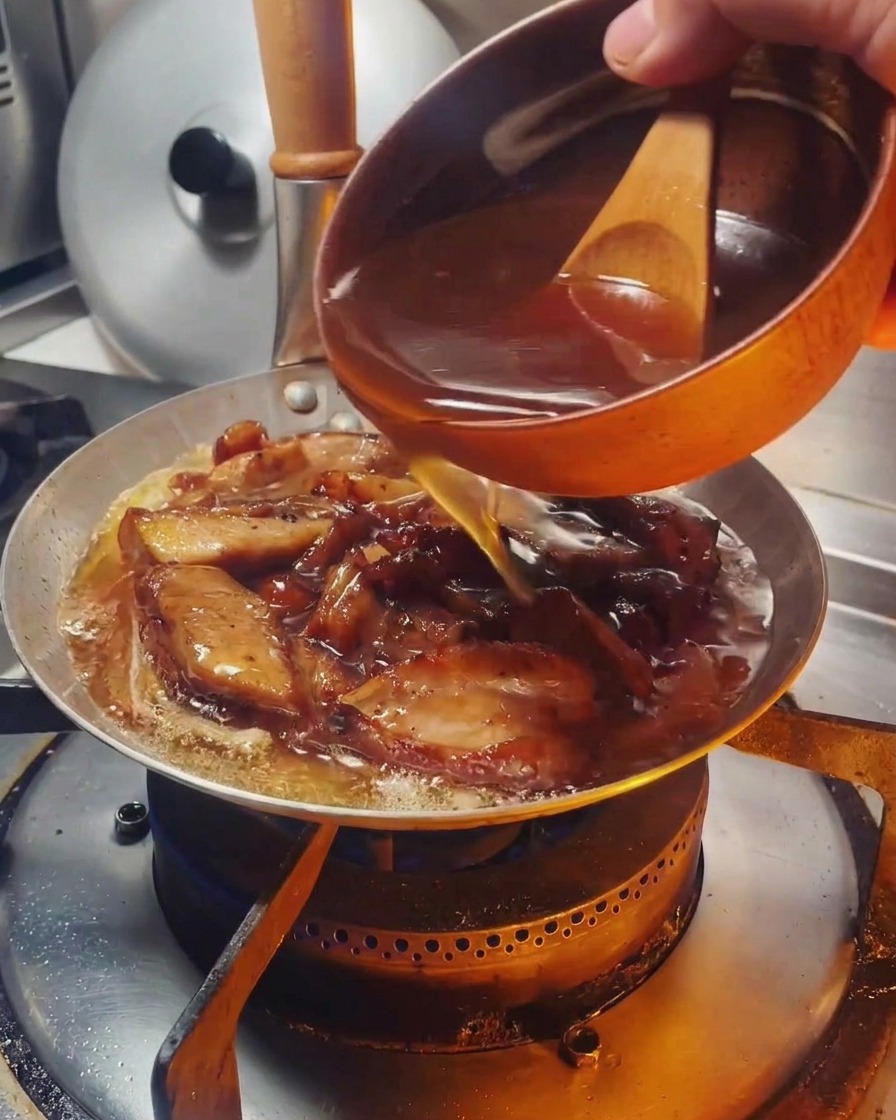
Pour the prepared mixture of mirin, sake, soy sauce, sugar, and chicken broth over the chicken and onions. Bring the liquid to a gentle simmer over low heat for about 3 minutes. This allows the meat to absorb the savory-sweet flavors of the broth.
Tip: Be careful not to boil the sauce too vigorously; a gentle simmer is all you need to combine the flavors without drying out the chicken. - 11Pour in the beaten eggs
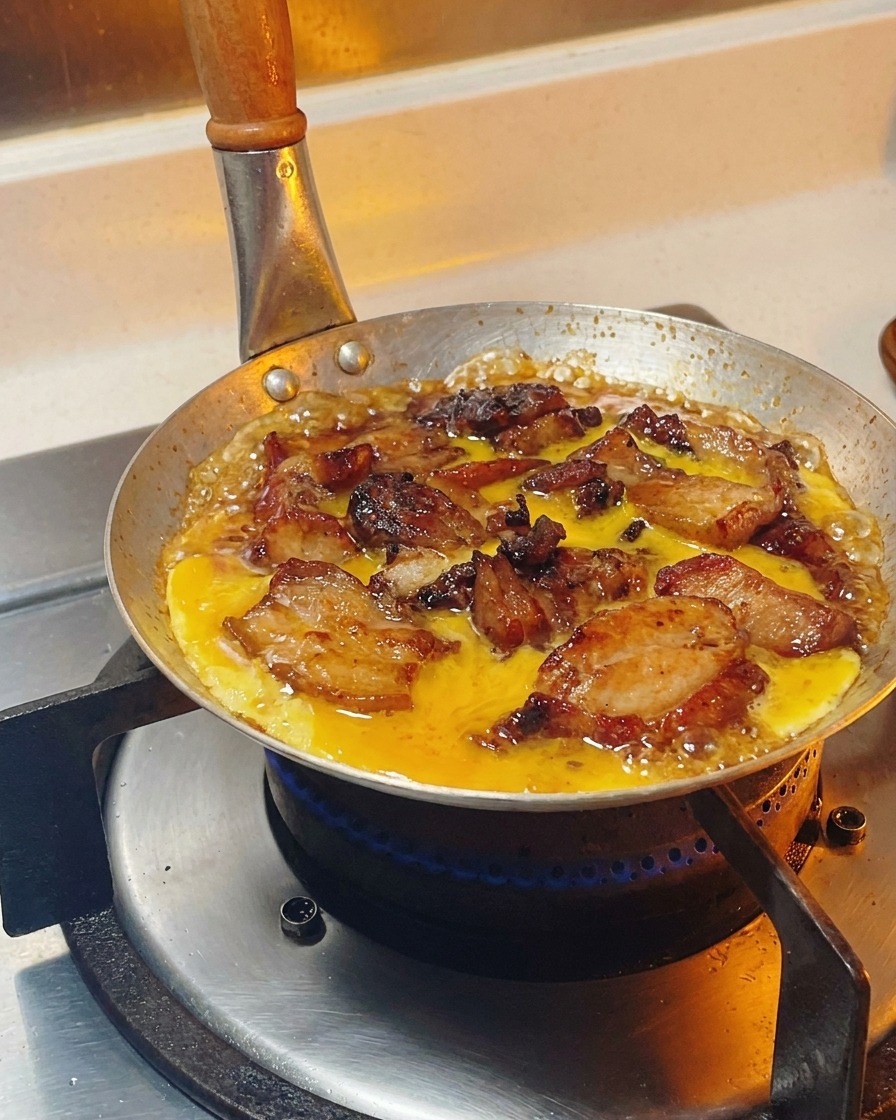
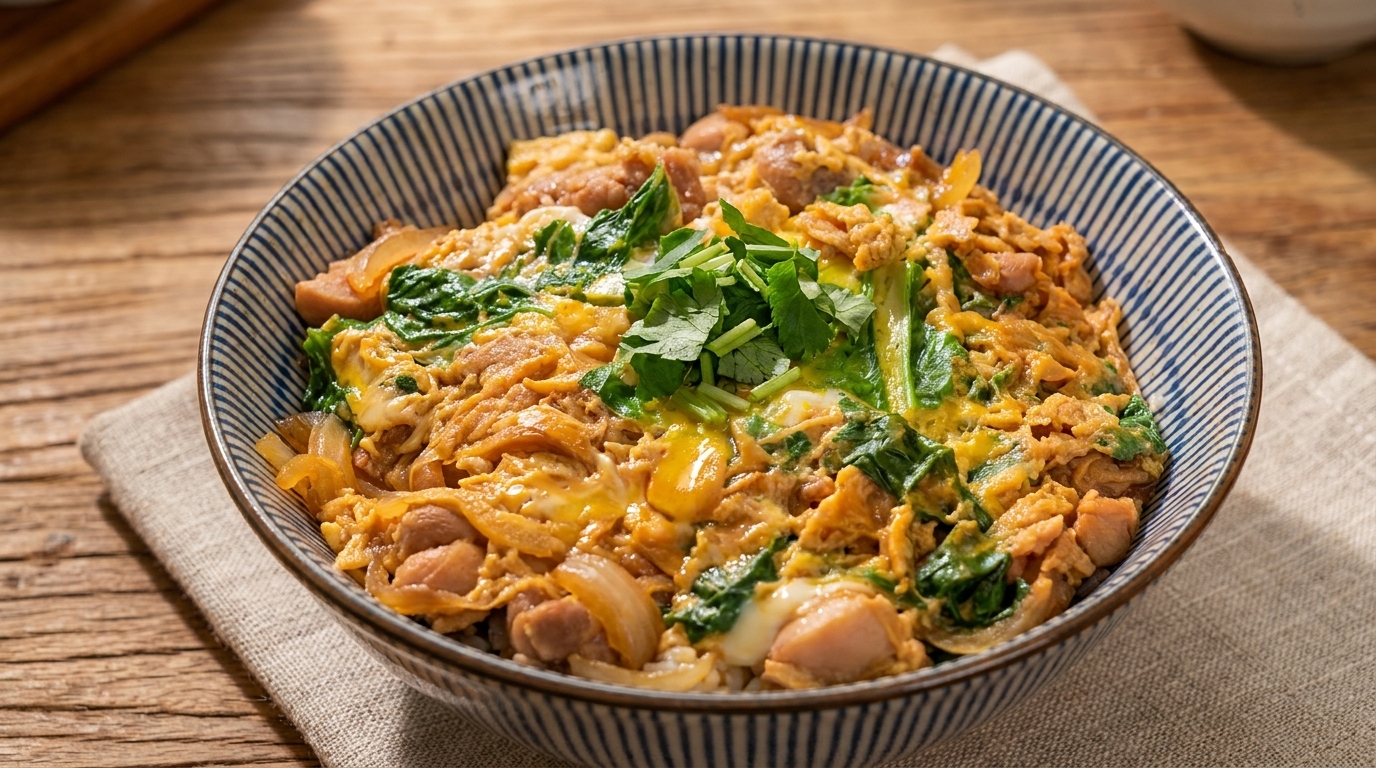
Lightly beat the eggs and pour them slowly over the simmering chicken and onions. Pouring in two separate batches helps achieve a layered texture where some of the egg is fully set while some remains soft and silky.
Tip: Dont over-mix the eggs before pouring; leaving distinct streaks of white and yellow gives the dish its classic, appetizing appearance. - 12Cook eggs until semi-solid
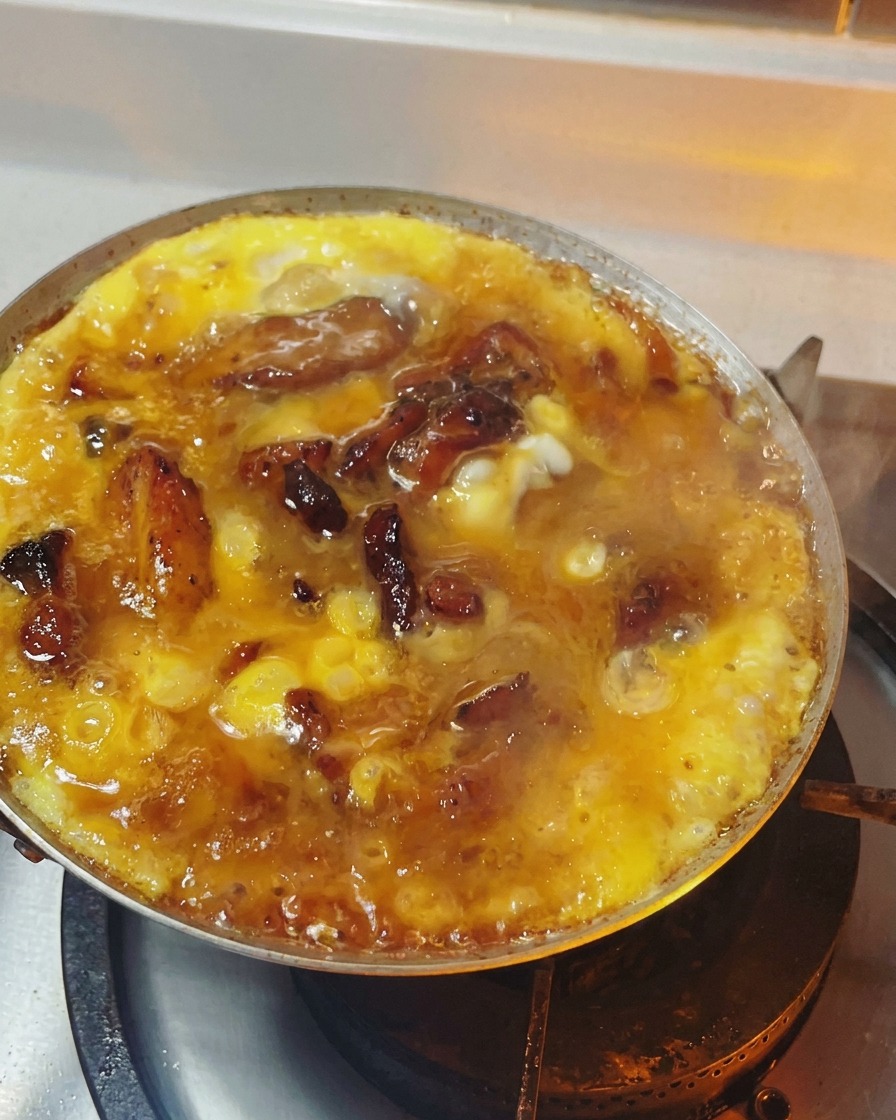
Continue to cook the mixture over low heat, gently shaking the pan to ensure even heat distribution. Cook until the eggs have reached a semi-solid, silky state—they should be set but still look moist and glossy on top.
Tip: Remove the pan from the heat just before the eggs look completely finished, as the residual heat will continue to cook them slightly. - 13Drizzle with remaining sauce
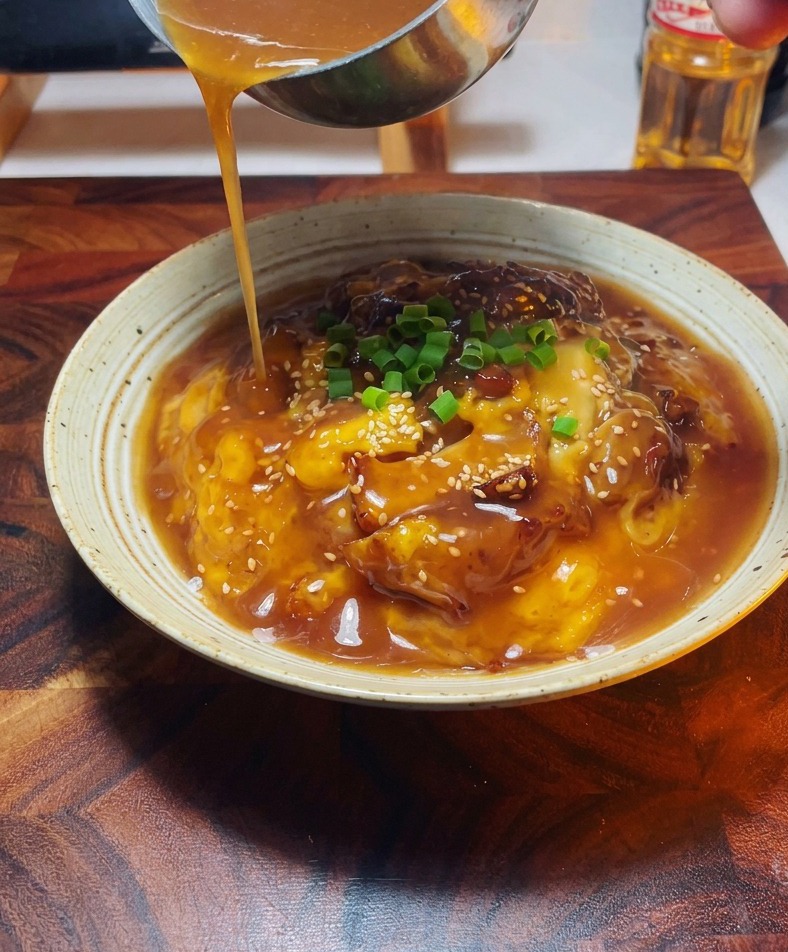
Take any remaining hot simmering sauce from the pan and carefully pour it over the assembled Oyakodon. This final addition ensures the rice is well seasoned and gives the egg and chicken a beautiful glossy finish.
Tip: Make sure the sauce is still hot when you pour it over to maintain the temperature of the dish and keep the eggs tender.