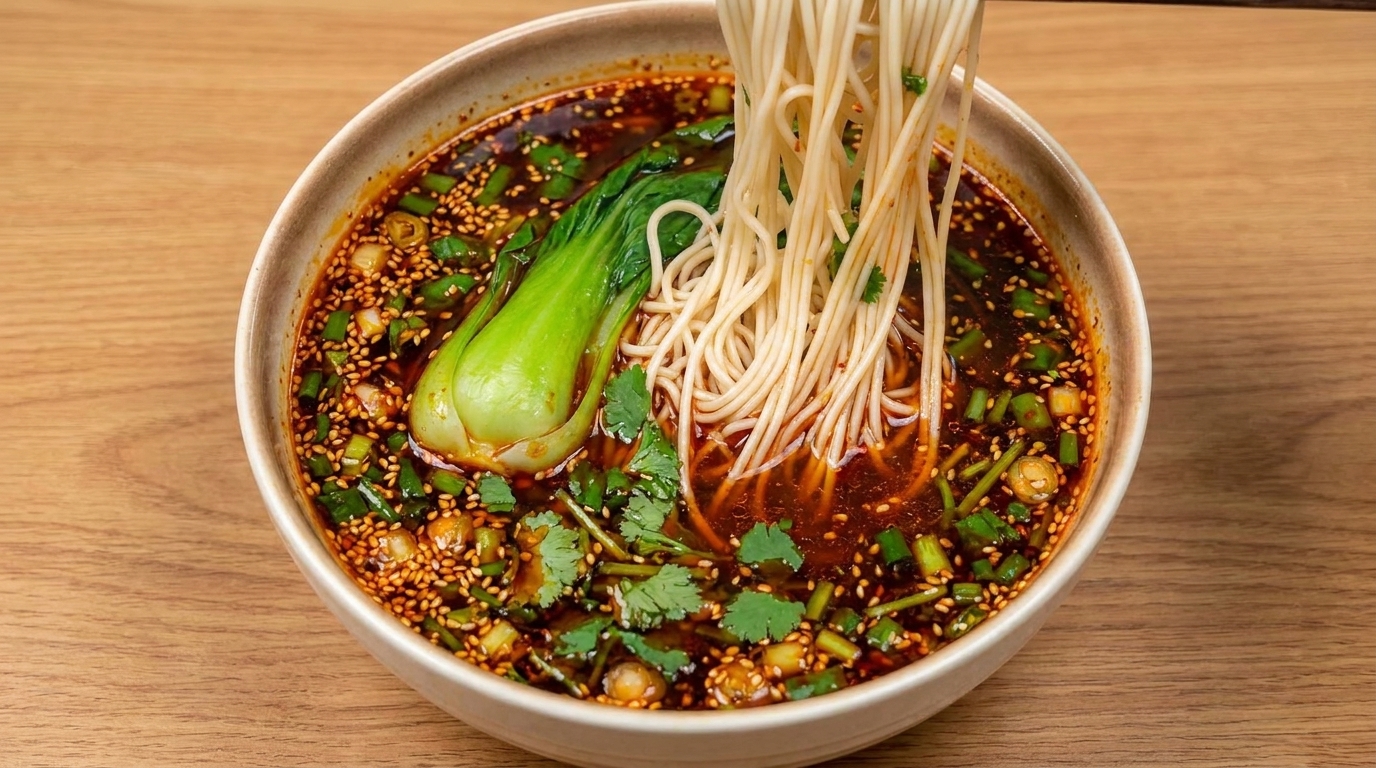
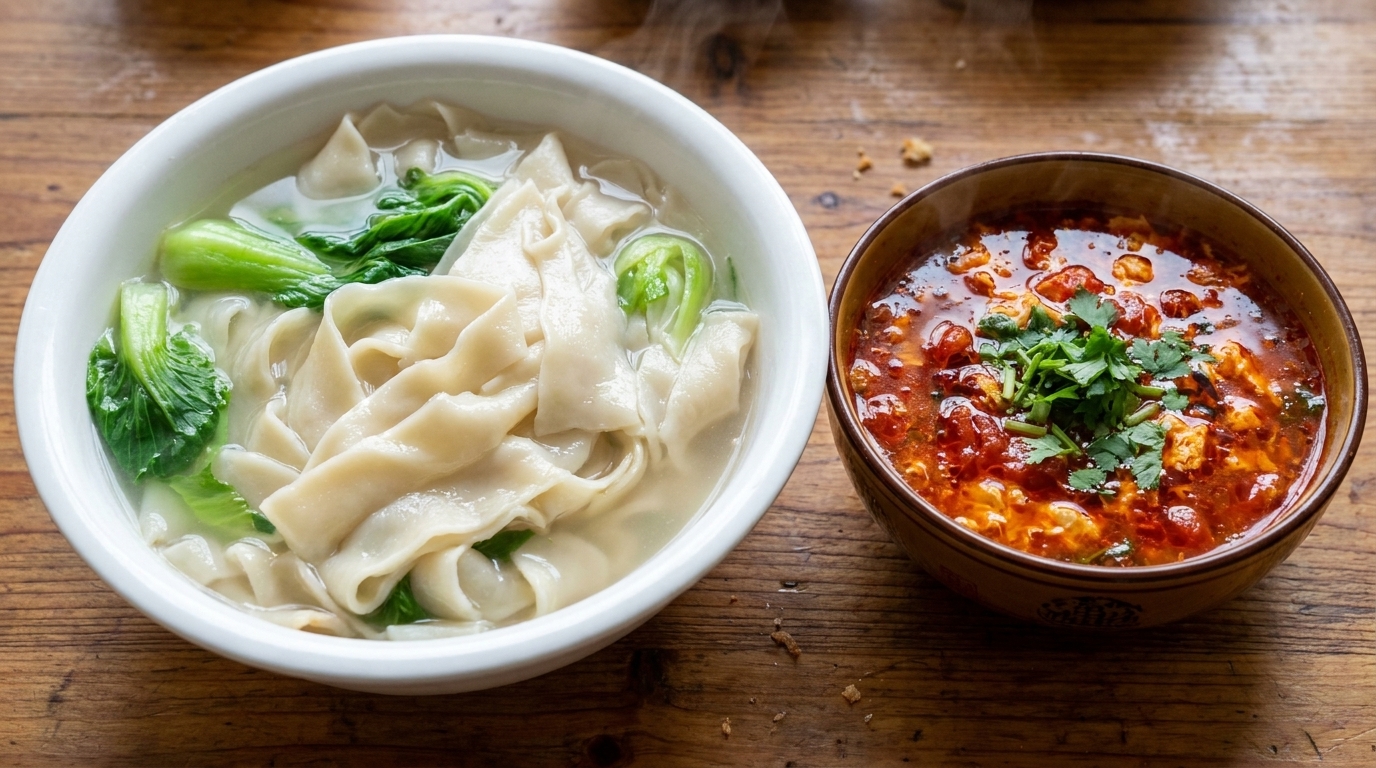
Shaanxi Dipping Water Noodles (Zhanshui Mian)
Silky hand-pulled wheat ribbons served in clear water alongside a savory, tangy tomato and egg drop dipping sauce. This Shaanxi classic has an incredible chew.
Zhanshui Mian, or dipping water noodles, is a soul-warming staple from Chinas Shaanxi province. Unlike most noodle dishes where the broth and noodles are served together, these long ribbons are presented in a bowl of clear water, allowing you to dip each piece into a concentrated, aromatic soup at your own pace. It is a humble yet deeply satisfying dish that highlights the pure texture of fresh wheat and the craft of hand-stretching dough.
Ingredients
- 500 g all-purpose flour
- 12 tsp salt
- 250 ml water
- 2 tbsp vegetable oil
- 3 cloves garlic
- 1 tbsp chili powder
- 2 tbsp vegetable oil
- 2 tomatoes
- 1 green onion
- 500 ml boiling water
- 1 tbsp light soy sauce
- 12 tsp dark soy sauce
- 12 tsp mushroom powder
- 2 eggs
- to taste fresh cilantro
- 4 leaves lettuce
Instructions
- 1Mix the flour and salt
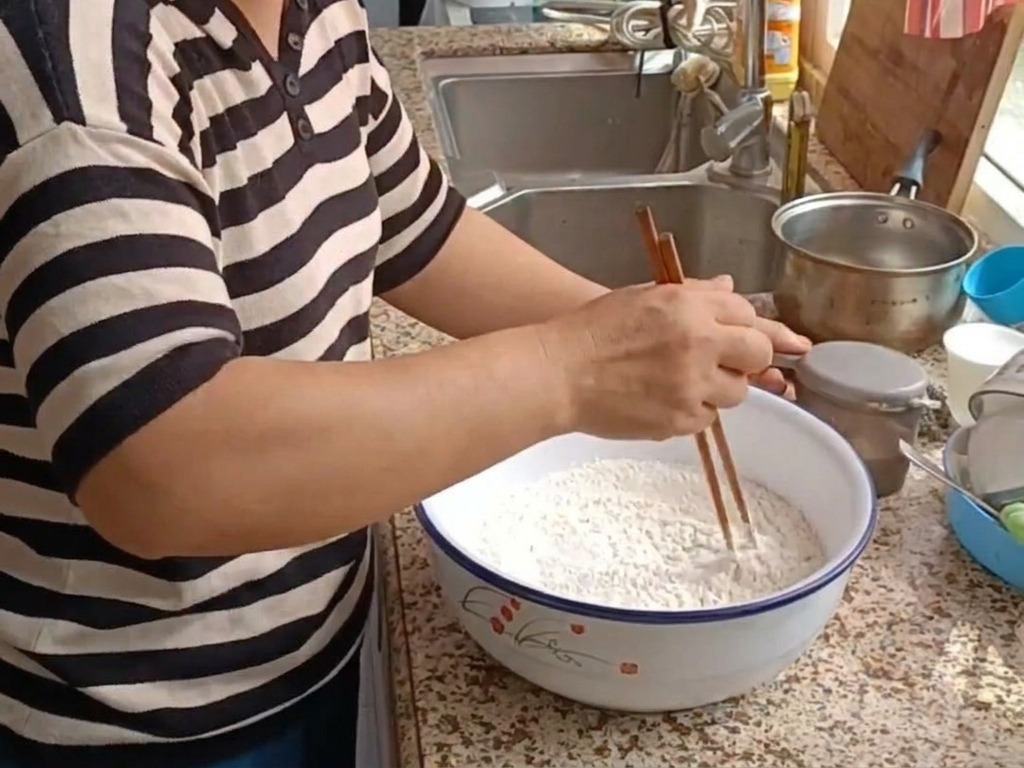
Place the flour into a large mixing bowl and add a small amount of salt. Gradually pour in water in small portions while continuously stirring with chopsticks until the mixture forms shaggy dough flakes.
Tip: Adding the water gradually helps prevent the dough from becoming too sticky and ensures even hydration. - 2Knead into a firm dough
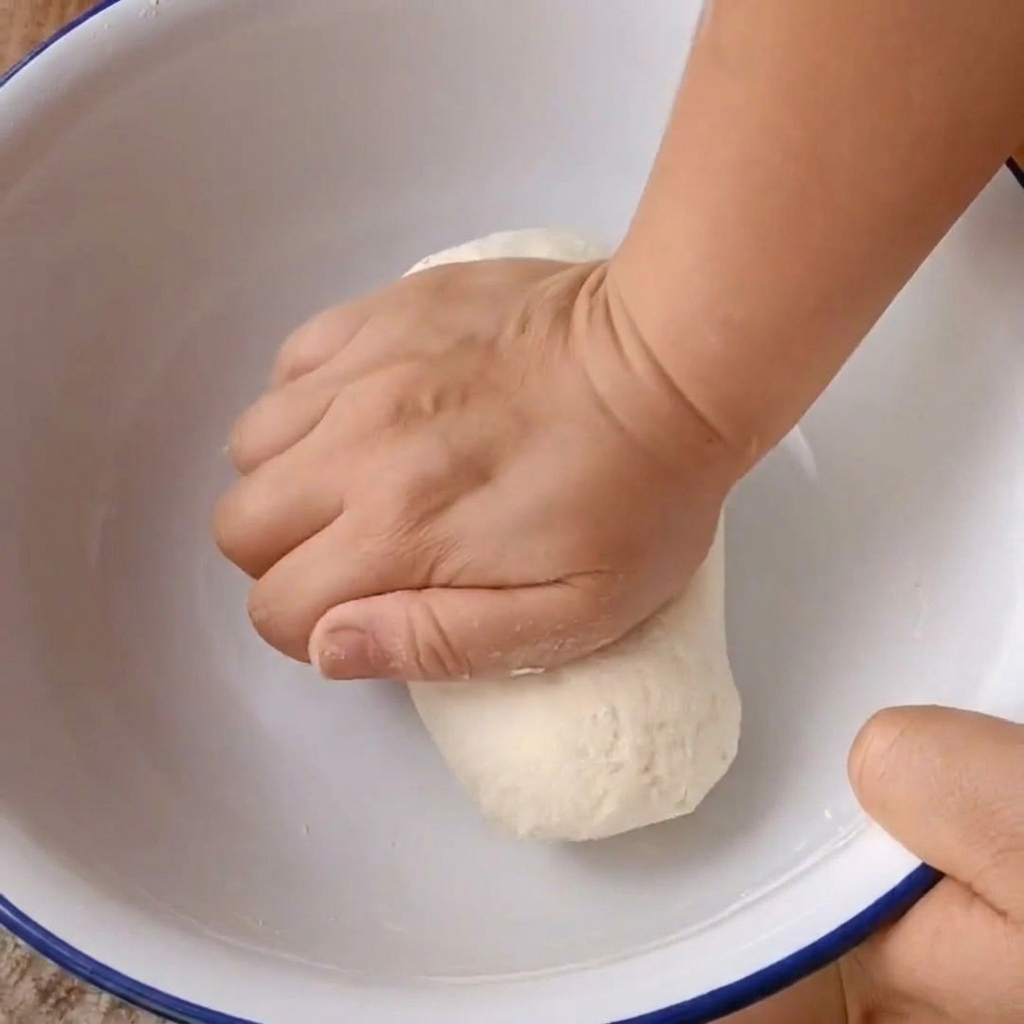
Use your hands to gather the dough flakes and knead them together. Continue kneading until it forms a relatively firm and solid dough ball. Smoothness is not required at this stage.
Tip: If the dough feels too dry, wet your hands slightly while kneading rather than pouring more water directly into the bowl. - 3Rest the dough
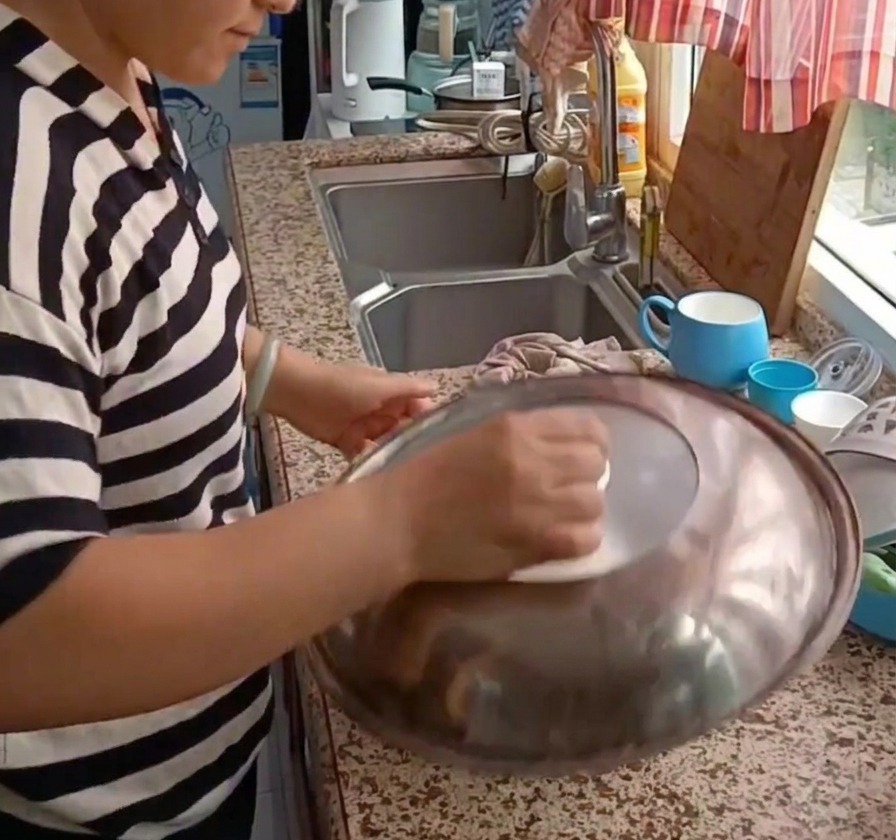
Cover the mixing bowl with a lid to prevent the dough from drying out. Let it rest for 30 minutes. During this resting period, uncover it and knead it a few more times to ensure the dough becomes perfectly smooth.
Tip: Resting relaxes the gluten, making the dough much easier to knead to a completely smooth consistency later. - 4Slice the dough cylinder
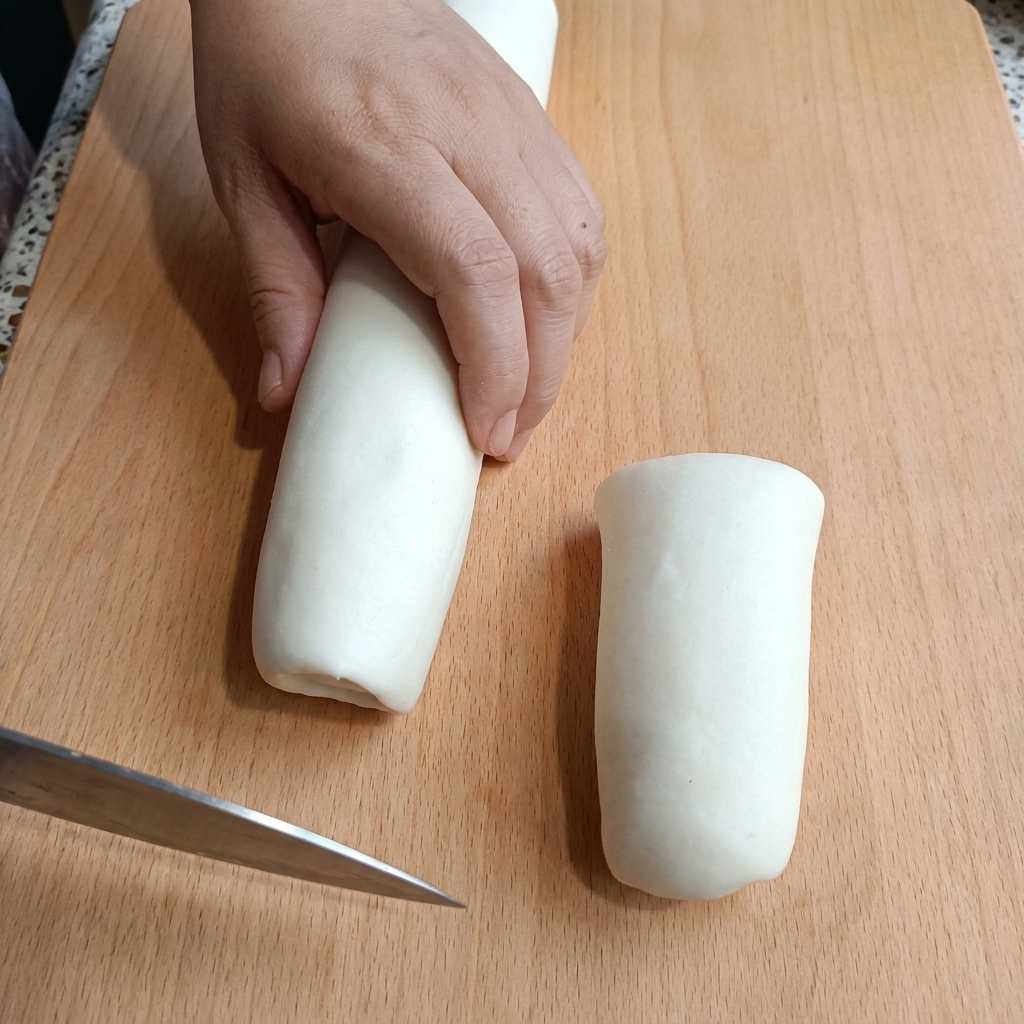
After the dough has rested and become completely smooth, roll it out into a long, even cylinder. Use a knife to slice the dough log into relatively equal, thick segments.
Tip: Ensure the pieces are relatively equal in size so they cook evenly later on. - 5Roll into thick disks

Take each cut dough segment, shape it into a small ball, and place it on your work surface. Use a wooden rolling pin to flatten each ball into a thick circular disk, about one centimeter in thickness.
Tip: Pressing the dough down slightly with your palm before rolling can help maintain a round shape. - 6Oil the dough disks
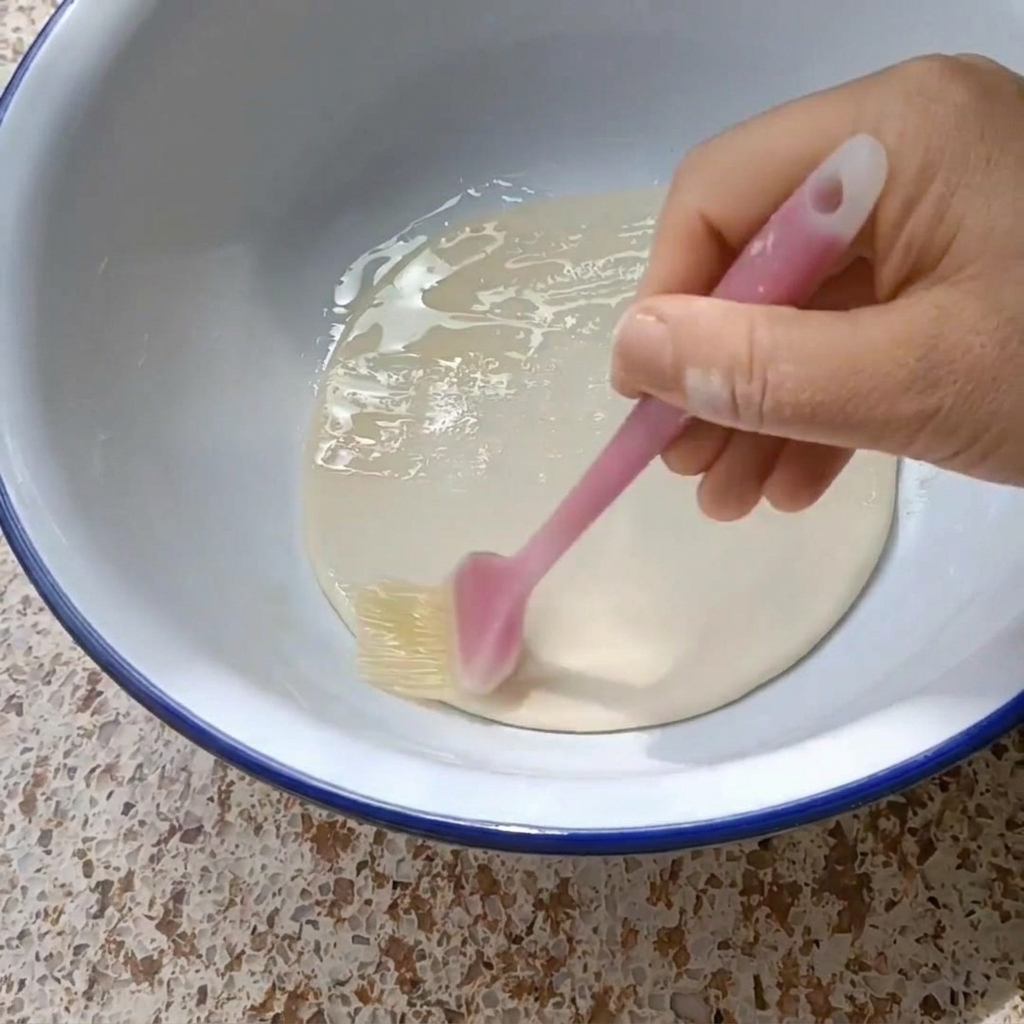
Brush a thin layer of vegetable oil over the surface of each dough disk. Stack them in a bowl, ensuring every disk is coated with oil to prevent sticking and to keep the dough supple during the resting period.
Tip: Apply plenty of oil because it is crucial for making the dough easy to stretch later. - 7Pound the garlic
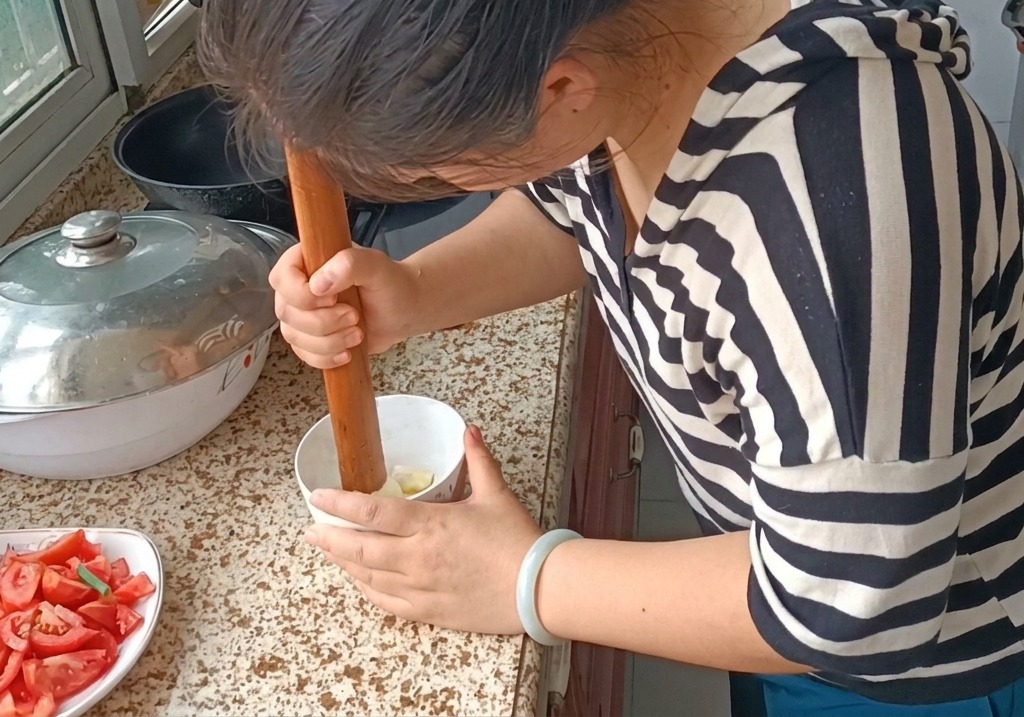
Place peeled garlic cloves into a small bowl or mortar. Use a wooden pestle to pound the garlic until it transforms into a smooth, fine paste. This traditional method breaks down the fibers and releases the maximum amount of garlic juice and flavor for the dipping sauce base.
Tip: Adding a small amount of salt while pounding can act as an abrasive, making it easier and faster to mash the cloves into a consistent paste. - 8Sizzle the dipping base
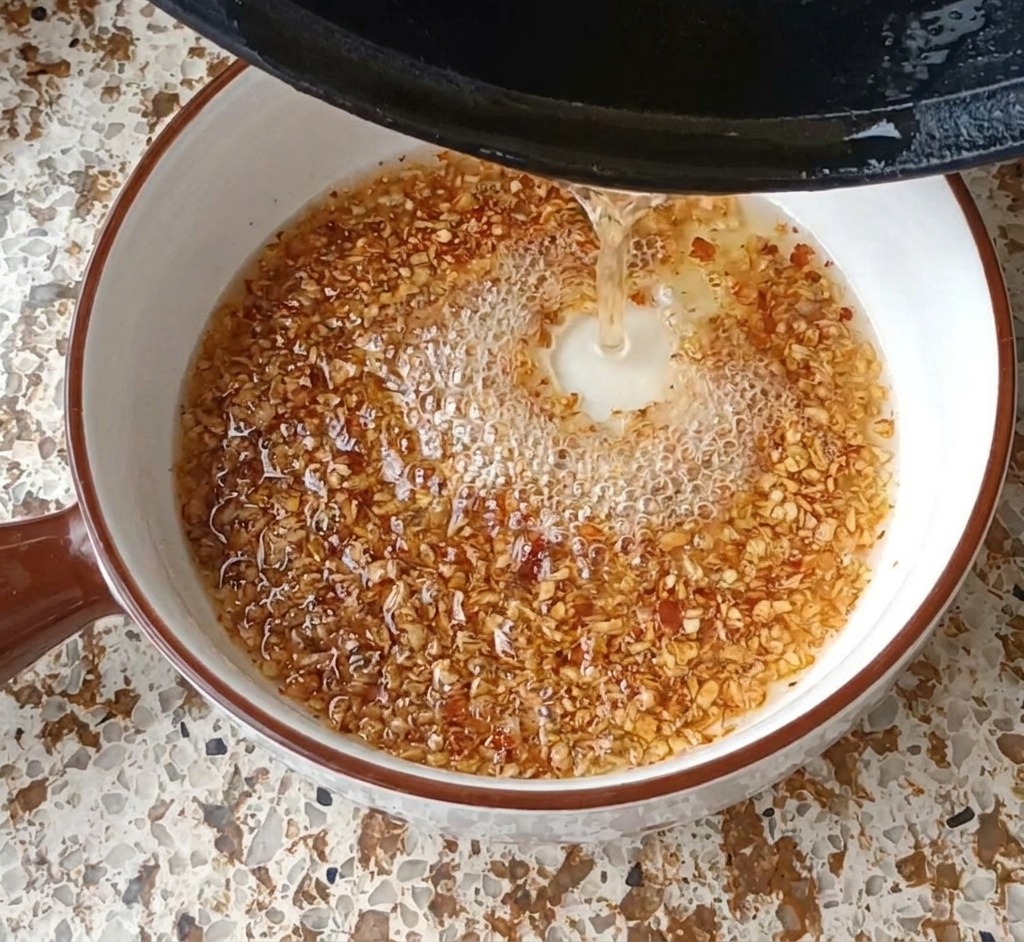
Place the mashed garlic paste and red chili powder in a heatproof bowl. Carefully pour hot, shimmering oil over the mixture to sizzle the aromatics, creating a rich and fragrant base for the dipping sauce.
Tip: The oil should be hot enough to sizzle immediately upon contact, which effectively unlocks the flavors of the garlic and chili without burning them. - 9Sauté the tomato base
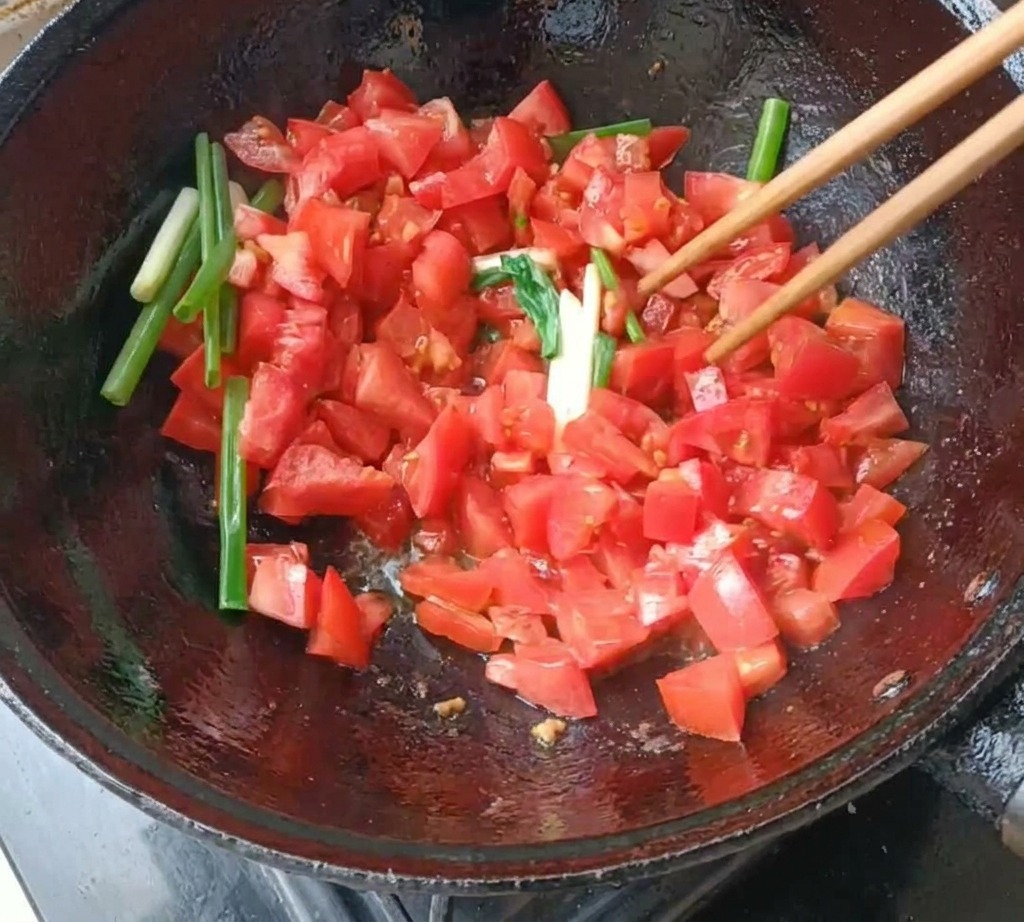
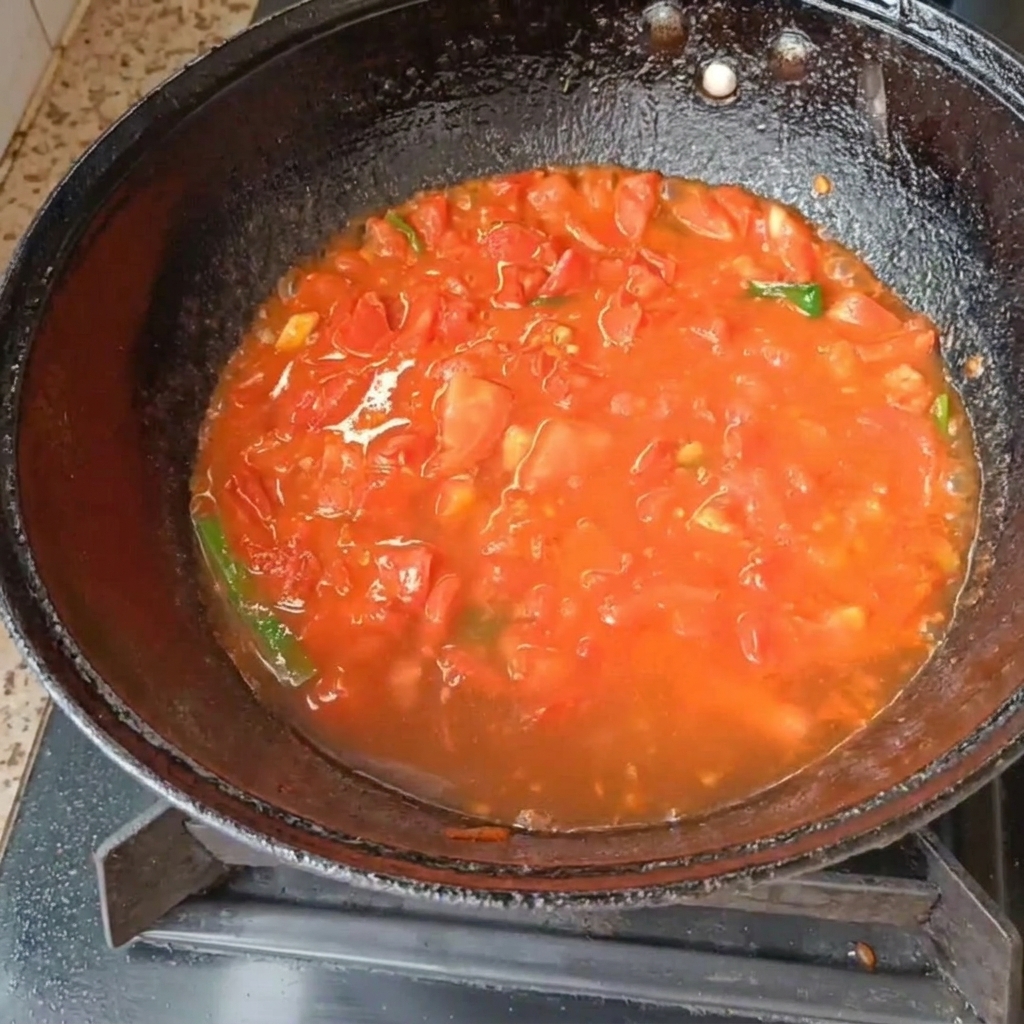
Heat a small amount of oil in a wok and add the diced tomatoes and chopped green onions. Stir-fry them over medium heat until the tomatoes begin to soften and release their juices, creating a flavorful base for the soup.
Tip: Press down on the tomatoes with your spatula or chopsticks to help them break down faster. - 10Create the soup base
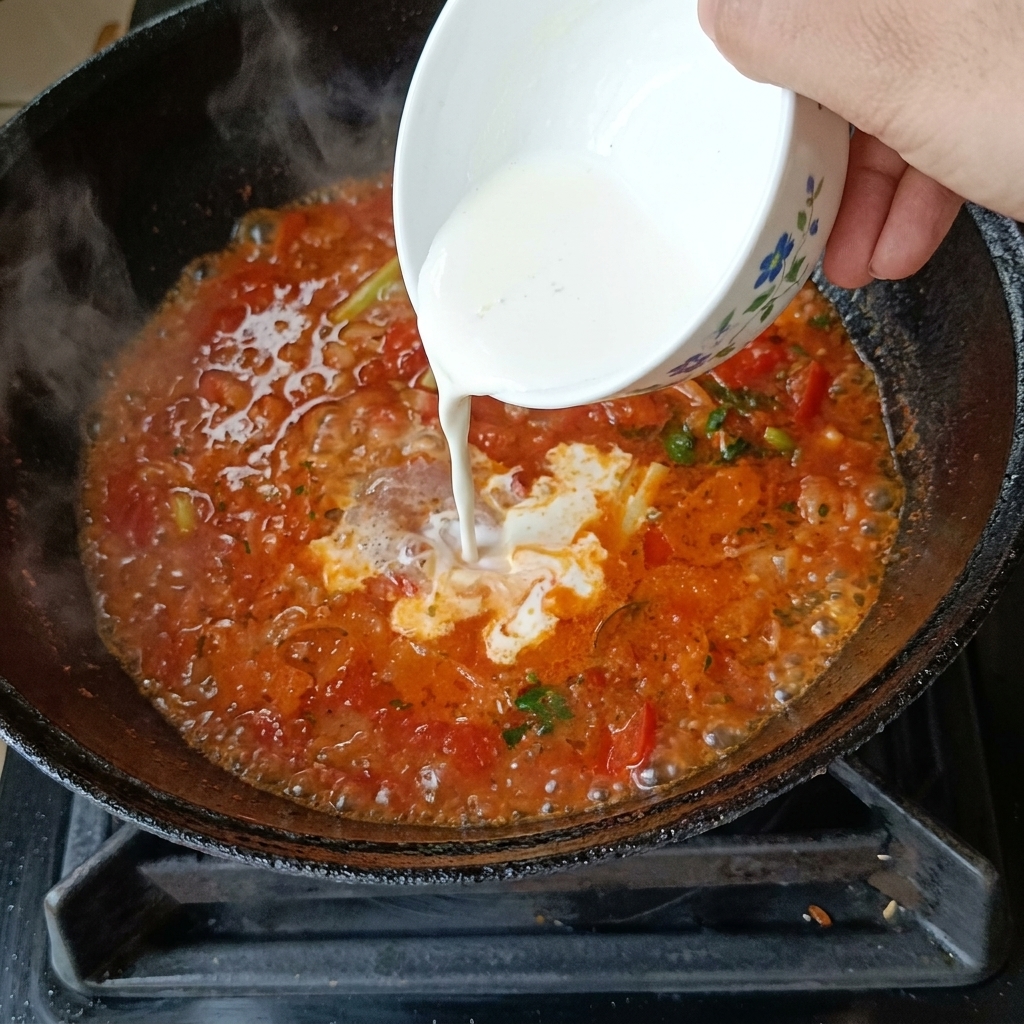
After sautéing the diced tomatoes and green onions until they are soft and have released their natural juices, pour in boiling water. This creates the liquid foundation for the dipping soup. Bring the mixture to a simmer to allow the flavors to combine.
Tip: Using boiling water instead of cold water keeps the cooking temperature high and prevents the tomatoes from becoming tough or losing their vibrant color. - 11Create silky egg ribbons
Gently drizzle the whisked egg into the boiling tomato soup in a slow, steady stream. Allow the egg to set for a few seconds to form soft ribbons before stirring, which adds a beautiful texture and savory richness to the broth.
Tip: To get very fine egg ribbons, stir the soup in a circular motion and pour the egg against the direction of the flow. - 12Garnish the dipping soup
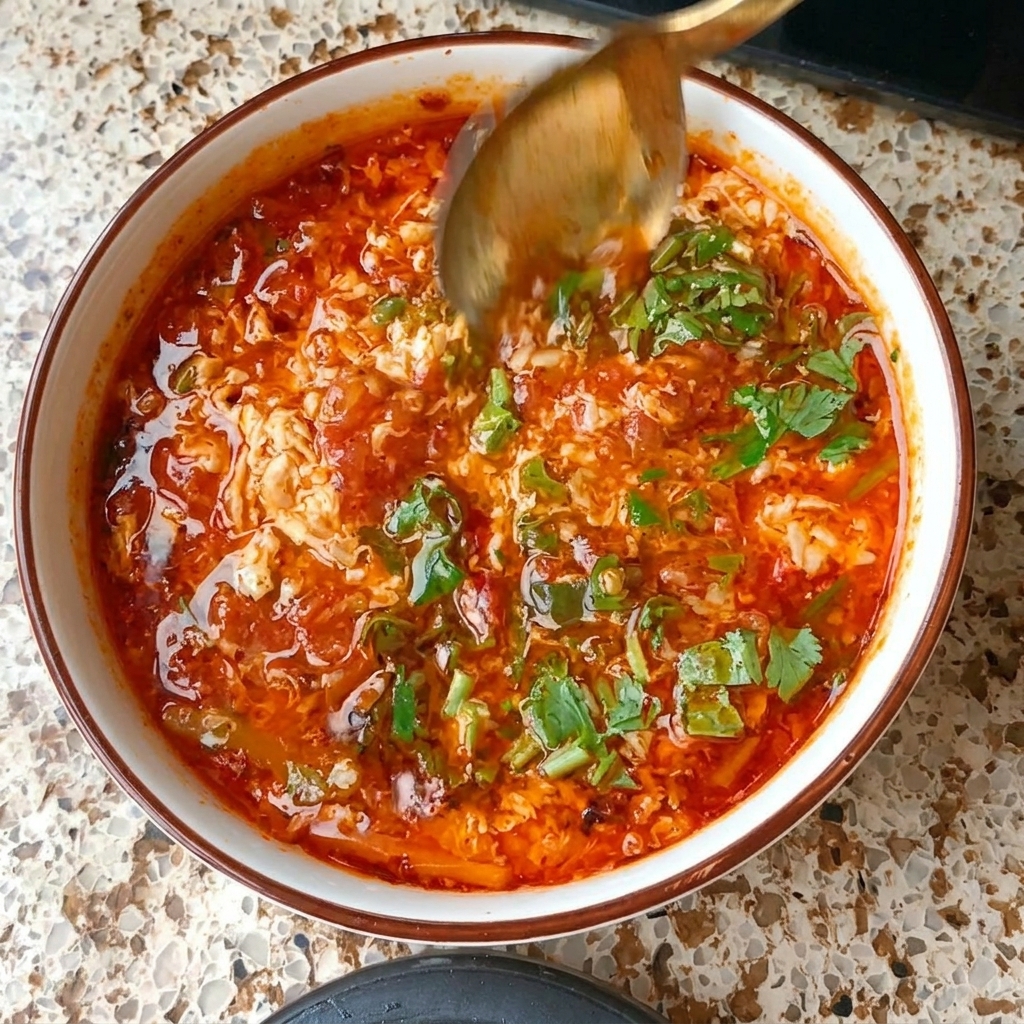
Combine the finished tomato and egg soup with the prepared garlic and chili oil mixture. Stir in a handful of freshly chopped cilantro to finish. The cilantro adds a bright, fresh herbal note that balances the rich and savory flavors of the broth.
Tip: Add the fresh cilantro at the very last second before serving to ensure it retains its bright green color and aromatic freshness. - 13Slice the dough into strips
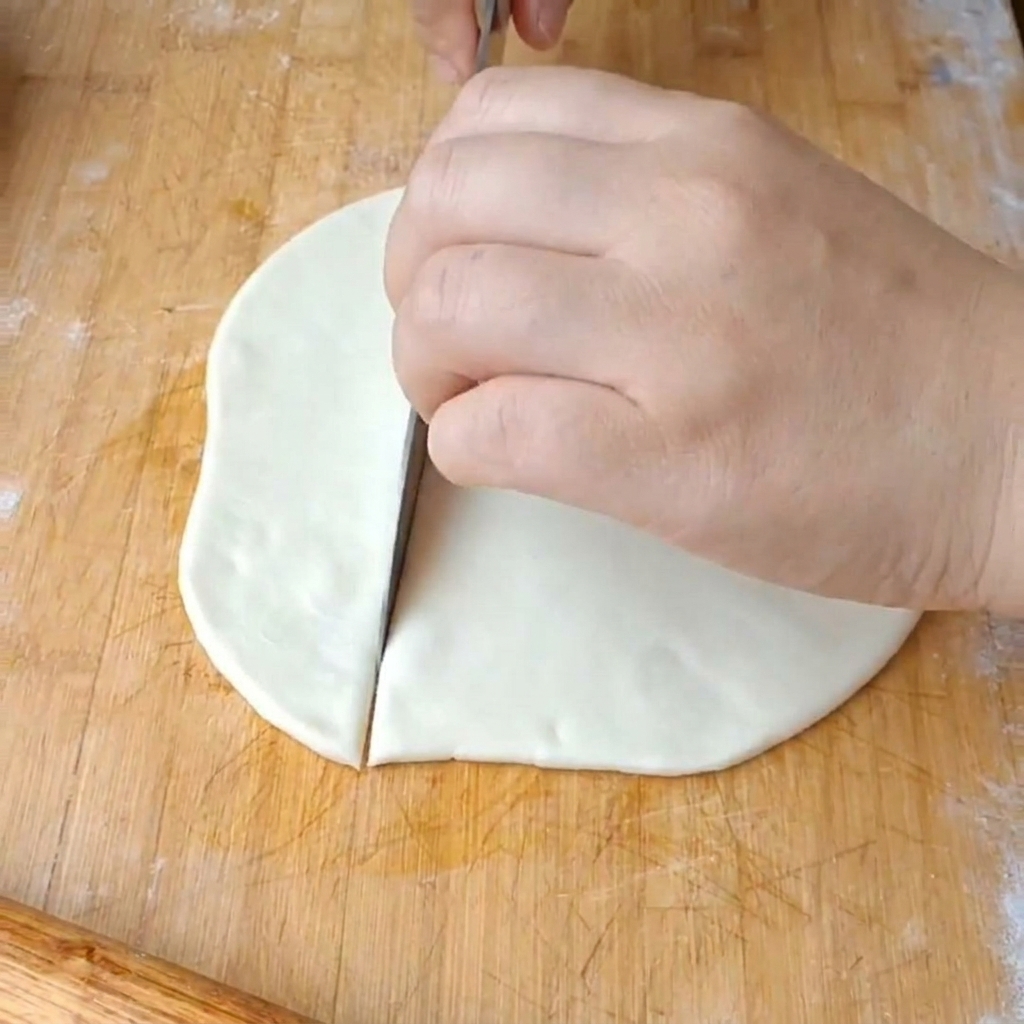
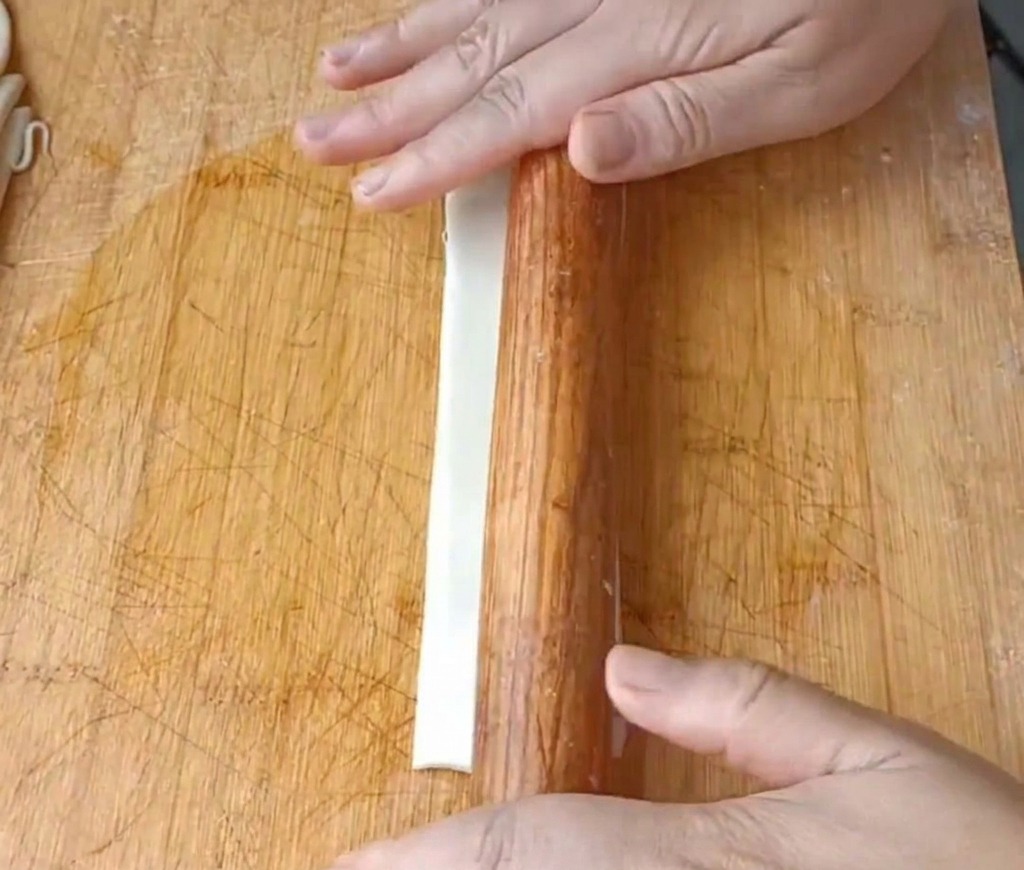
Place the rested and oiled dough disk onto a wooden cutting board. Use a large, sharp knife to cut the dough into wide, uniform strips. These strips will later be flattened and hand-stretched to create the long, wide ribbons for the dipping noodles.
Tip: Ensure the dough has rested for at least 30 minutes after oiling; this relaxes the gluten and makes it much easier to cut and stretch without it snapping back. - 14Flatten the dough strips
Take the rested, oiled dough strips and use a rolling pin to gently flatten each one. Applying light, even pressure ensures the dough has a uniform thickness, which is essential for the subsequent hand-stretching process. The oil on the surface helps the pin glide smoothly without sticking or tearing the delicate dough.
Tip: Roll from the center toward the ends to maintain an even shape and prevent the edges from becoming too thin. - 15Stretch the noodle ribbons
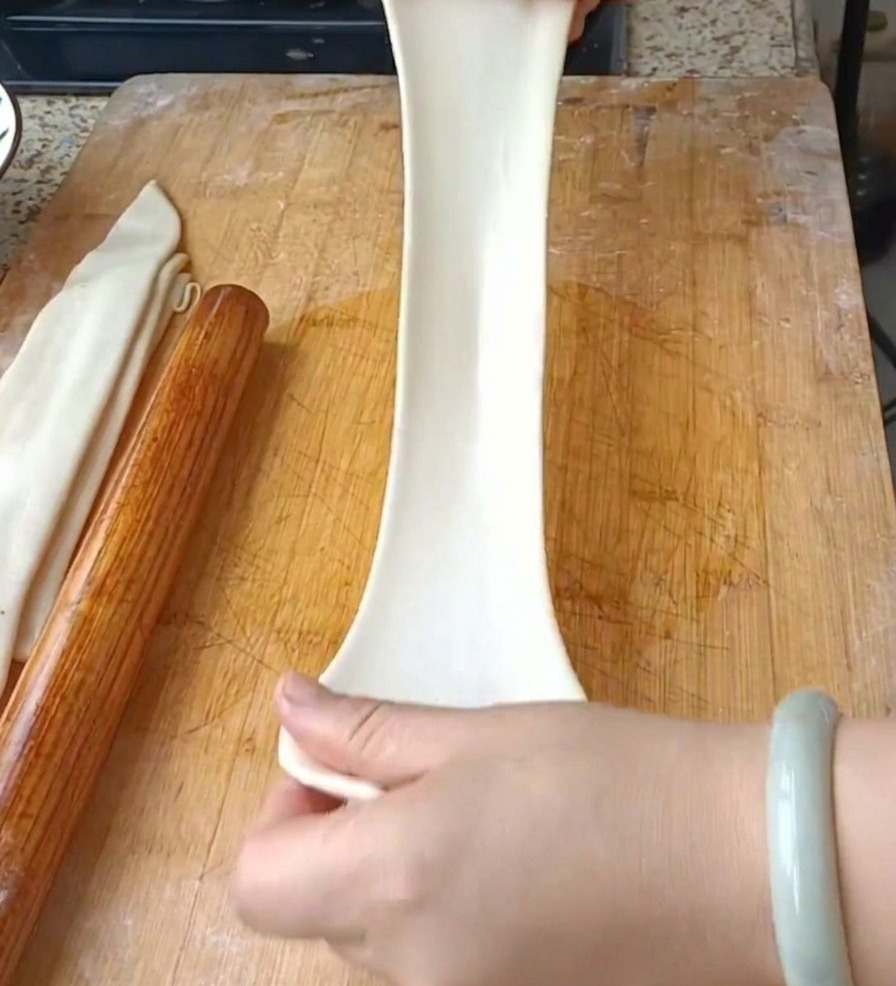
Take a strip of the rested, oiled dough and use both hands to pull it gently. Stretch the strip out until it becomes a long, wide ribbon, utilizing the elasticity developed during the resting period.
Tip: If the dough feels too resistant, let it rest for a few more minutes to relax the gluten, then try stretching again with a smooth, steady motion. - 16Boil the noodles and vegetables
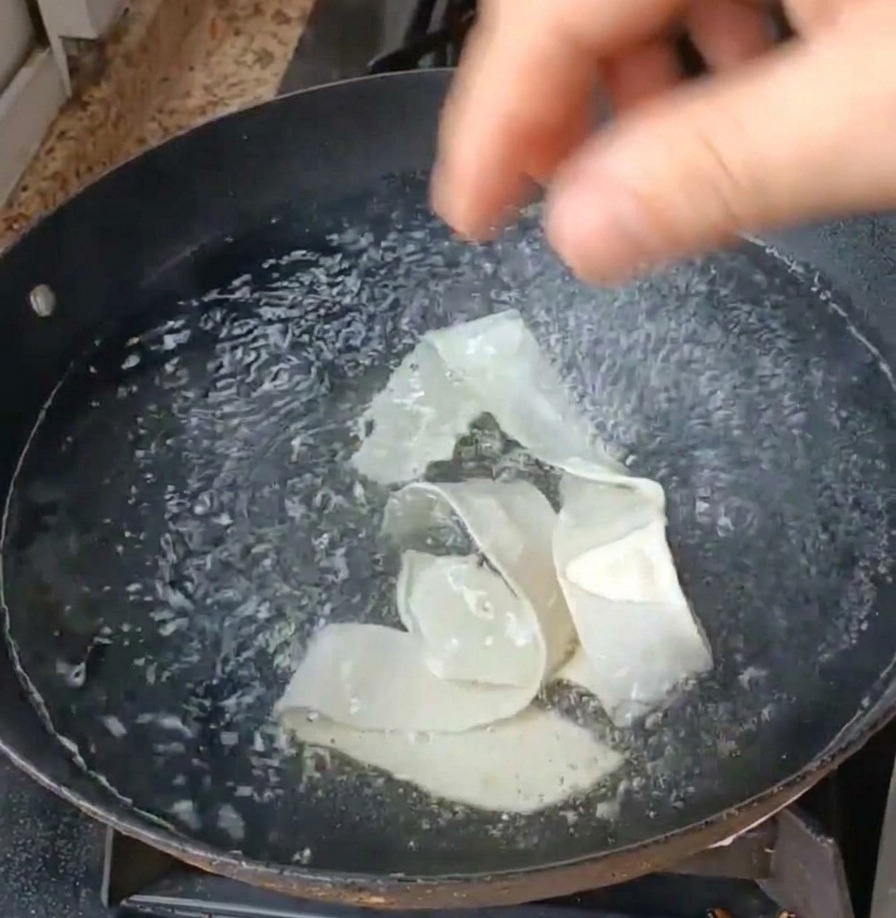
Carefully drop the hand-stretched noodle ribbons and fresh green lettuce into a pot of boiling water. Cook briefly until the noodles are chewy and the vegetables are just tender.
Tip: Wide noodles cook very quickly. Usually one to two minutes is enough to achieve the perfect firm and chewy texture.